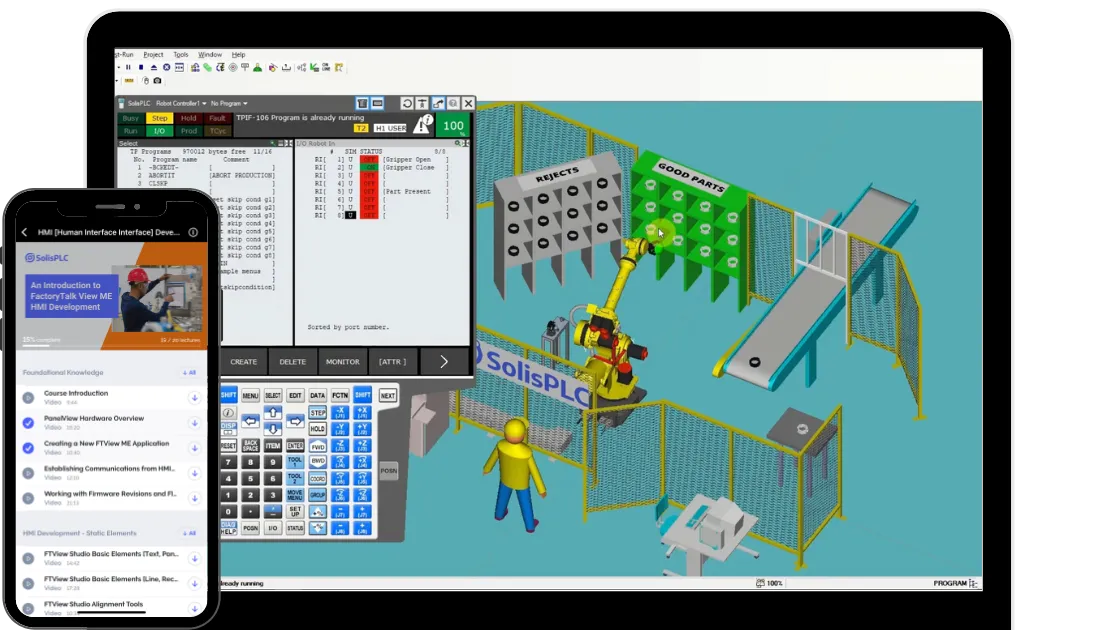
PLC Integrated Dashboard Using TIA Portal’s View of Things

Introduction
In the era of Industry 4.0 and the Industrial Internet of Things (IIoT), seamless connectivity and real-time monitoring are pivotal for efficient industrial processes. However, one common challenge in this landscape is the rapid access to HMI visualizations, especially when dealing with various PLCs scattered across a facility or during maintenance operations. Traditional methods of interacting with HMIs can be inconvenient, often requiring physical presence. For this kind of case, Siemens integrates a web server in all 1500 PLC series from which we can interact remotely with the PLC. And thanks to the View Of Things functionality, it is possible to create HMI visualizations directly inside the PLC and access it through web browsers.
The View Of Things (VOT) feature in TIA Portal offers the capability to create web-based Human-Machine Interface (HMI) visualizations directly within a PLC through its integrated web server. This functionality enables the development of interactive HMI dashboards accessible via web browsers. Based on WinCC Unified, VOT facilitates the creation of dynamic HMI interfaces, promoting real-time data interaction and control using any device that supports a web browser.
This tutorial teaches you how to create a VOT application inside a 1500 CPU. We will go through the steps of creating a PLC program with which we will interact through a dashboard created using VOT before testing it using a PLCSim Advanced instance.
Prerequisites
To follow this tutorial, you will need an installation of TIA Portal and PLCSim Advanced. We will use the latest versions to date (v18), but you can use any other version. No additional hardware or software is required.
TIA Portal’s View Of Things
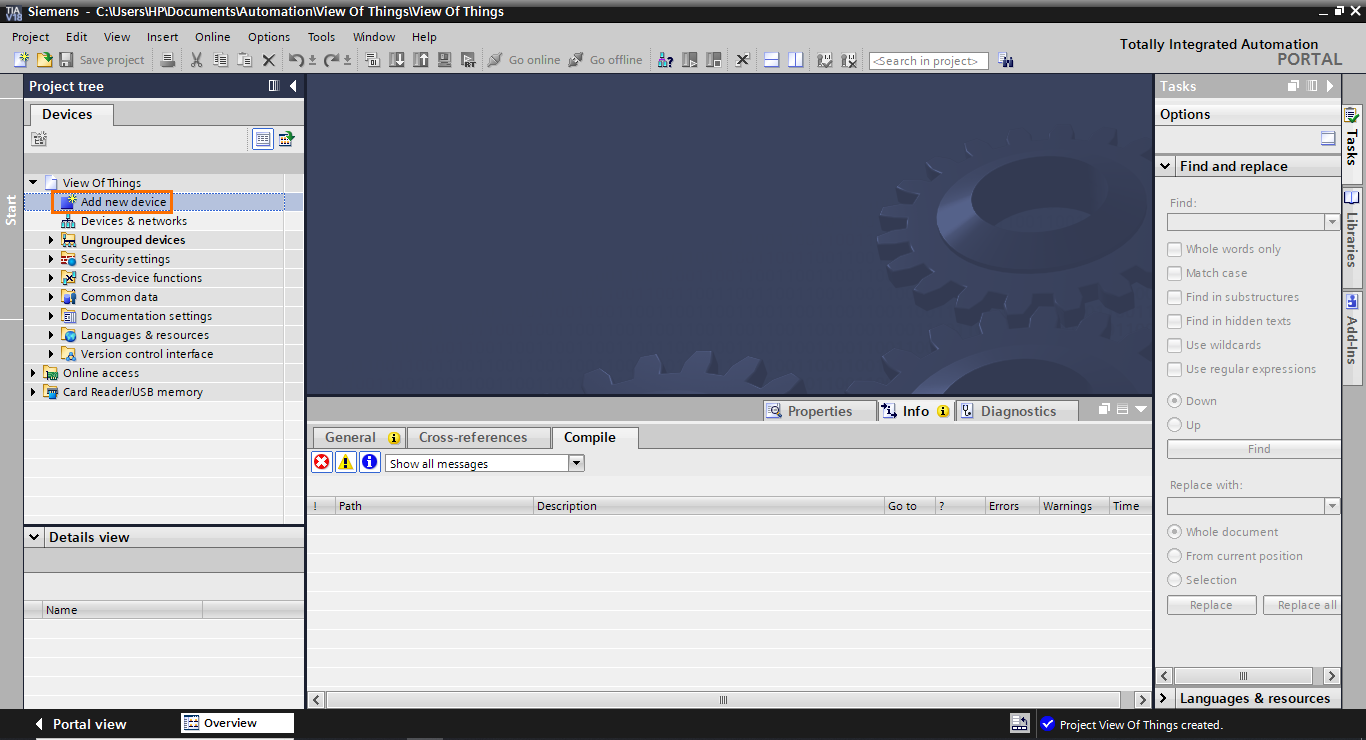
Let’s start by creating a new TIA Portal project. Once done, click “Add new device” in the project tree.
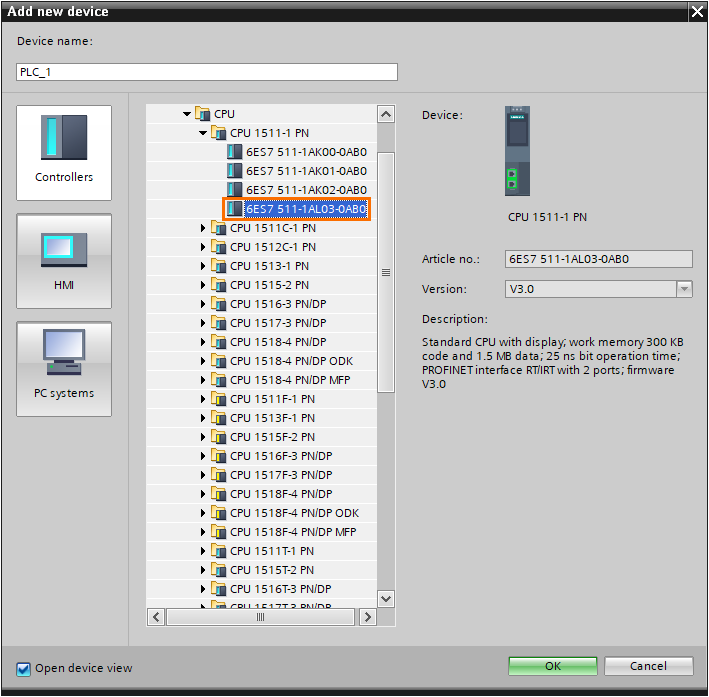
In the device selection, select a 1500 CPU. All 1500 devices integrate a web server essential for the VOT applications. Here, we are picking a 1511-1 PN CPU.
Once the device is added, we must configure it. On the bottom side of the screen, you will find the “Properties” tab of the CPU.

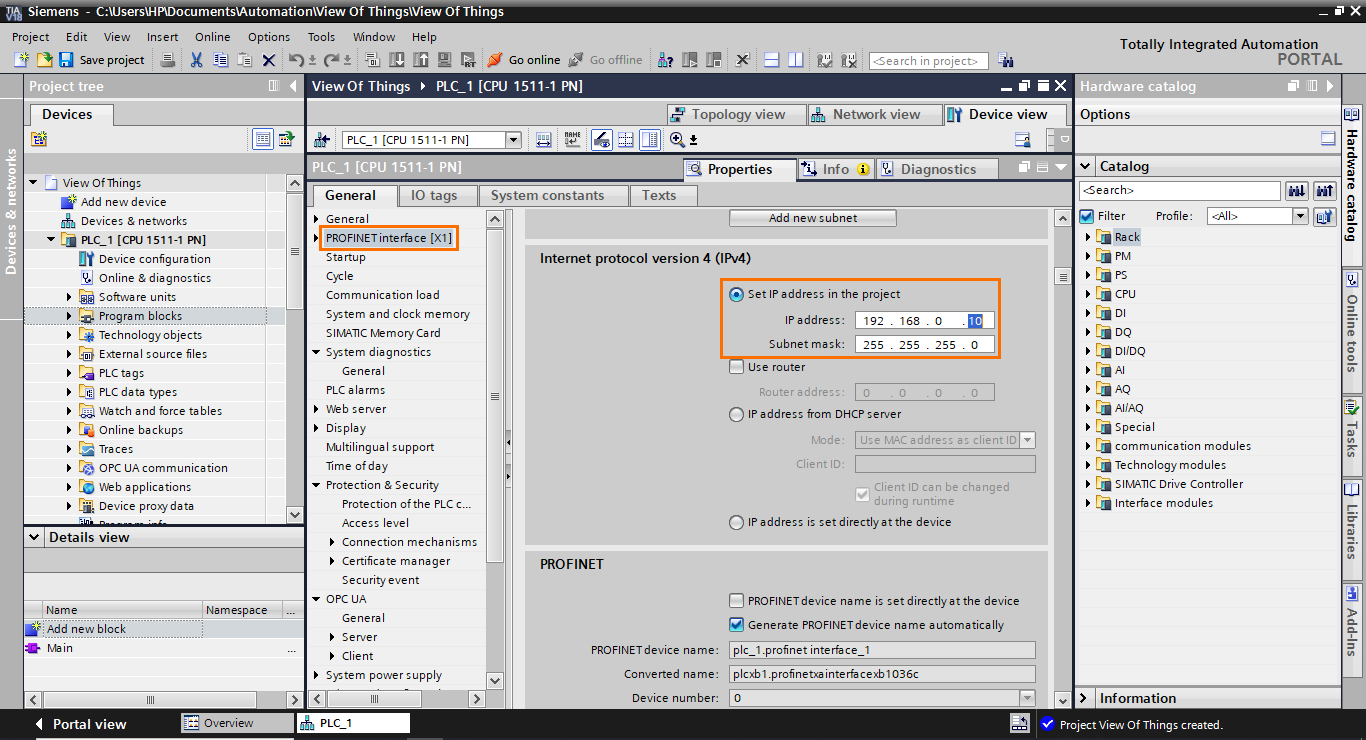
Open the PROFINET section of the properties and edit the IP address of the CPU. Here, we will use the 192.168.0.10/255.255.255.0 address.
After that, open the web server section of the properties and enable both “Activate web server on this module” and “Permit access only with HTTPS” checkboxes.

On the same section, scroll down until you find the user management part. Here, we must configure a user that will be allowed to access the VOT application. Click on “Add new user”.
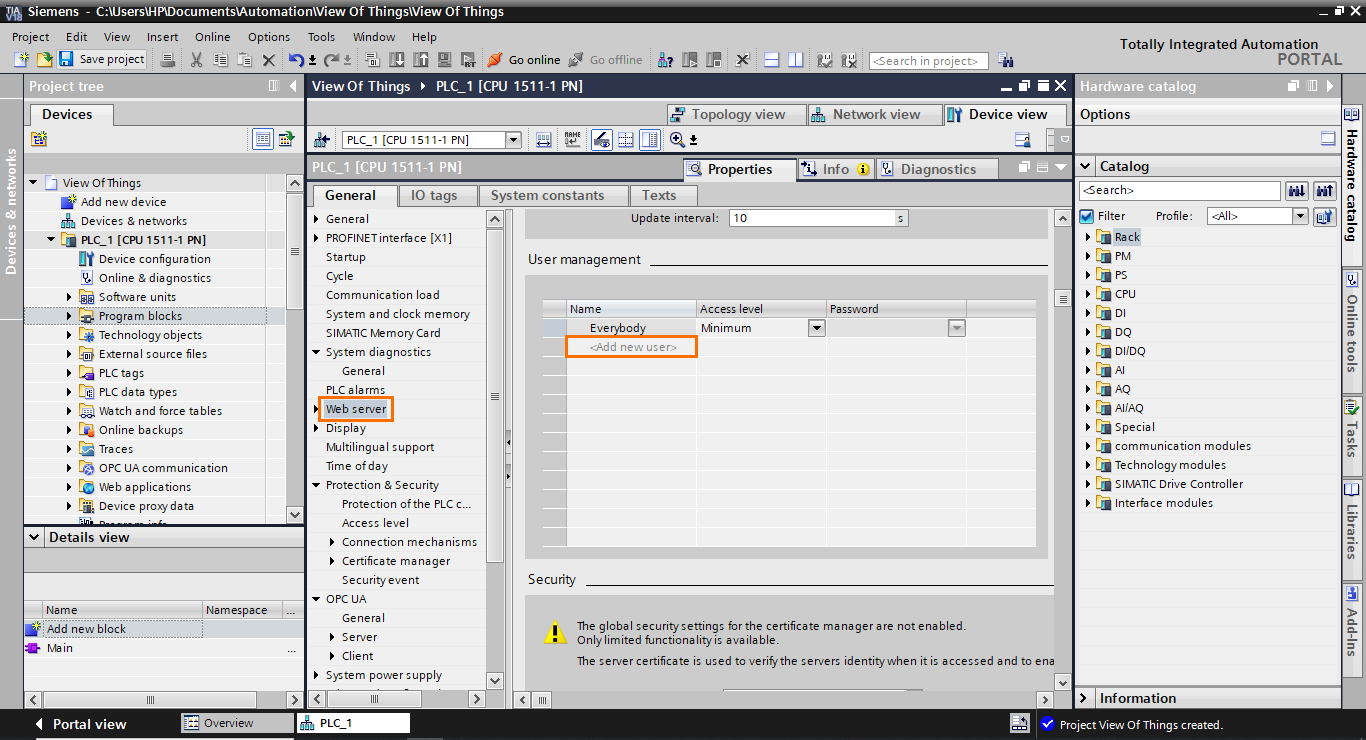
The new user appears with a default name. Edit the user name, then click on the arrow button in the “Access level” section.
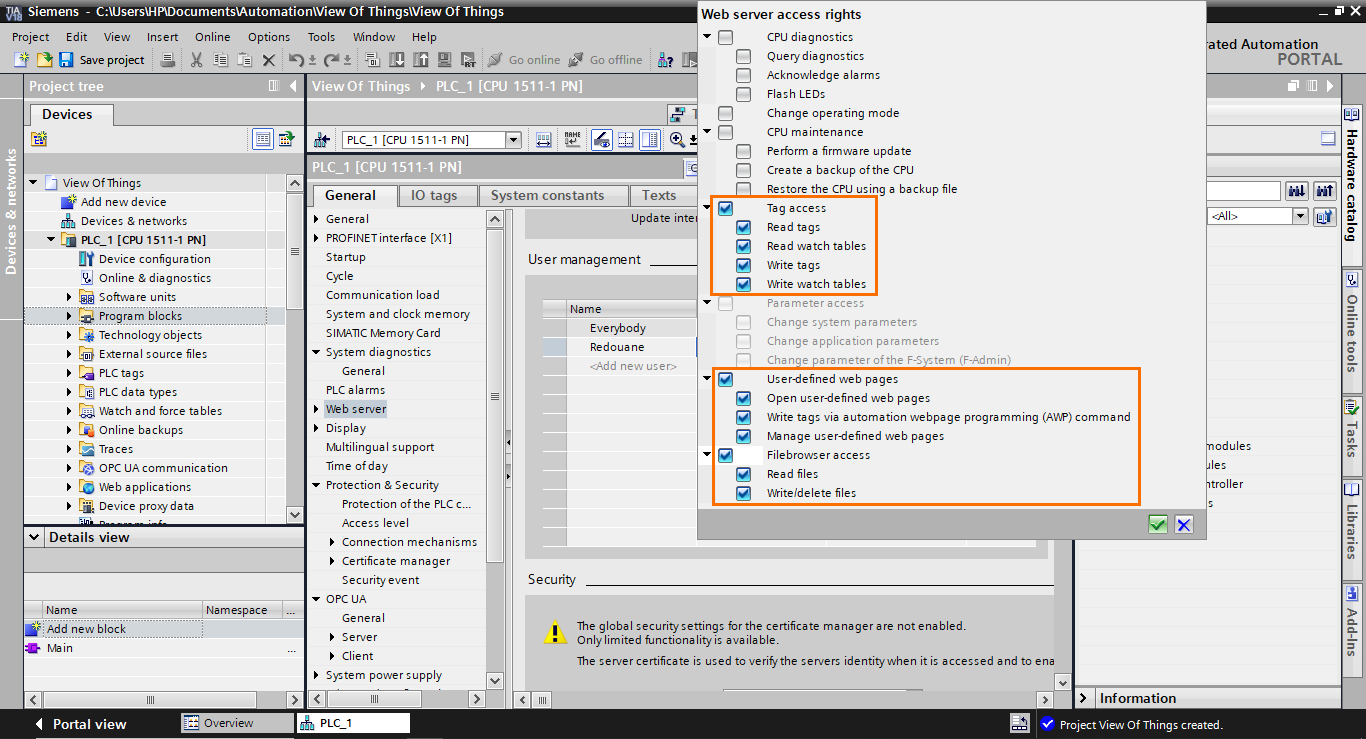
VOT applications require three types of access rights: Tag access, User-defined web pages, and Filebrowser access. Enable all the checkboxes of these access rights.
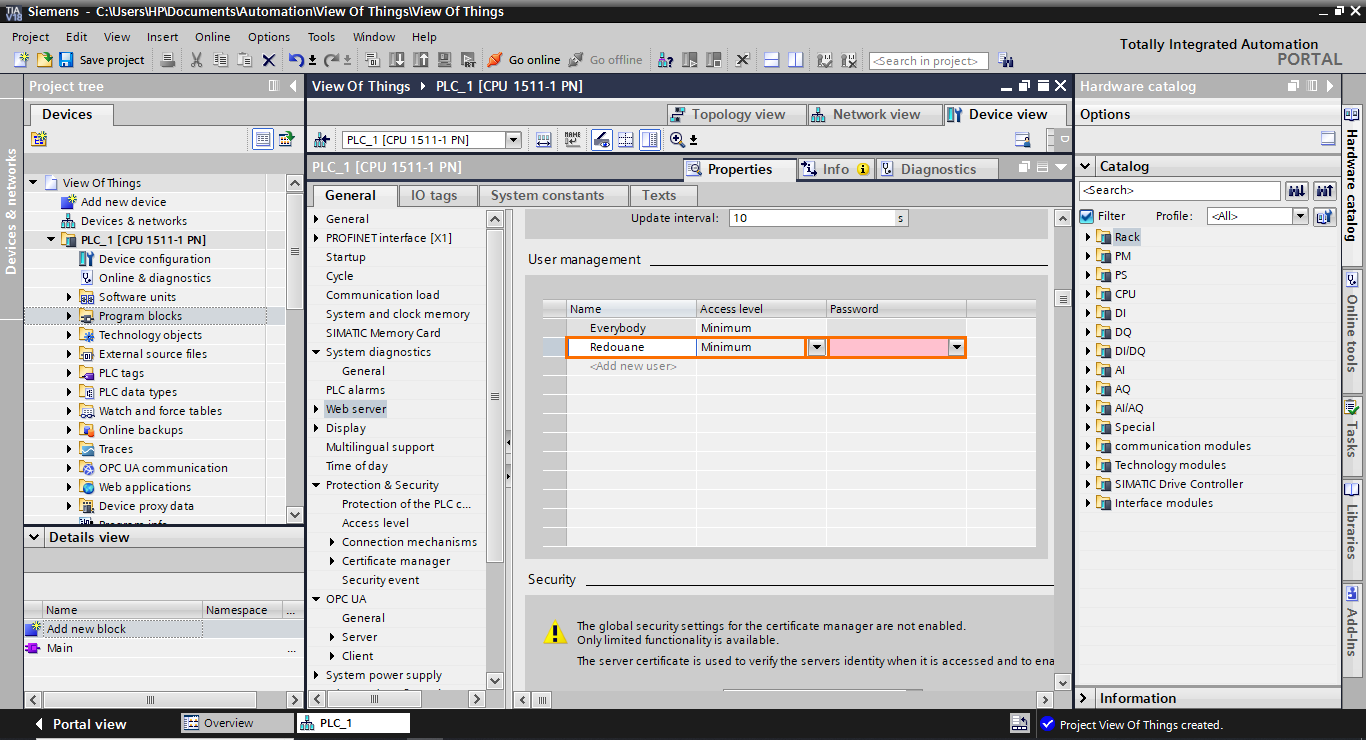
Next, click the arrow button on the password section and add the password of your choice.

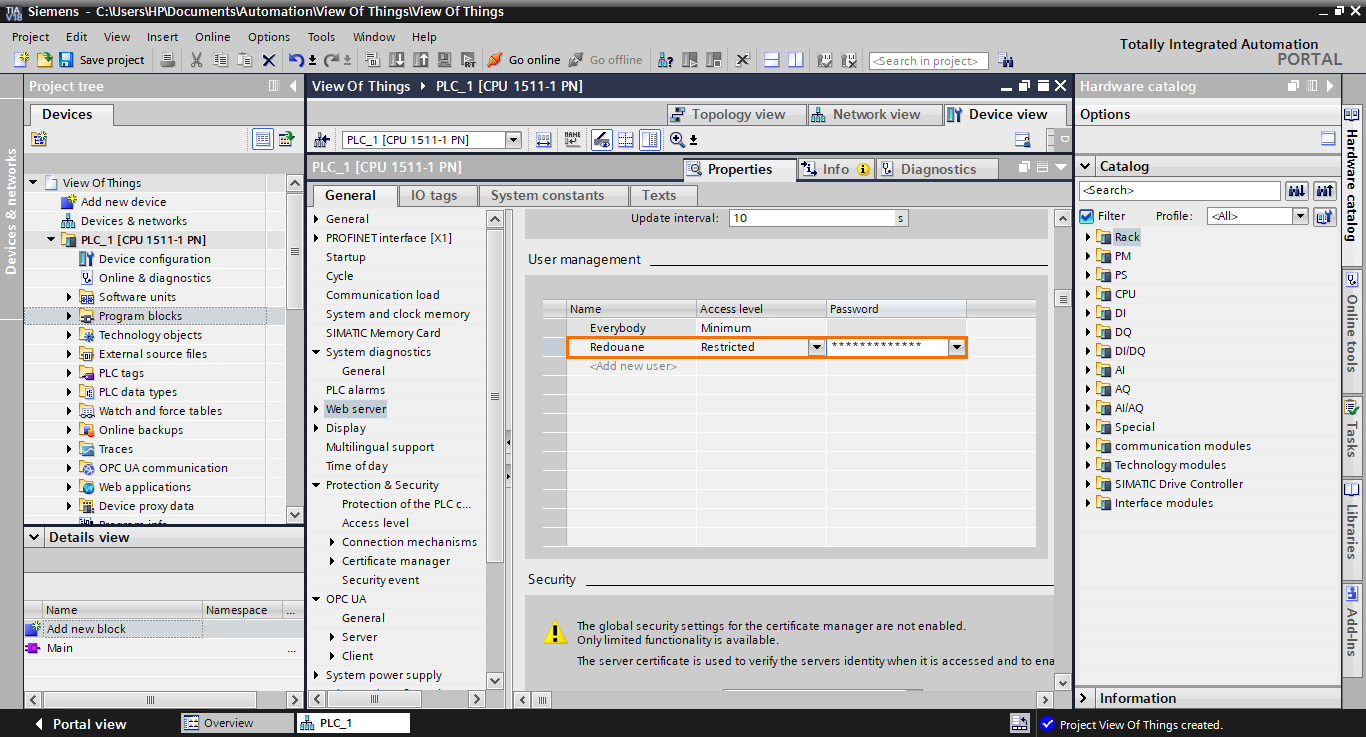
The user configuration is complete. We are now done with the CPU configuration.
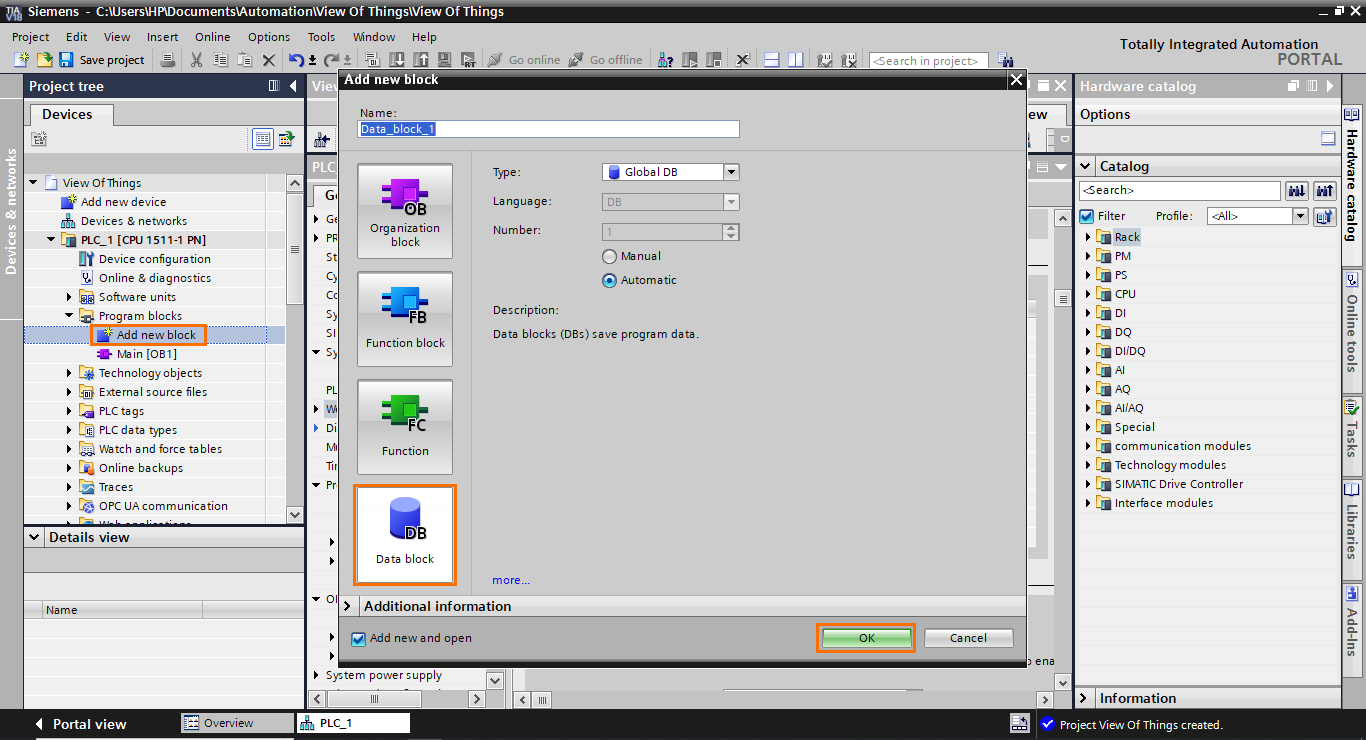
Once the CPU configuration is done, we must create a small program to which we will associate the VOT application later for testing. We will start by creating a DB containing the program’s data. Click on “Add new block” in the program blocks section of the project tree, select “Data block,” and click on “OK.”
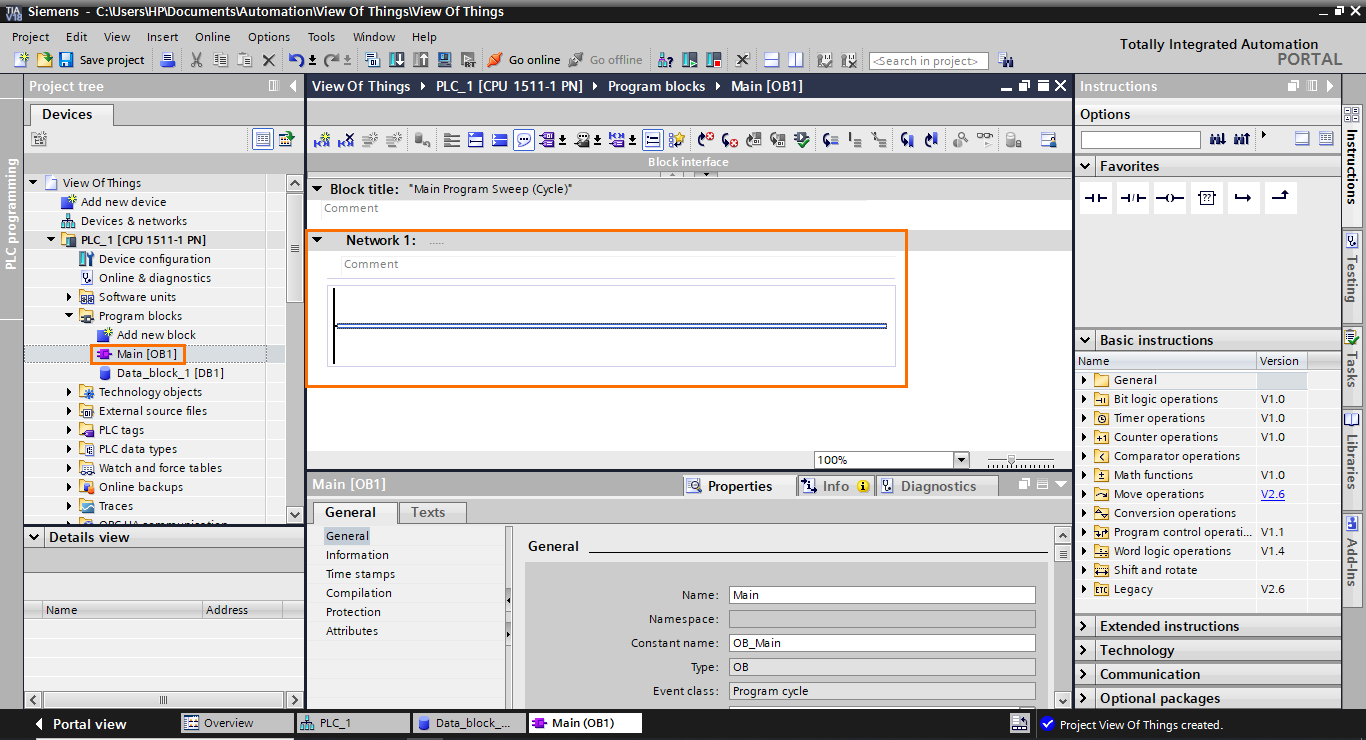
After that, open the main program. Here, we will create a small program that sends data from one DB element to another (Input/Output), all controlled with a boolean.
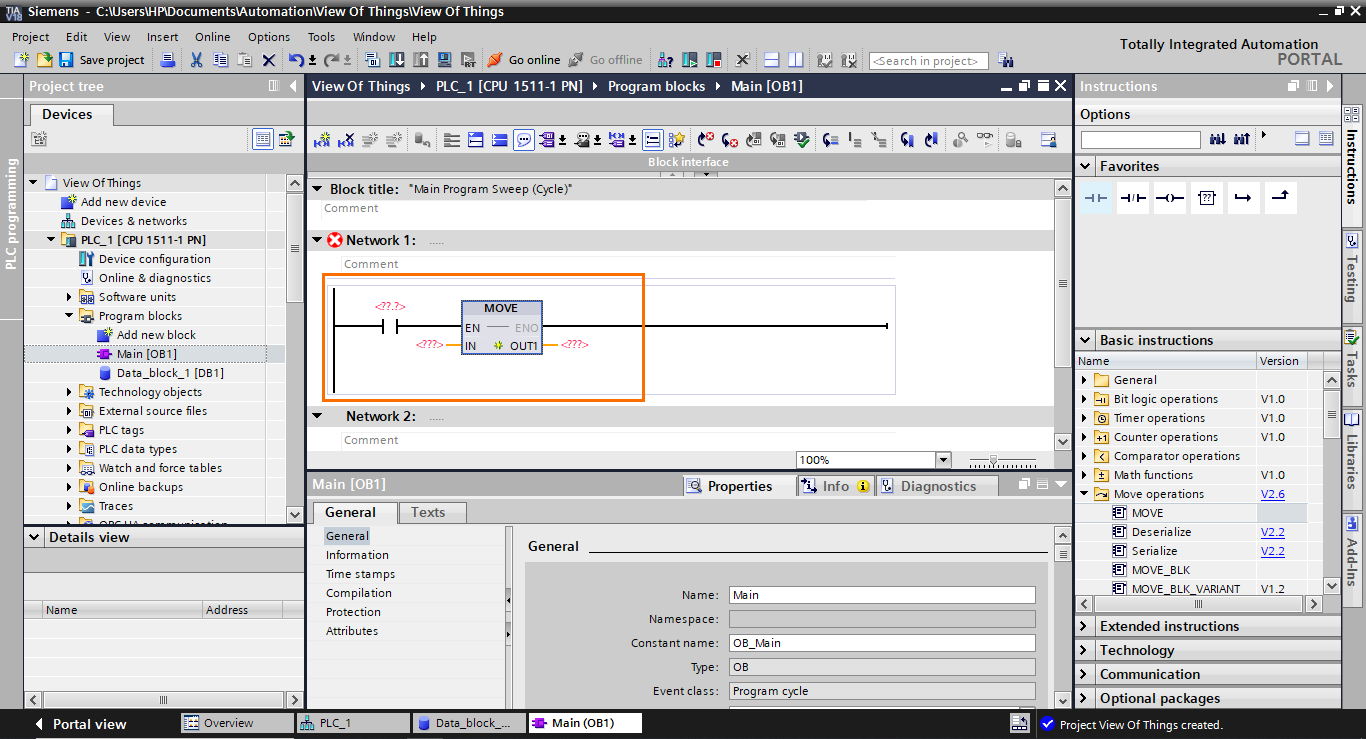
To create this program, we will need a NO contact instruction in addition to a “MOVE” instruction. Reproduce the program shown in the following figure.
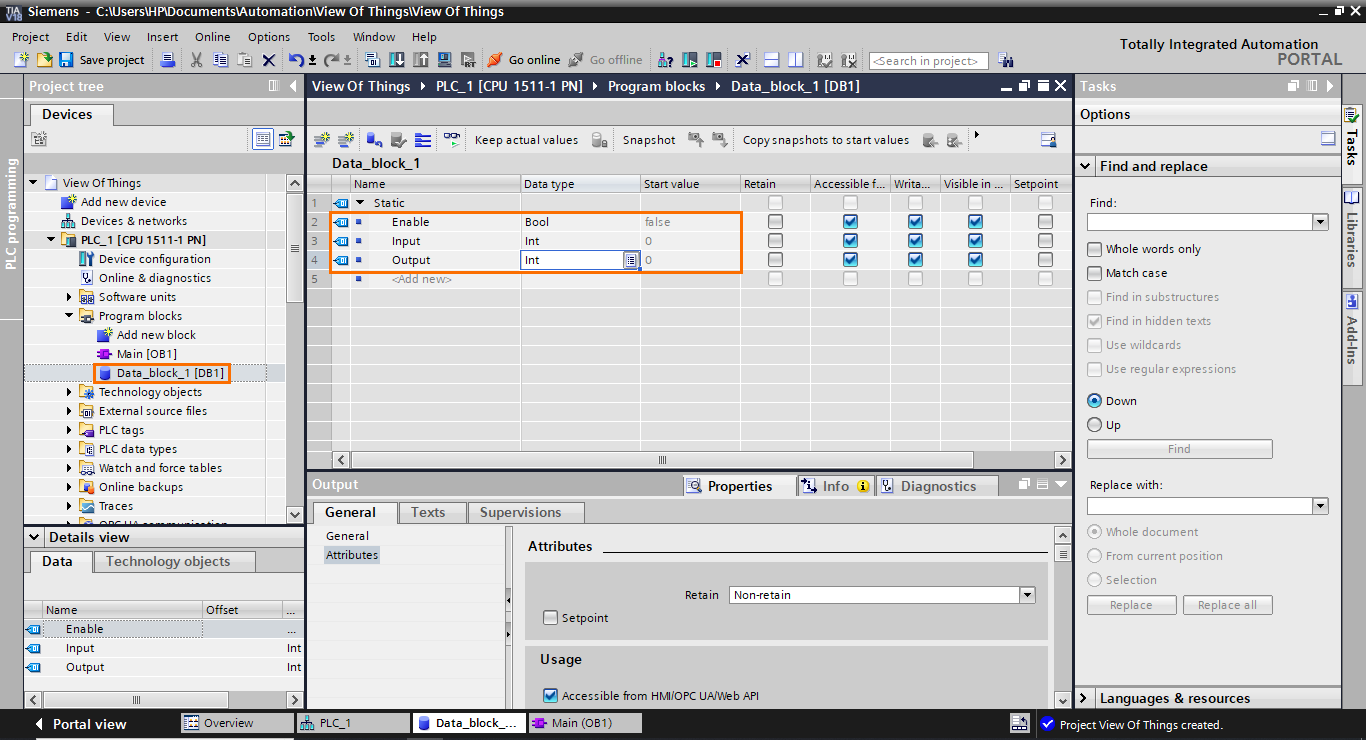
Then, go back to the DB and create the following elements.
Once done, go to the main program and add the DB elements to the program, as shown in the following figure. You can drag and drop the elements directly from the details view (by selecting the DB) to the program.
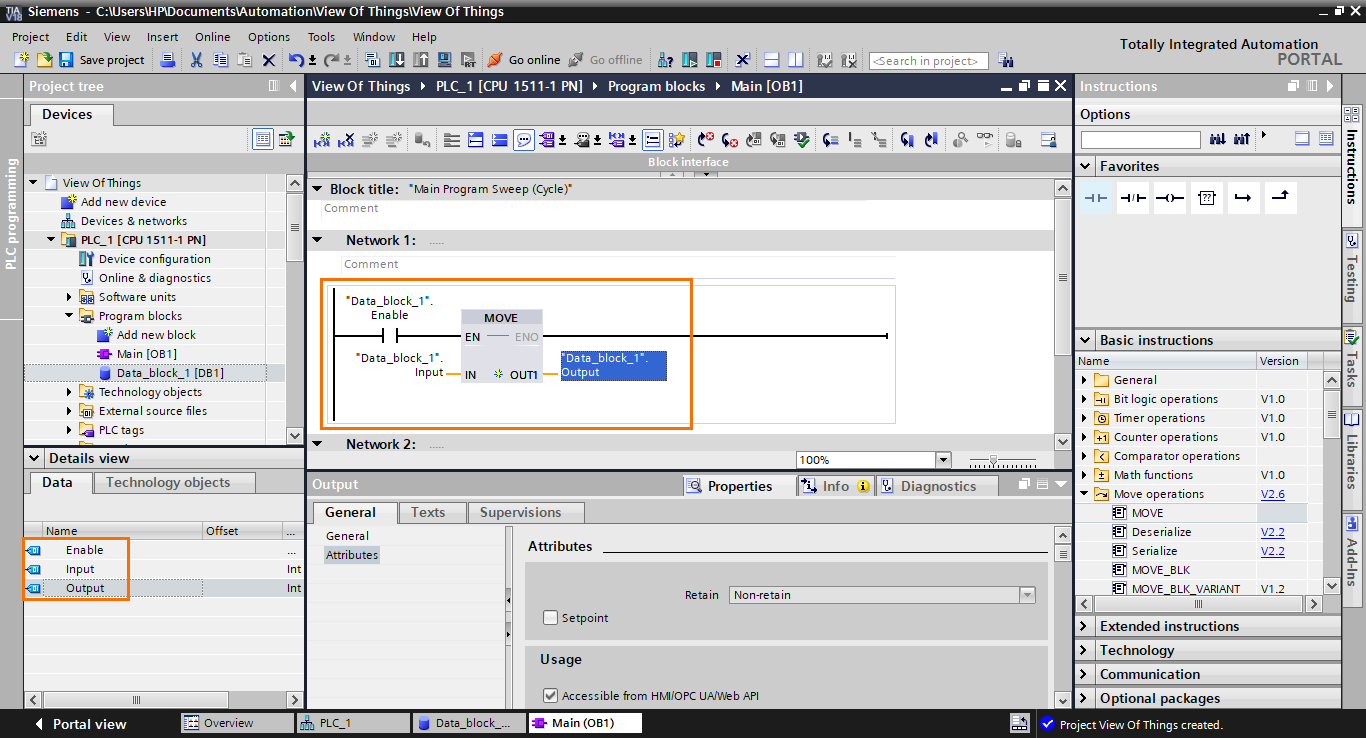
The program is now done. If the “Enable” boolean is 1, the move instruction sends the data from the input element to the output element.
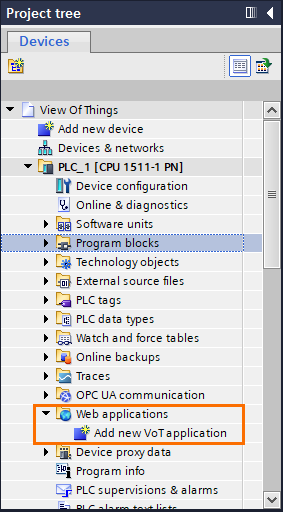
We can now create the VOT application. Open the “Web application” section in the project tree and click “Add new VoT application.”
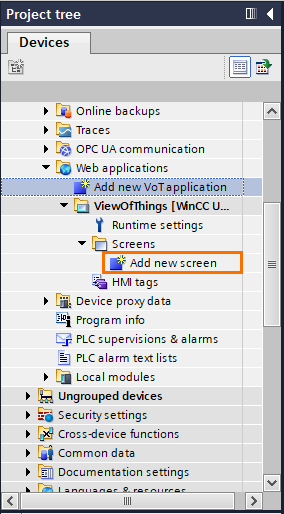
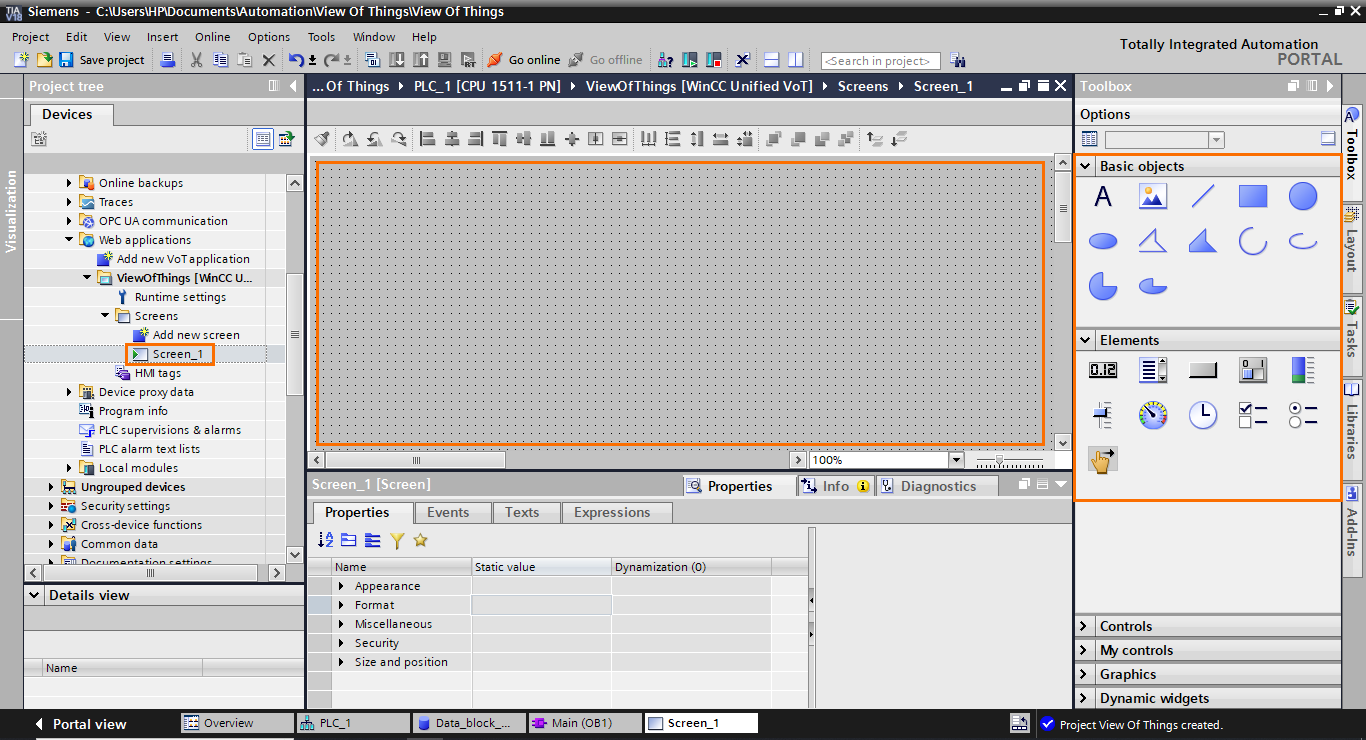
The VOT application appears in the project tree. It is a simplified version of an HMI interface containing sections such as runtime settings, screens, and HMI tags. Let’s create a new screen. Click on “Add new screen”.
As you can see, the screen interface is identical to a regular HMI screen interface. VOT applications are based on WinCC Unified, and they allow you to create simple web-based HMI visualizations directly inside the PLC that can be accessed through the PLC web server. In the toolbox section, you will find essential objects and elements to create dashboards to monitor/interact with your PLC program.
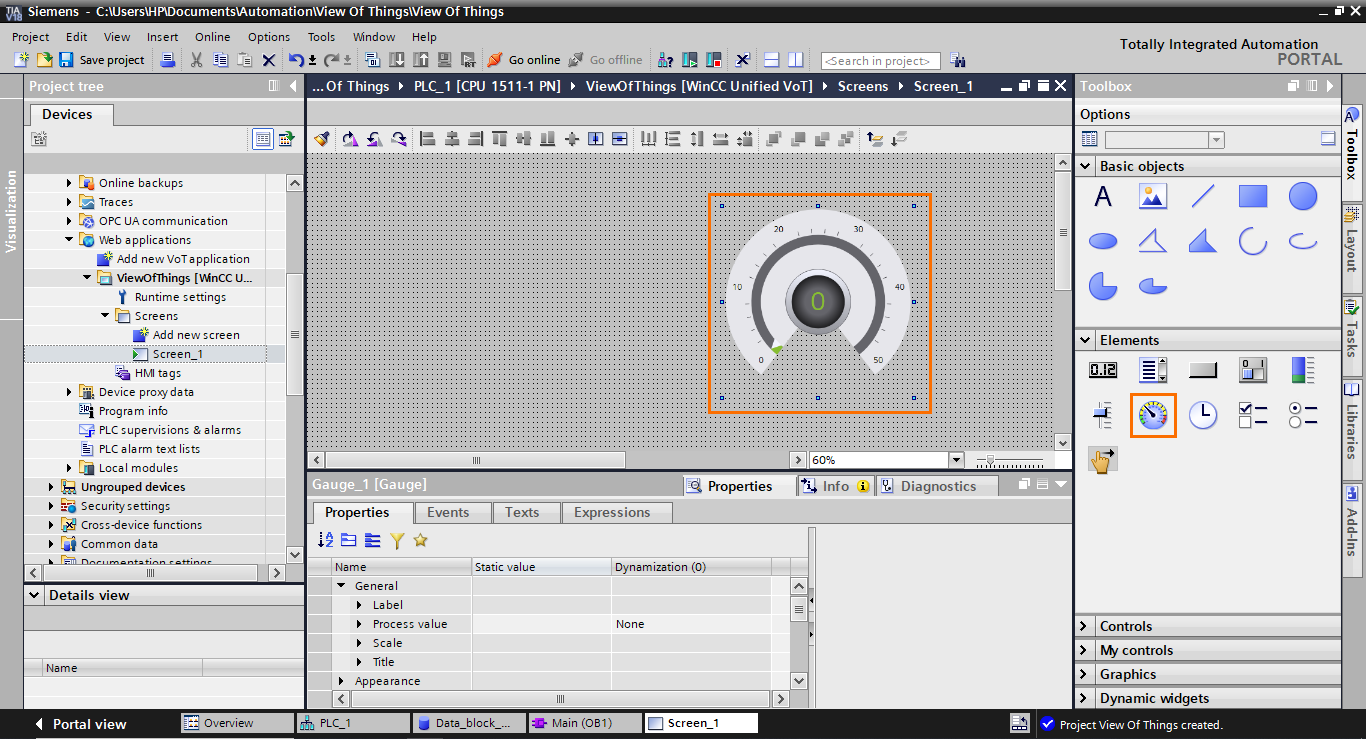
Let’s start creating the dashboard. We will need three elements to interact with the PLC program: A button to enable data sending, a slider to select a value for the input, and a gauge to display the output. Grab a gauge element in the toolbox section and drop it in the workspace.
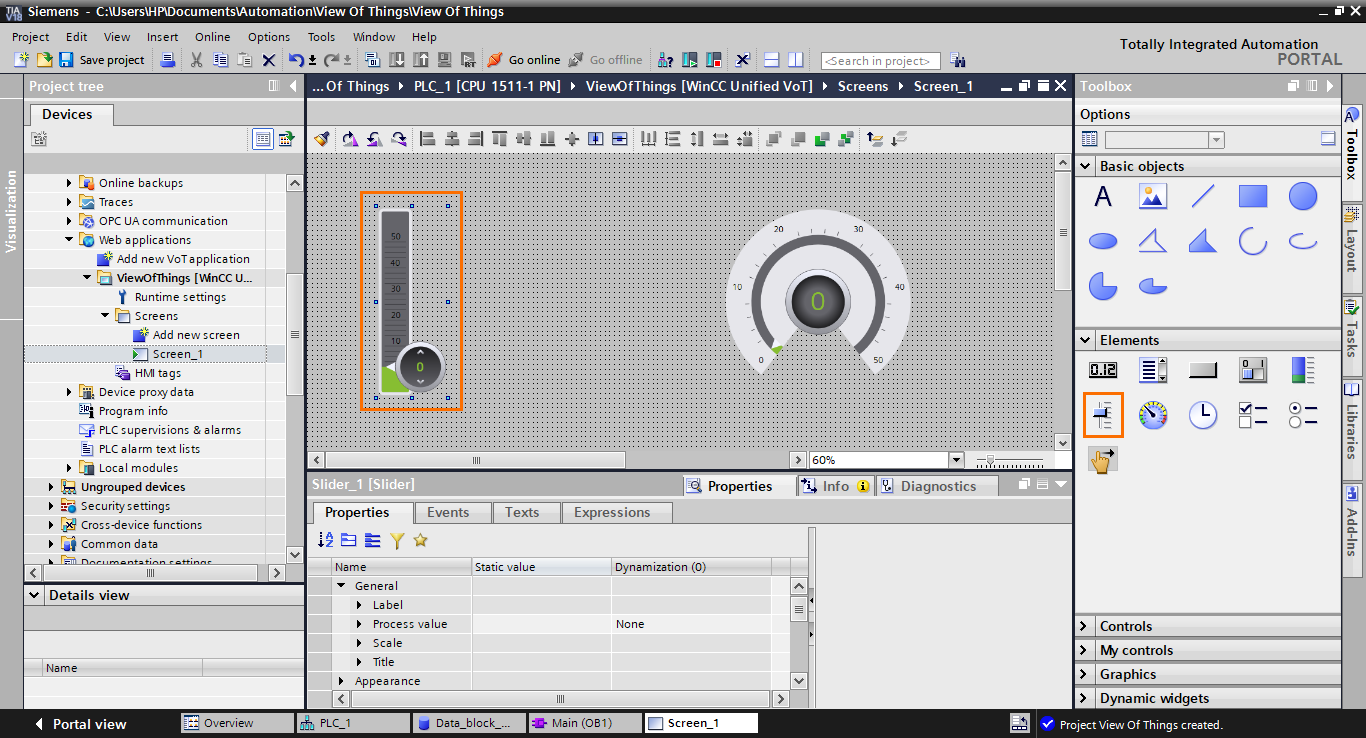
Repeat the same operation to add a slider to the workspace.
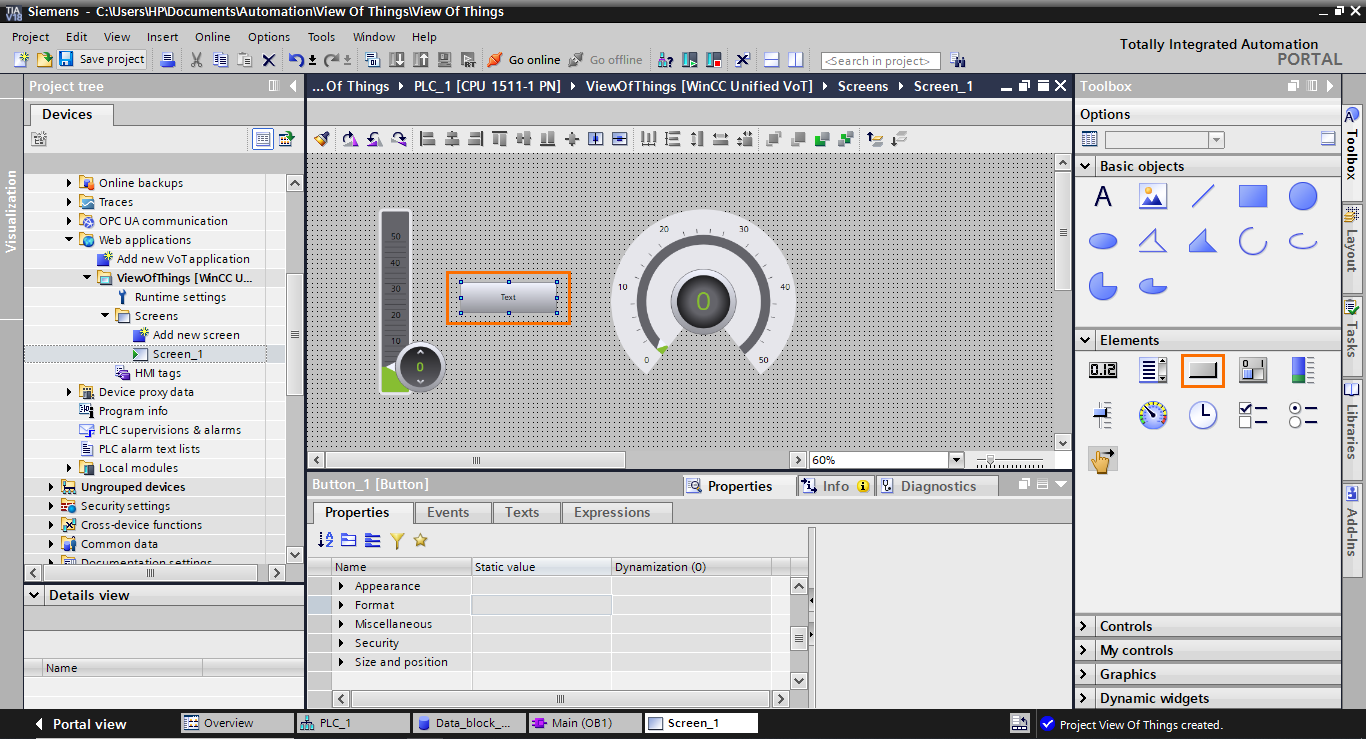
Then repeat it one last time to add a button.
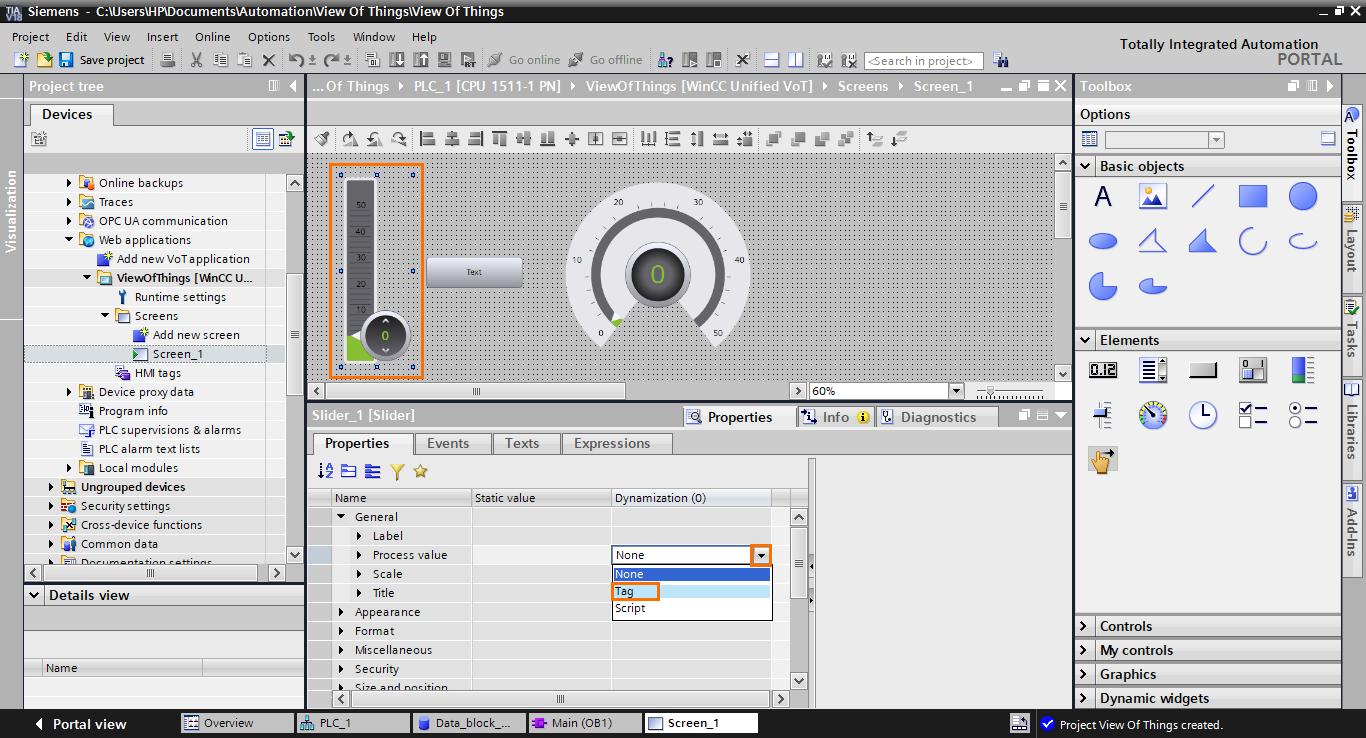
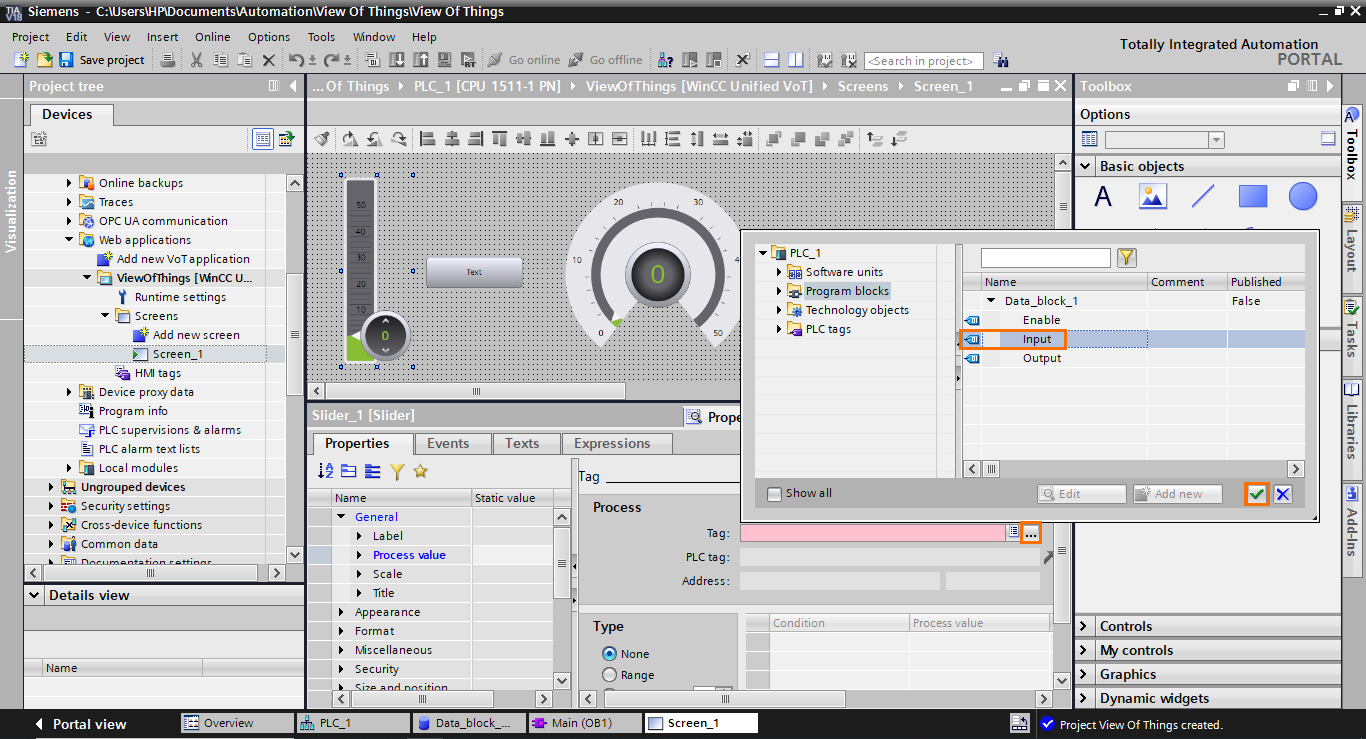
We added all the elements we need; we must configure them now. Select the slider, go to its “Process value” property, and select “Tag.”
Then, in the tag configuration, open the tag search by clicking on the three dots button and select the “Input” DB element.
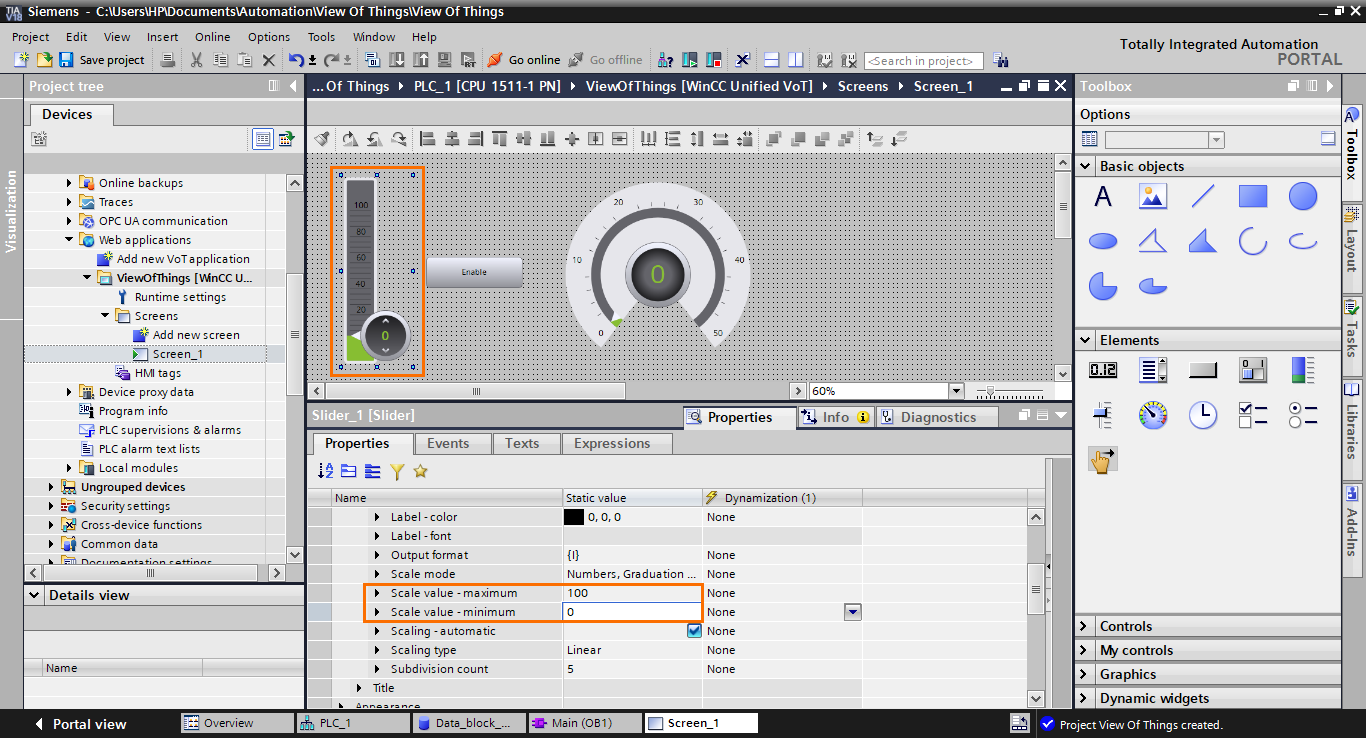
Next, go to the scale section of the properties and edit the maximum and minimum scale values, as shown in the following figure.
The input slider is now fully configured. let’s move to the button. Select the button, then go to its “Events” tab and open the “Press” event. Once done, click on “Add function.”
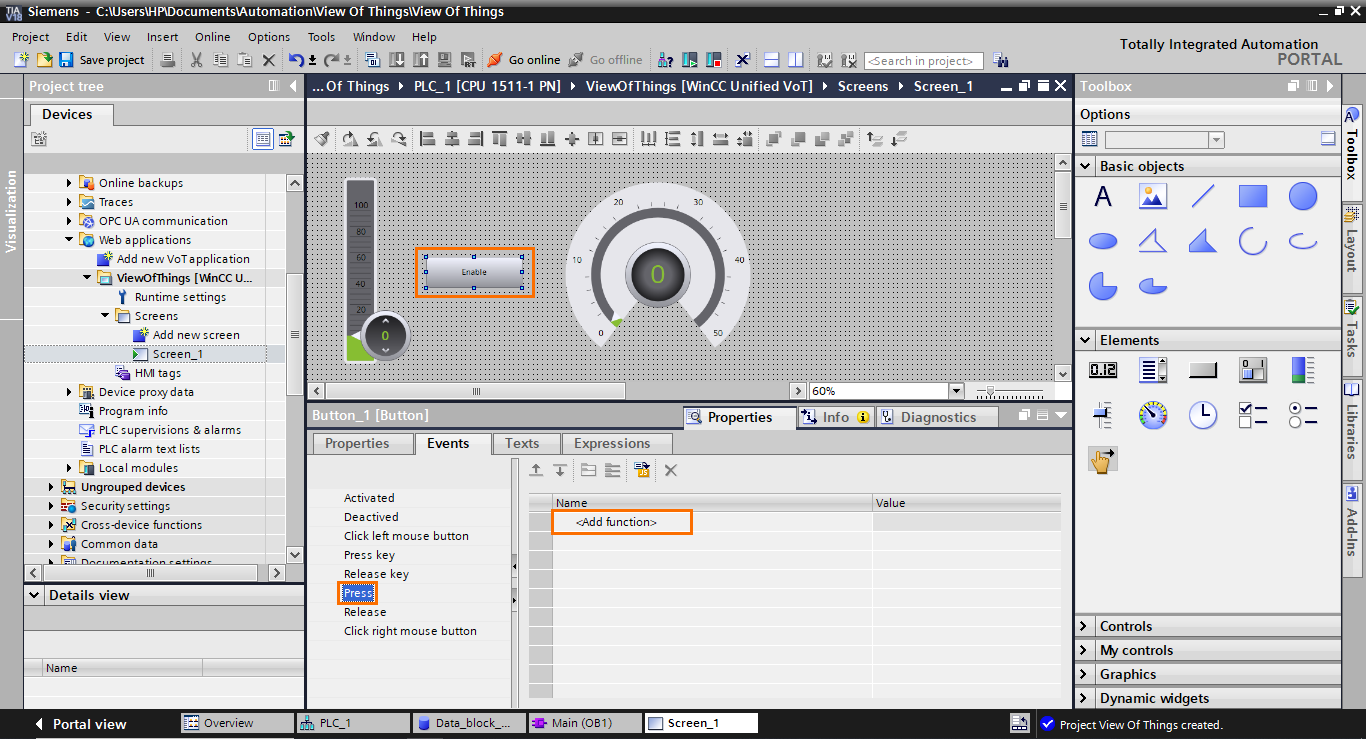
Select the “SetTagValue” function.
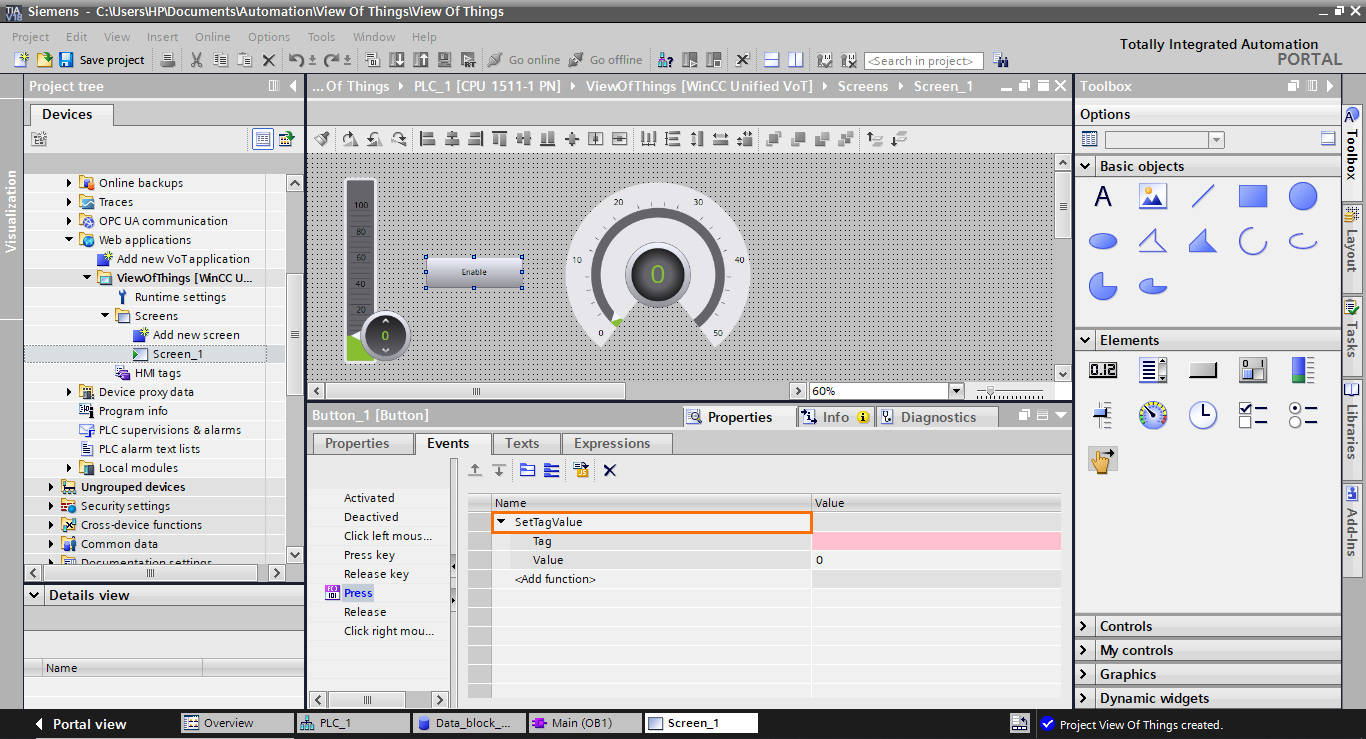
Then, select the “Enable” DB element in the tag section.
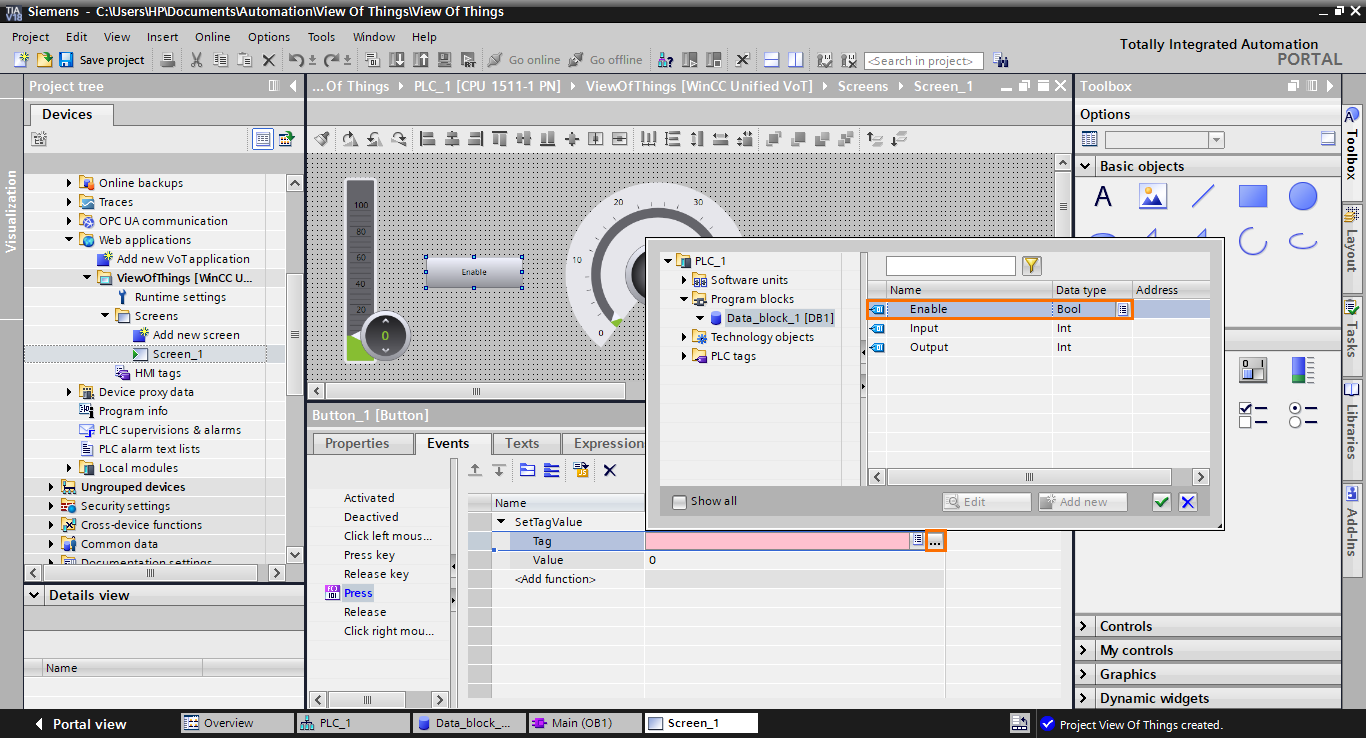
After that, in the value section, type “1”.
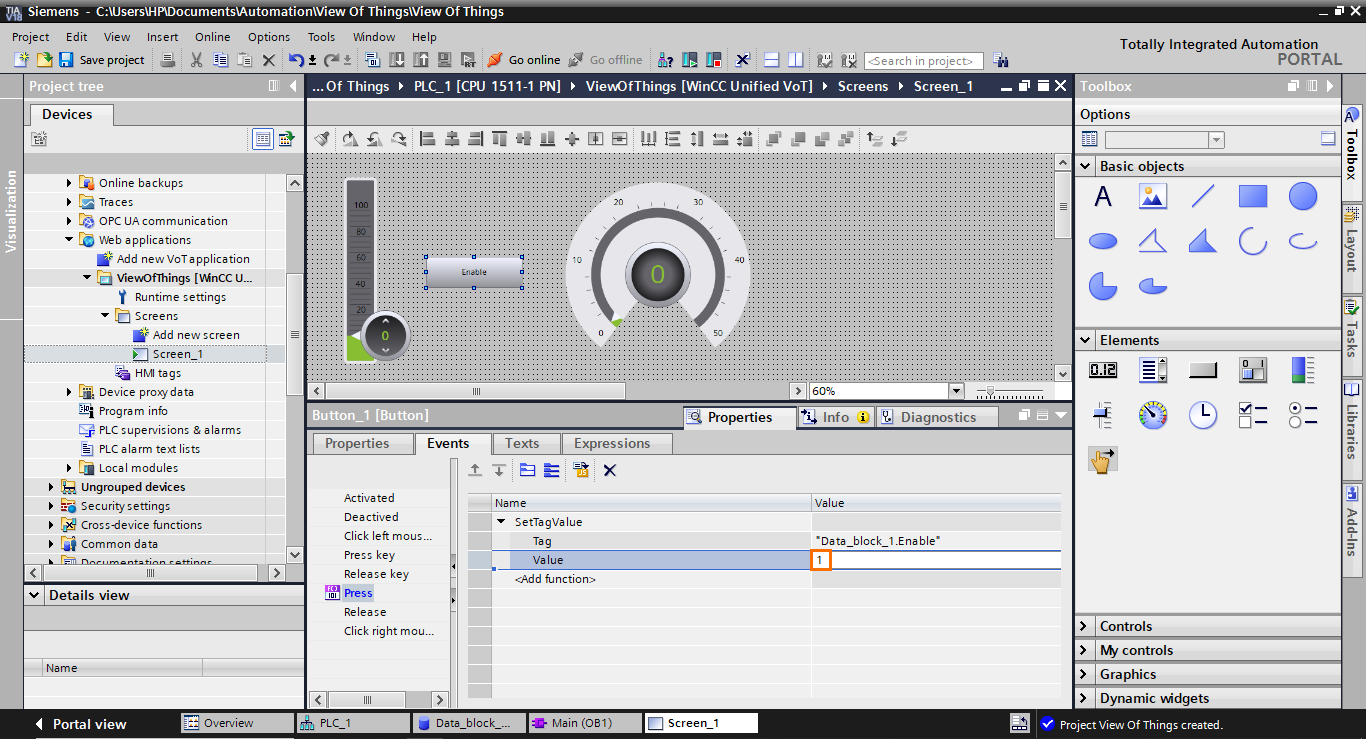
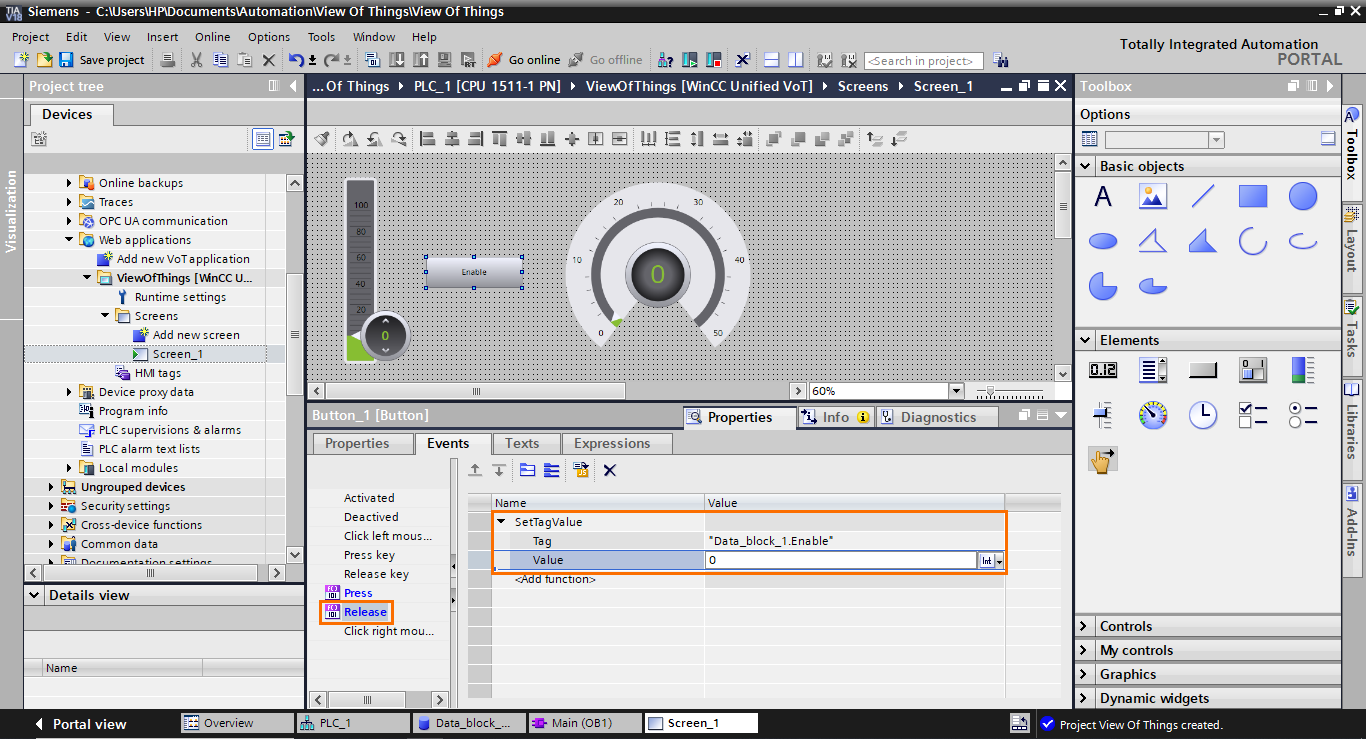
Once done, go to the “Release” event, and select the same tag but type “0” in the value section. This way, pressing briefly on the button will send an impulsion to the “Enable” tag.
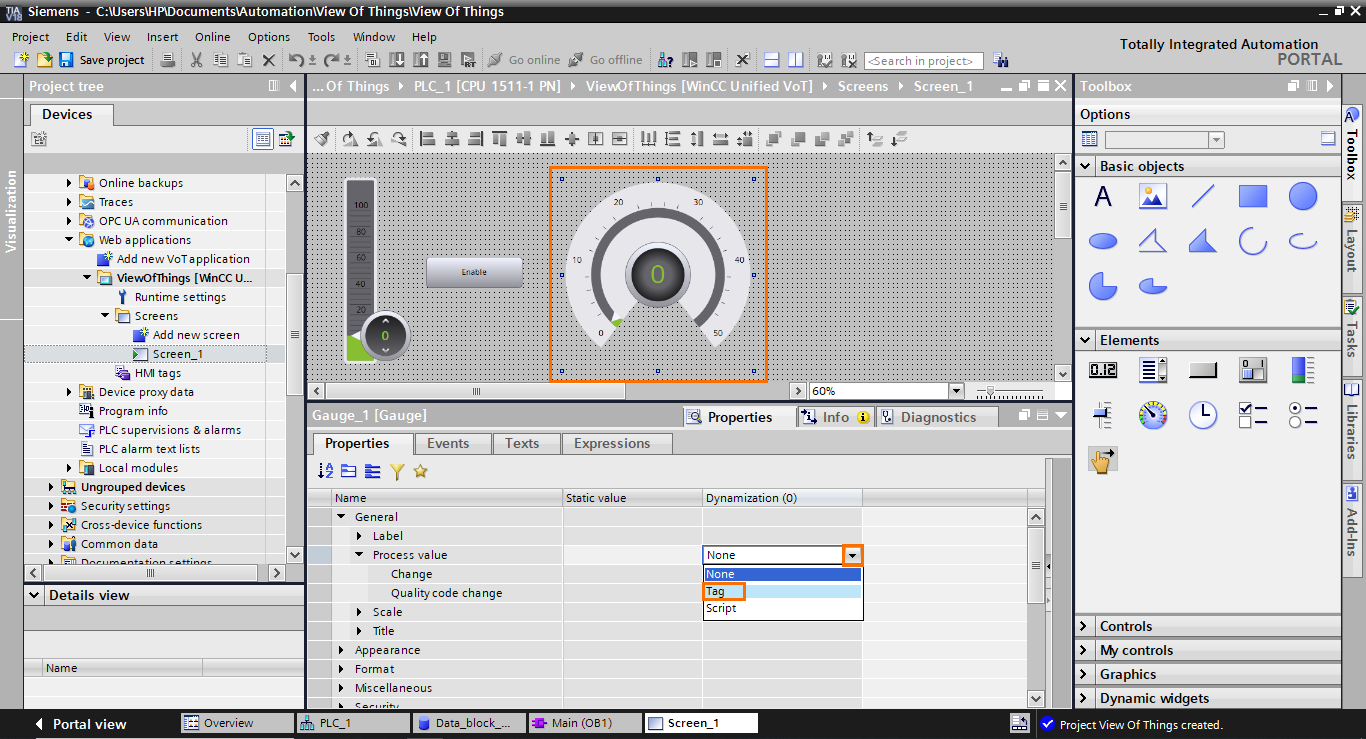
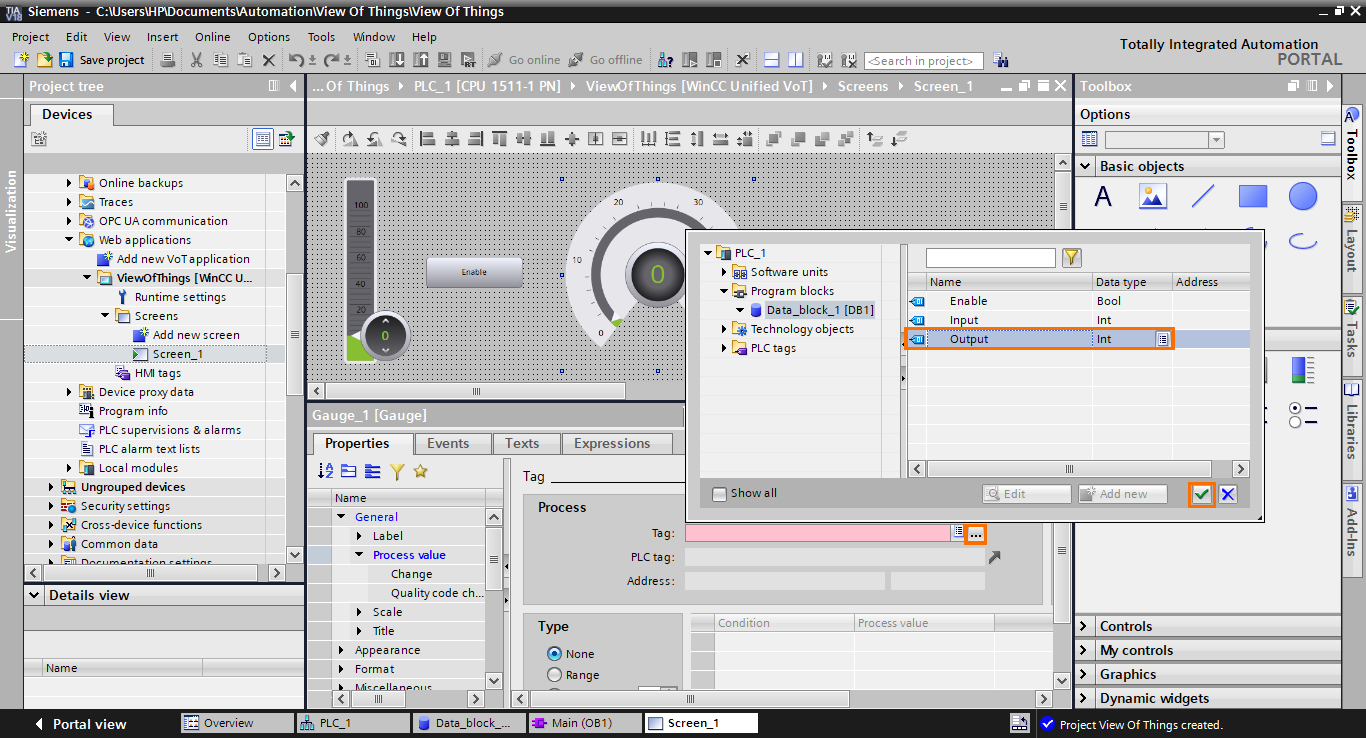
Let’s head now to the last element. Select the gauge and set its process value to “Tag.”
In the tag section, select the “Output” DB element as the associated tag.
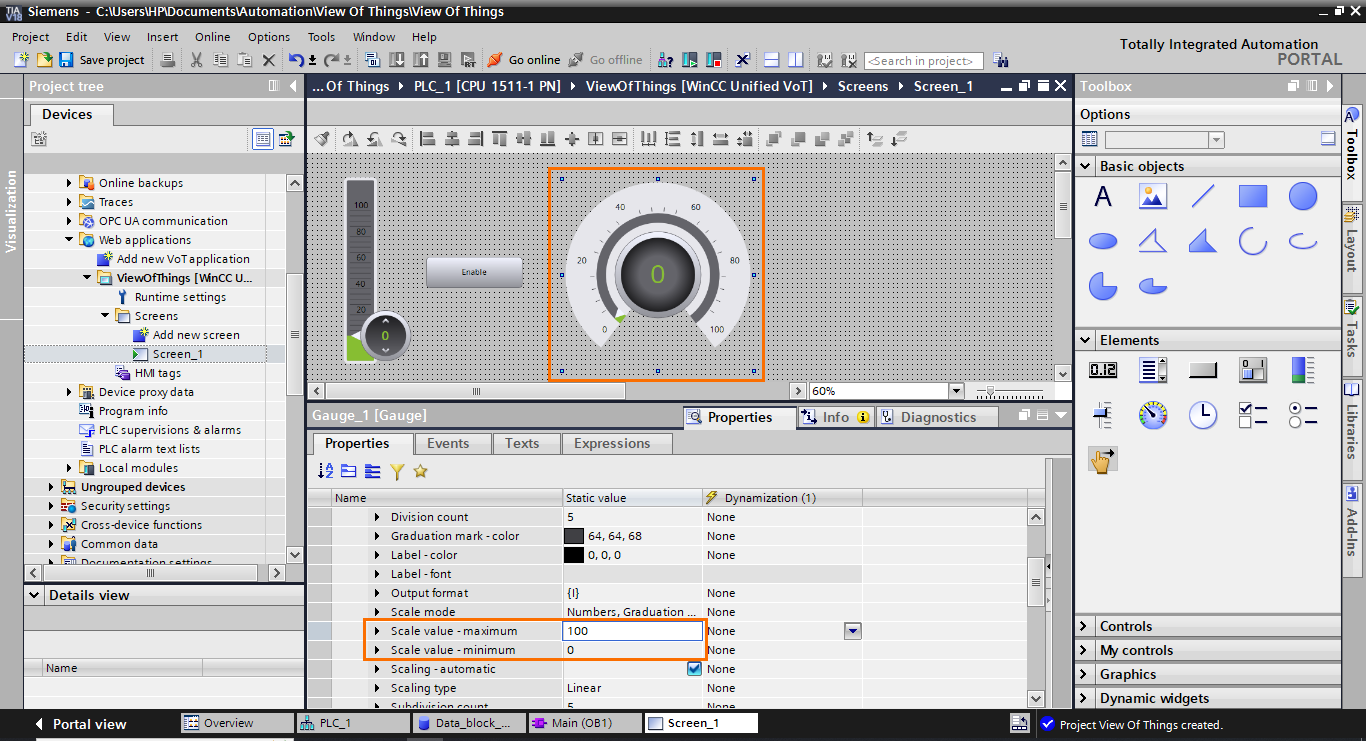
Then, go to the scale properties and set maximum and minimum scale values with the same values we used in the slider configuration.
The VOT configuration is now done. To generate the VOT code that will be sent to the PLC, we have to compile the VOT program. While a VOT screen is active, click on the compile button. Don’t forget to also compile after modifying a VOT screen.
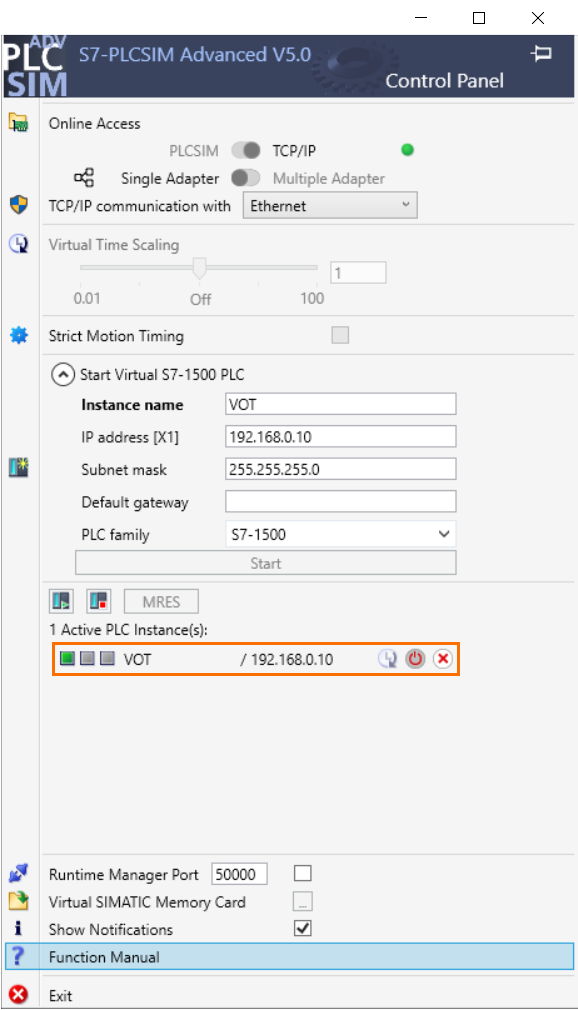
Once the VOT application is compiled, we can download the project to the PLC. In our case, we will use a PLCSim Advanced instance. Create an instance and download the program into it. Be sure to have the Ethernet Virtual Adapter enabled.
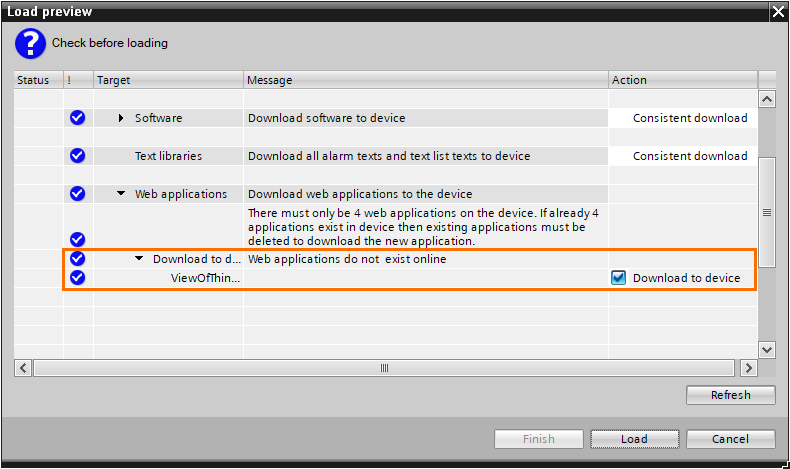
During the download, in the load preview window, enable the “Download to device” checkbox to allow the VOT application to be loaded.
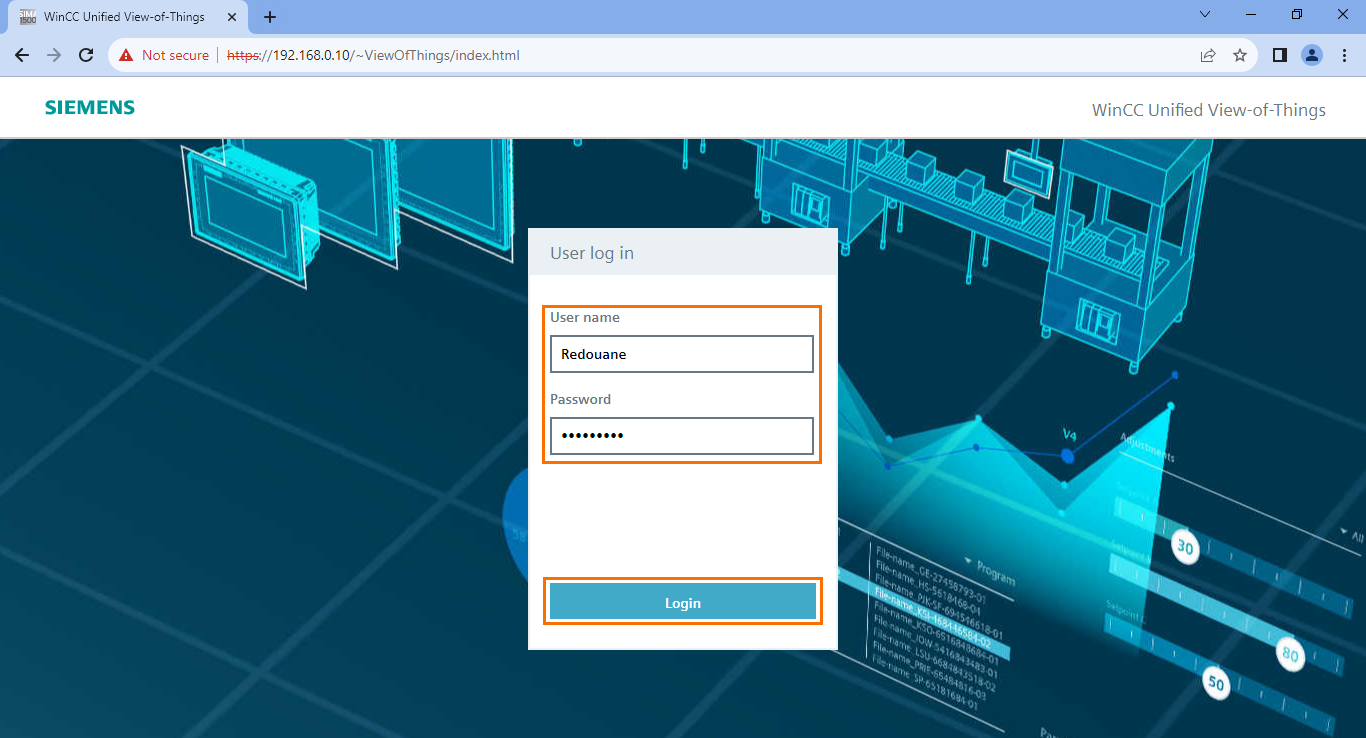
The PLC program and the VOT application are now running. Let’s try accessing the dashboard. To do this, use the following URL in the web browser of your choice
https://192.168.0.10/~ViewOfThings/index.html
Once you open this page, you will find a user login where you can introduce the user we created previously.
The dashboard will appear in your web browser, where you can interact with the program we created.
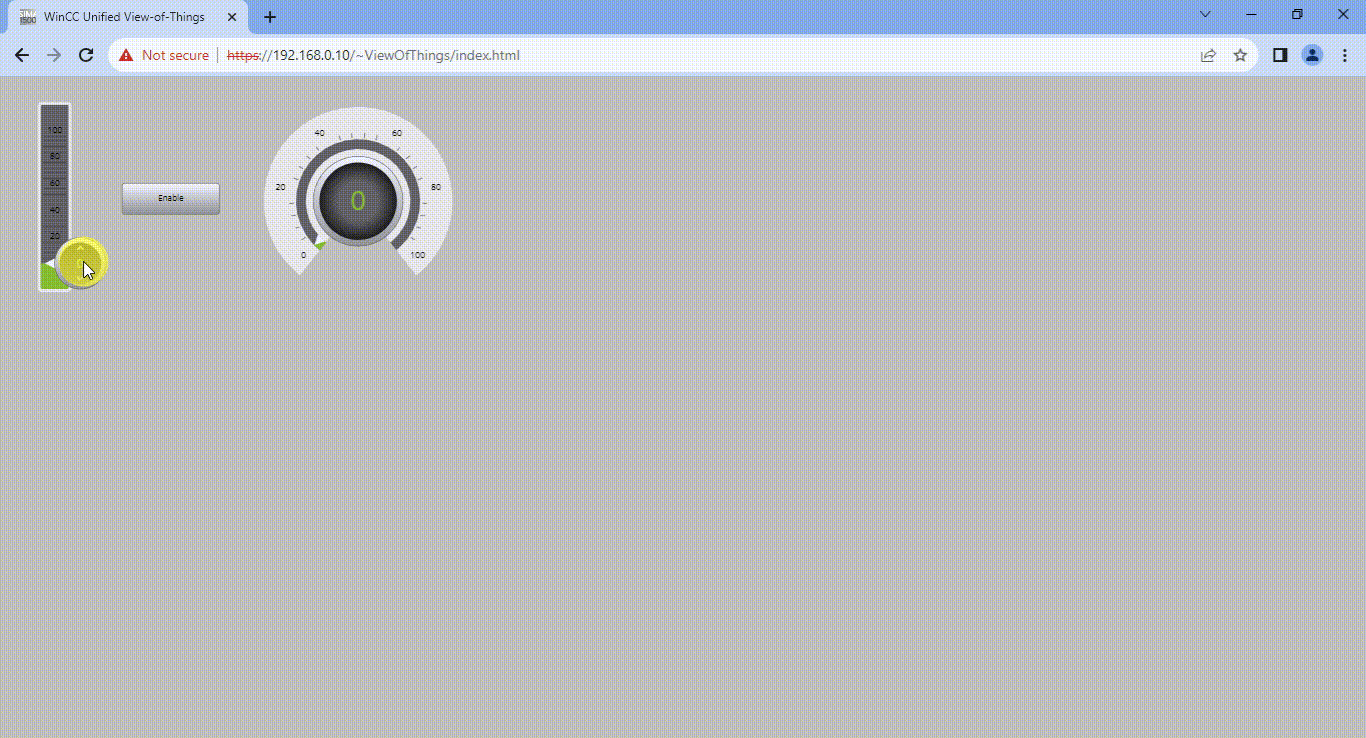
As you can see, pressing the “Enable” button sends the value indicated on the slider to the gauge. The dashboard works perfectly and allows you to interact with the PLC program.
Conclusion
In this tutorial, you learned how to leverage the View Of Things feature in TIA Portal to seamlessly integrate web-based HMI visualizations directly within a PLC. Start configuring a CPU and creating a small program as the basis for your VOT application. After that, we created an interactive screen and added essential elements like buttons, sliders, and gauges, configuring them to interact with the PLC program. Then, we compiled and deployed the PLC and VOT codes to the PLCSim instance before testing the dashboard interactions using a web browser.
The benefits of having swift access to HMI visualization through the View Of Things feature are significant. This approach optimizes operational efficiency by eliminating the need for dedicated HMI panels and complex network setups. With direct integration into the PLC's web server, engineers and operators can swiftly monitor and manipulate critical processes from any location. Real-time interaction with the HMI dashboard enhances decision-making, troubleshooting, and system responsiveness.