PointIO Allen Bradley Hardware & Software Tutorial | 1734-AENT Point IO EtherNet RSLogix 5000 Logic

Introduction
PointIO provides a simple solution to integrate field devices into a control system. These modules are extremely flexible, provide a vast array of replaceable cards and communicate over many network protocols such as EtherNet/IP, ControlNet & DeviceNet.
It’s costly and often impractical to install a completely new control system within a manufacturing plant. The need to do so may arise due to expansion, need to develop new machinery or the push to automate a new area. Whatever the need may be, it’s important to consider options which aren’t simply a new PLC-based rack. PointIO is a solution which may be installed in a remote panel & communicate over an industrial protocol to the main PLC chassis.
In this article, we will be discussing the process of addressing a new PointIO rack over EtherNet/IP; the most popular network used in current manufacturing.
Setting an IP address through BOOTP / DHCP
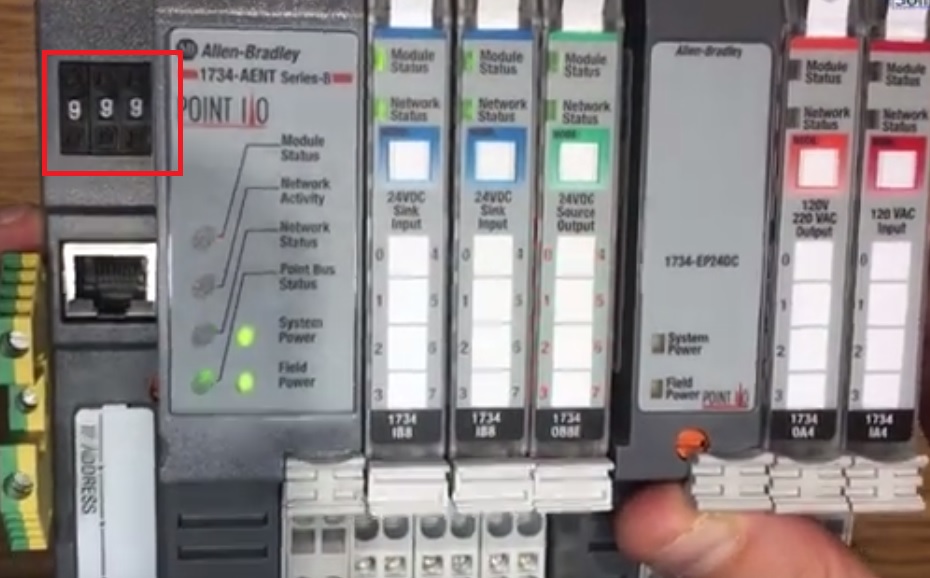
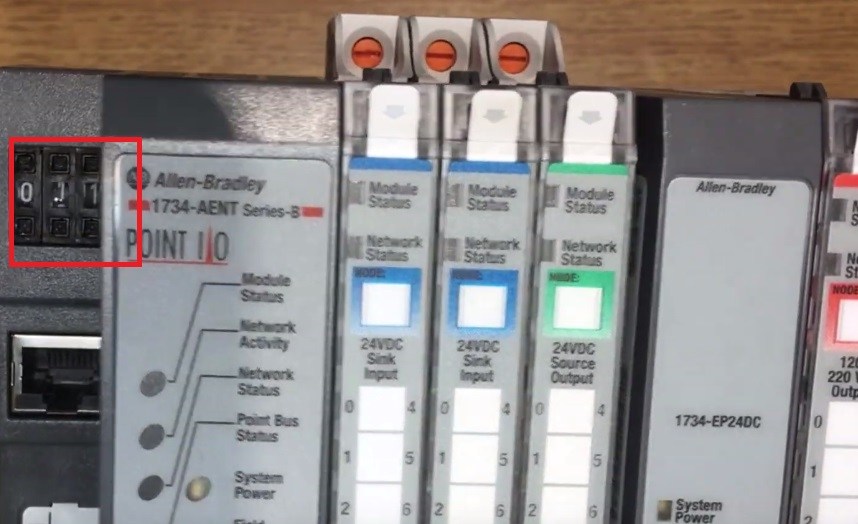
By default, the PointIO communication module (catalog # 1734-AENT or 1734-AENTR) comes with the dial set to “999”. This setting allows the module to acquire an IP address through BOOTP or DHCP. In case you’re not familiar with BOOTP, it’s a tool which is provided by Rockwell Automation & is usually installed with most software packages such as RSLogix, RSLinx or Studio 5000. It’s used for giving most hardware devices an IP address.
Here’s the default setting of an 1734-AENT PointIO Module.
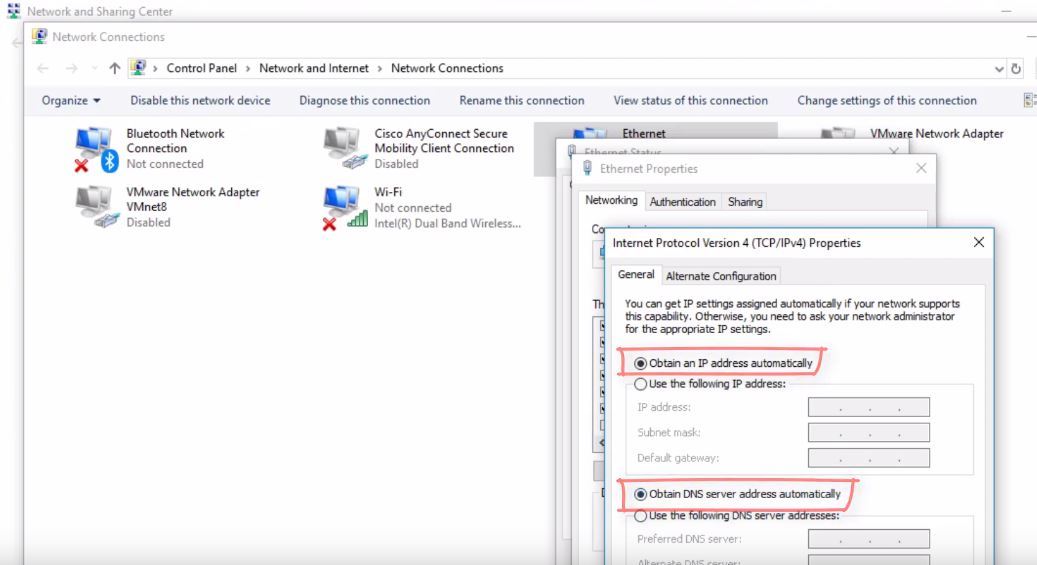
Just as you’d need to do with any other EtherNet based module, configure your computer’s card to have a dynamic IP address on the network card you plan on using to configure the PointIO module. This can be accomplished through Control Panel > Network Settings > Adapter Settings > Ethernet (choose the right card) and Properties.
Here are the settings on my laptop; make sure that you don’t have a static IP address here.
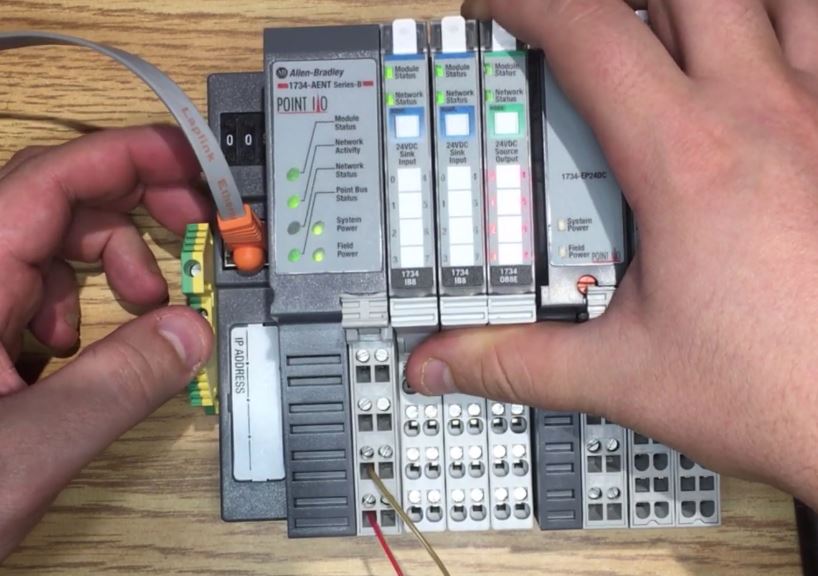
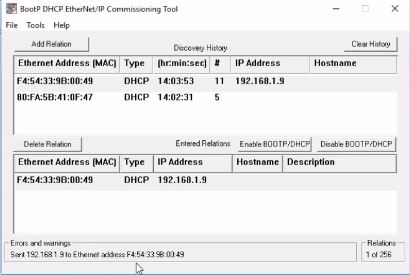
At this point, launch BOOTP utility from the software menu & plug into the EtherNet cable from your computer to the 1734-AENT module. You should start seeing a list of devices within the window. Although this may seem obvious to some, it’s highly critical to select the proper device. This is done by matching the MAC address to the 1734-AENT card. You should be able to find the exact MAC address on the side of the physical module.
Select the device with the right MAC address and add it to the list. By doing so, a new pop-up window should appear. Within this window, you need to specify the desired IP address for the module.
Note that as you complete the step above, you still aren’t done. The address has been sent to the module, but you still need to turn off the BOOTP/DHCP setting within the hardware. Failure to do so will result in the IP address being replaced at the following reboot. You’ll also notice that if you try to disable BOOTP/DHCP at this point, the command will fail; you’ll receive the appropriate notification in the bottom left corner.
To disable BOOTP/DHCP, you need to change the IP on your network card once again. Go back into the adapter settings and set it to be on the same subnet as the 1734-AENT module you’re working with. This is the only way to be able to send a signal from the computer to your module. Re-issue the command once that’s done & make sure to wait for the “Success” message.
Setting the IP Address of the PointIO 1734-AENT Through Dial Switches
Although you will need to use the method above to set a public IP address on your module; the preferred method & approach is to use a private one. The range is 192.168.1.1 – 192.168.1.256. There are two main reasons to set the IP within this range. The first one is the fact that your PointIO modules need to be isolated from the external network. There’s absolutely no reason to connect to the module directly after it has been commissioned by the engineer. You can see all the information you may need through the RSLogix or Studio 5000 interface. The other reason is that you’ll enable anyone within your facility to replace the module without the need to program. In other words, the replacement of the module in case of failure will be limited to setting the proper value & swapping out the hardware.
To accomplish this, simply set the dial to a number between 1 and 256. This will set the IP address to 192.168.1.xxx where xxx is the value specified by the dial. At this point, you may connect to the module just as you did above.
The example below illustrates the module at the address 192.168.1.11.
Conclusion
The first step in working with PointIO modules is knowing how to address them properly. If you’re using an EtherNet/IP based communication module (1734-AENT or 1734-AENTR), you’ll need to utilize BOOTP/DHCP utility or the dial setting methods outlined above. We've covered ways in which to connect these modules to controllers in our Allen Bradley PLC Training tutorials.
Once communication is established to the module, you may add it into your RSLogix or Studio 5000 Projects & start leveraging the multiple input & output blocks available.