PLC Programming - Getting Started in RSLogix 500 & MicroLogix 1100 Programmable Logic Controller

Introduction
Getting into Programmable Logic Controller (PLC) Programming can be stressful for a beginner. There aren’t many guides on how to get started and such guides are often convoluted and too complicated for a complete beginner.
In this article, we will be exploring how you can get up and going in RSLogix 500 on a MicroLogix 1100 PLC. The reason for this software & hardware combination is that it offers a cost-effective way to get onto a robust platform which is used in many manufacturing facilities today. RSLogix 500 offers a free version of the software which can be used to practice most of the instructions used in most PLC platforms. A MicroLogix 1100 PLC is a legacy piece of hardware which can be purchased on eBay from 200$; extremely inexpensive for a PLC. Check out the PLC purchase guide here.
Connecting the MicroLogix 1100 PLC to the Computer
The first step of the process is to get the hardware communicating to our machine. In order to accomplish this, we need to connect the hardware to power as well as a means of communication.
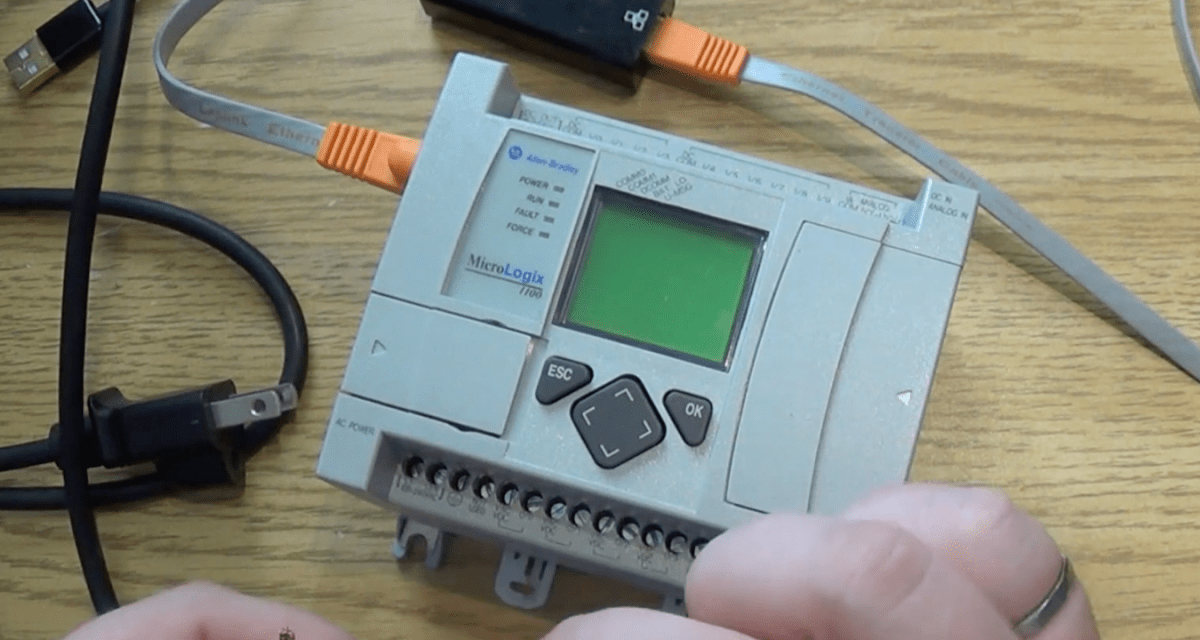
Connecting power is straightforward. Depending on the MicroLogix 1100 PLC, or any other RSLogix 500 PLC unit, you’ll need to connect the appropriate wiring to the bottom left terminals. In case of a 110VAC powered unit, as shown below, you’ll need to connect the neutral, line as well as the ground into the first three terminals. If you’re working with a 24VDC unit, you’ll need to provide a power supply with said voltage in order to power the unit.
There are two distinct ways to communicate with a MicroLogix 1100 PLC: Serial through RS232 and EtherNet. Although it may seem easier to communicate over RS232 which has been utilized for decades, this mean of communication is slowly being replaced by EtherNet. Therefore, we will be exploring the second option of communication. That being said, you may choose to purchase a USB-to-Serial converter instead. Here are some hardware links for this purpose:
- EtherNet to USB Adapter
- Cable Matters USB to Ethernet Adapter
- See on Amazon
- EtherNet Straight Through Cable
- Mediabridge Ethernet Cable (15 Feet)
- See on Amazon
- (Optional) USB to Serial Adapter
- Generic PLC Micrologix Cable Replace USB Interface for AB PLC Micrologix 1000
- See on Amazon
Establishing a Connection in RSLinx
Last week, you’ve downloaded RSLogix 500 alongside with RSLinx. RSLinx is the primary software used for Allen Bradley communication. It allows one to communicate with PLCs & other Allen Bradley hardware over EtherNet, Serial, USB & other protocols. We went over the setup of this software in a previous video, but it’s important to know the steps of creating a driver and establishing a connection to our PLC, so it will be covered here once again.
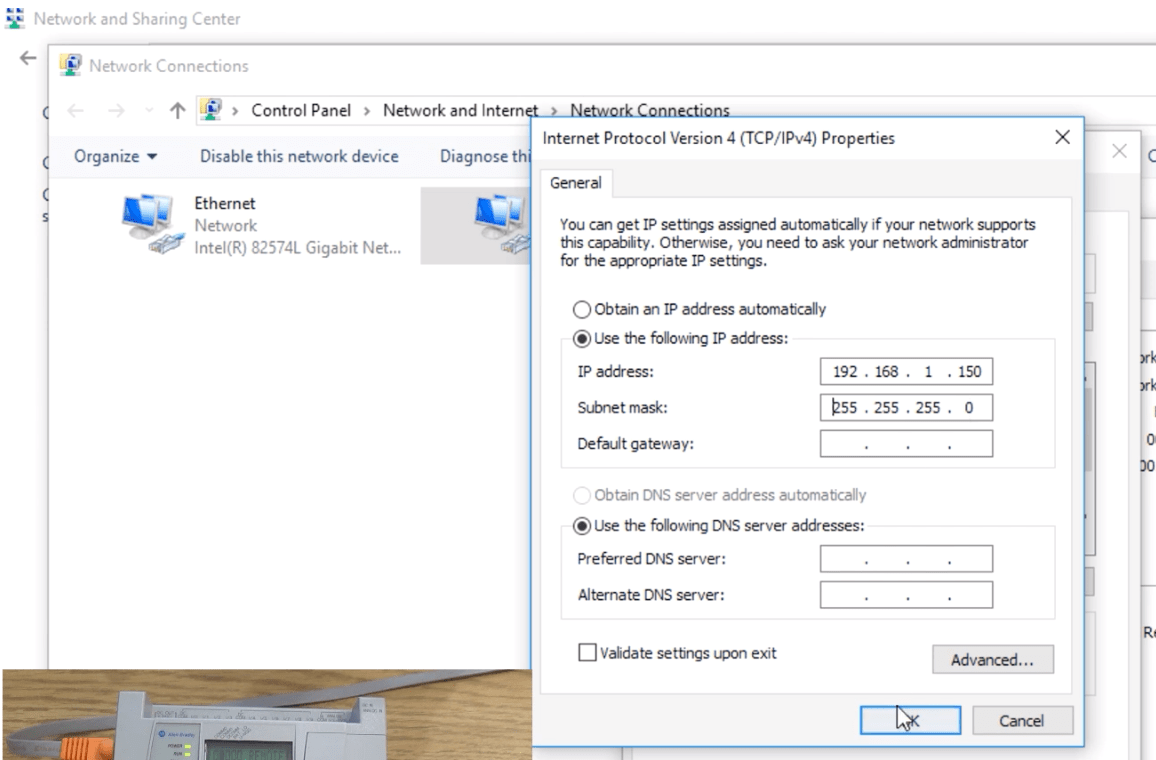
Setting the IP address of our network card to match the network of the PLC is the first step. Go into Control Panel > Network Settings > Change Adapter Settings > Select the appropriate adapter > Change IPv4 Settings. The PLC is on 192.168.1.4, so we match the network by setting our IP to 192.168.1.150 as shown below.
At this point, we can check the connection by pinging the PLC. By searching RSLinx we can open the software and reveal the drivers which are currently running. For the purpose of this tutorial, we will create a new EtherNet driver which will browse the local subnet. Make sure to select the proper network adapter which we’ve configured above.
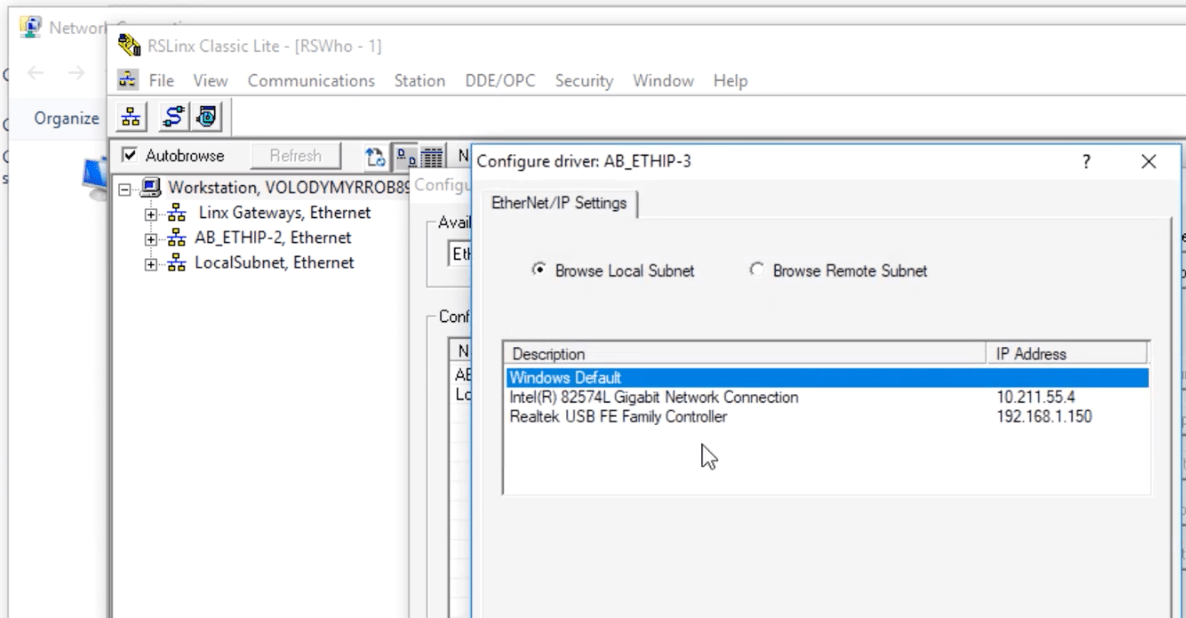
If the setup was correct, you should see your processor under the driver tree. If it wasn’t you’ll either see a red “X” mark or nothing at all at that IP address. Make sure to go back to the previous configurations if that’s the case.
Going Online with the Processor through RSLogix 500
At this point, we’re definitely communicating with the MicroLogix 1100 PLC. The next step is going online in order to start programming. This can be accomplished in one of two ways: Uploading what’s currently on the processor to our computer or Downloading a clean program to the processor from our PC. Depending on the state of the PLC in question you may choose one method over the other.
Uploading what’s on the PLC allows you to keep the program which is currently running on the processor. This is the preferred method of “Going Online” for operational systems and if you want to preserve the code which is currently on the PLC.
Downloading a new program will erase everything that’s currently configured on the PLC when it comes to software. There’s no way to recover what was there prior to a download. Therefore, you should only go this route if you’re absolutely sure that you will never need what’s there.

Conclusion
Learning through RSLogix 500 and a MicroLogix 1100 PLC is one of the best ways for a beginner to get into PLC Programming. These tools offer the most cost-effective solution while exposing the user to systems currently being used on manufacturing floors. In the article above we covered the steps one needs to take in order to set up the hardware and go online with the processor in order to start practicing the craft of PLC Programming.
To download your copy of RSLogix 500 at no cost, visit the following page: RSLogix 500 Download.
