Siemens S7-1200 PLC Configuration - Digital and Analog IO Modules Settings
Introduction
Configuring PLC digital and analog inputs and outputs cards is critical to ensure proper functionality and reliable performance of the PLC. The following are some reasons why it is crucial:
It ensures the precise acquisition of the required data from field devices, which is essential for the PLC to make decisions.
It ensures compatibility with the hardware. Thus, it prevents any issues or malfunctions from using incompatible components.
It ensures the PLC system operates optimally, with the right amount of data being acquired and sent to the appropriate devices. It helps to prevent errors and ensures the system runs as smoothly as possible.
Poorly configured inputs and outputs cards can lead to unreliable performance and safety hazards. So, proper configuration ensures that the system is safe and reliable.
Prerequisites
What you will need to follow along with this tutorial:
- The installation of TIA Portal software on your computer. We will use TIA Portal version 16 in this tutorial; however other TIA Portal versions are also acceptable.
- Understanding S7-1200 CPU digital IO settings
- Understanding S7-1200 CPU analog IO settings
- Understanding S7-1200 CPU startup, memory, time, and protection settings
Selecting IO Modules and Making Their Settings
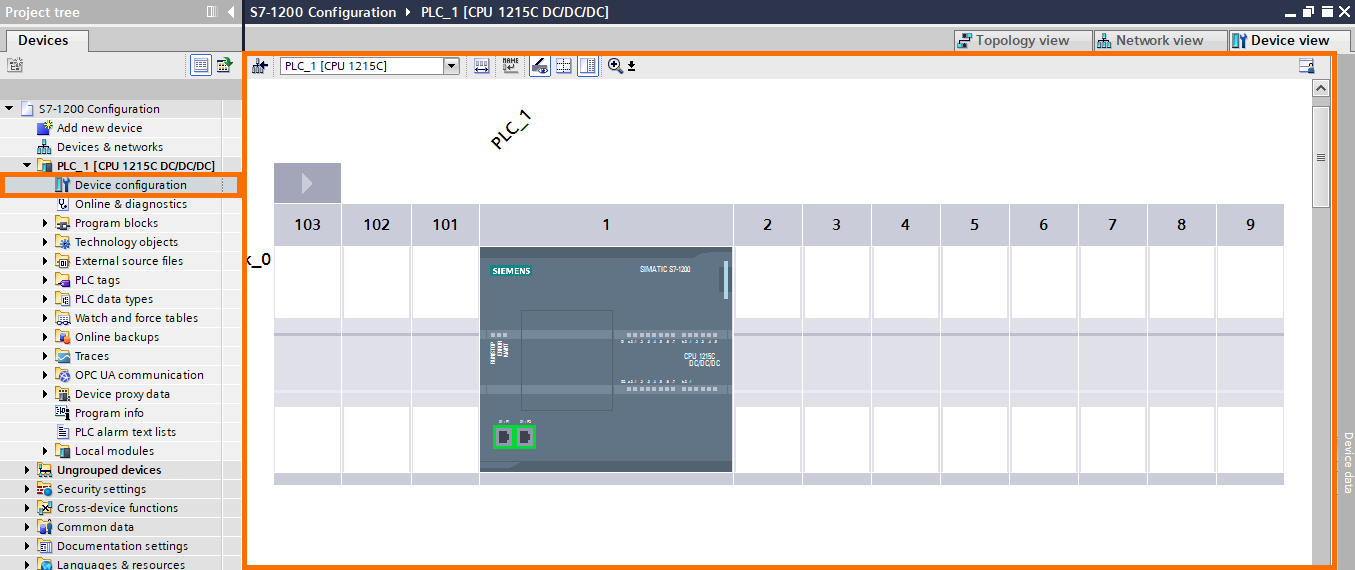
To start, launch your project in TIA Portal software and then go to the left panel and click twice on the "Device configuration" item. It will bring up the window for configuring the PLC hardware.
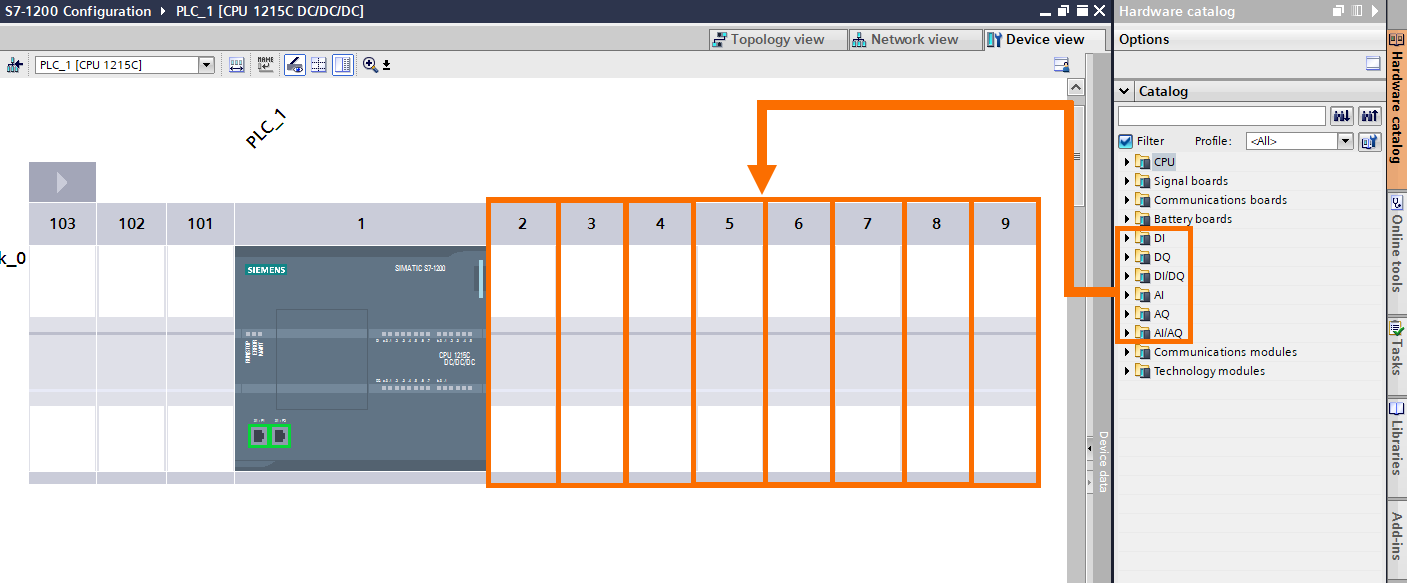
If input and output modules are needed, select these cards from the software catalog and place them in slots 2 to 9 in the rack. After selecting each of the IOs, you can set the module by selecting the card and entering its "Properties" section. The settings of the IO modules are similar to the CPU inputs and outputs settings, and the vital points are explained below.
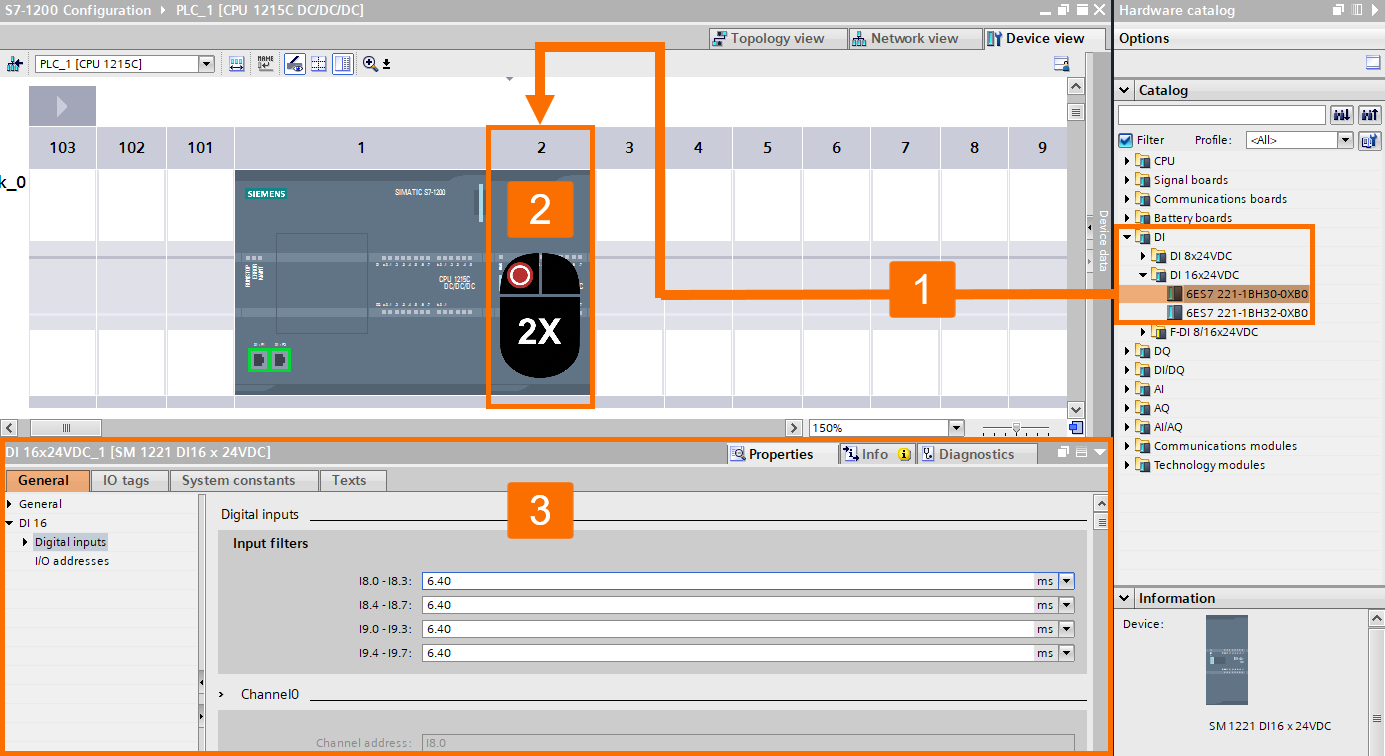
Digital Input Module Setting
To check the digital input module setting, you will consider the "DI 16xDC 24V" module as an example. If you select this module and double-click on it, the module setting section will be displayed.
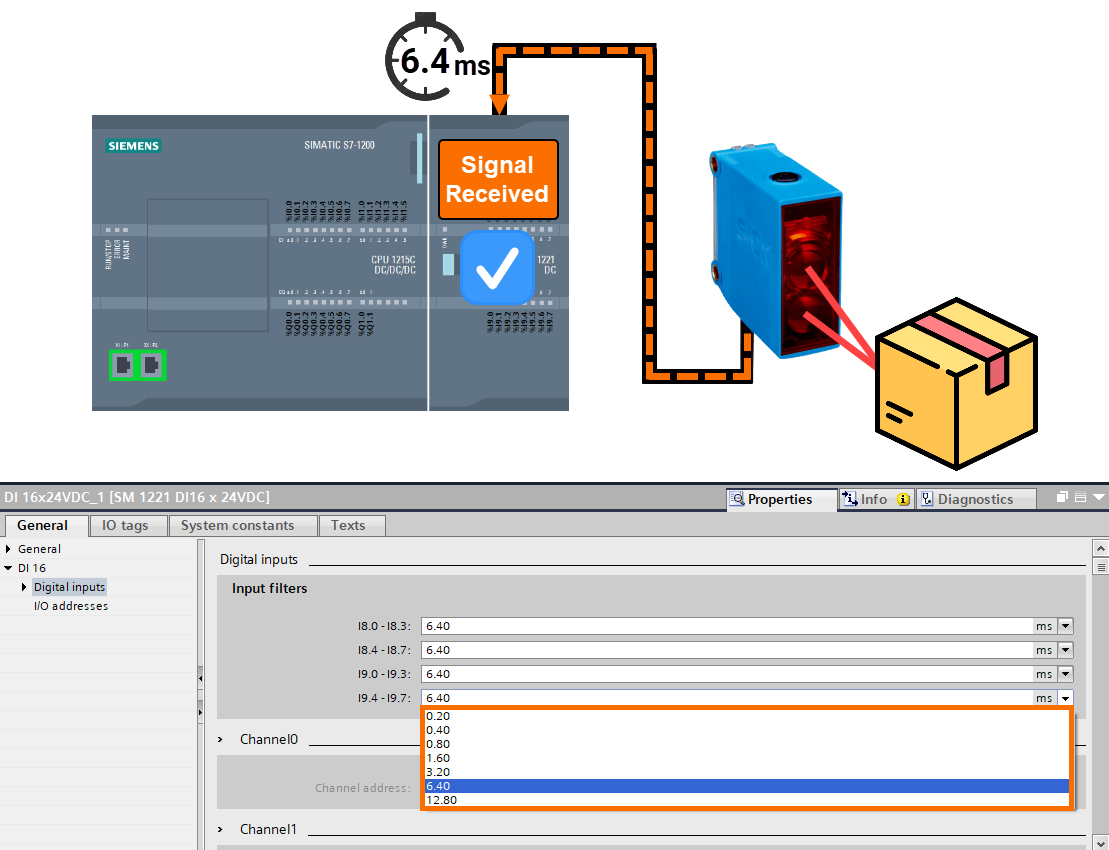
Step 1: Digital inputs section. The only possible setting is editing the input signal receiving delay time in this section. It is previously described in the CPU digital input setting in detail.
Step 2: IO addresses section. You can set the module address and select the "Process image" area in this section. These settings are similar to the ones stated in the CPU digital IO settings.

Digital Output Module Setting
To check the digital output module setting, you will explore the "DQ 16xDC 24V" module as an example. If you select this module and double-click on it, the module setting section will be shown.
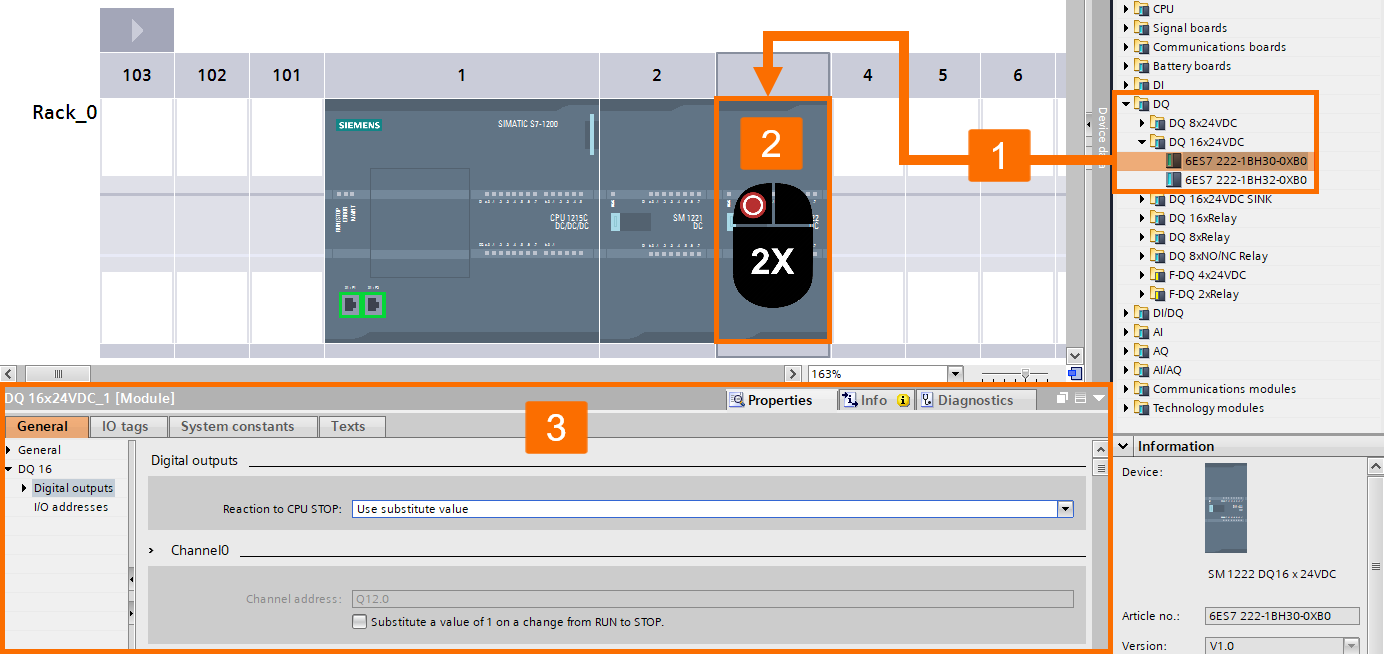
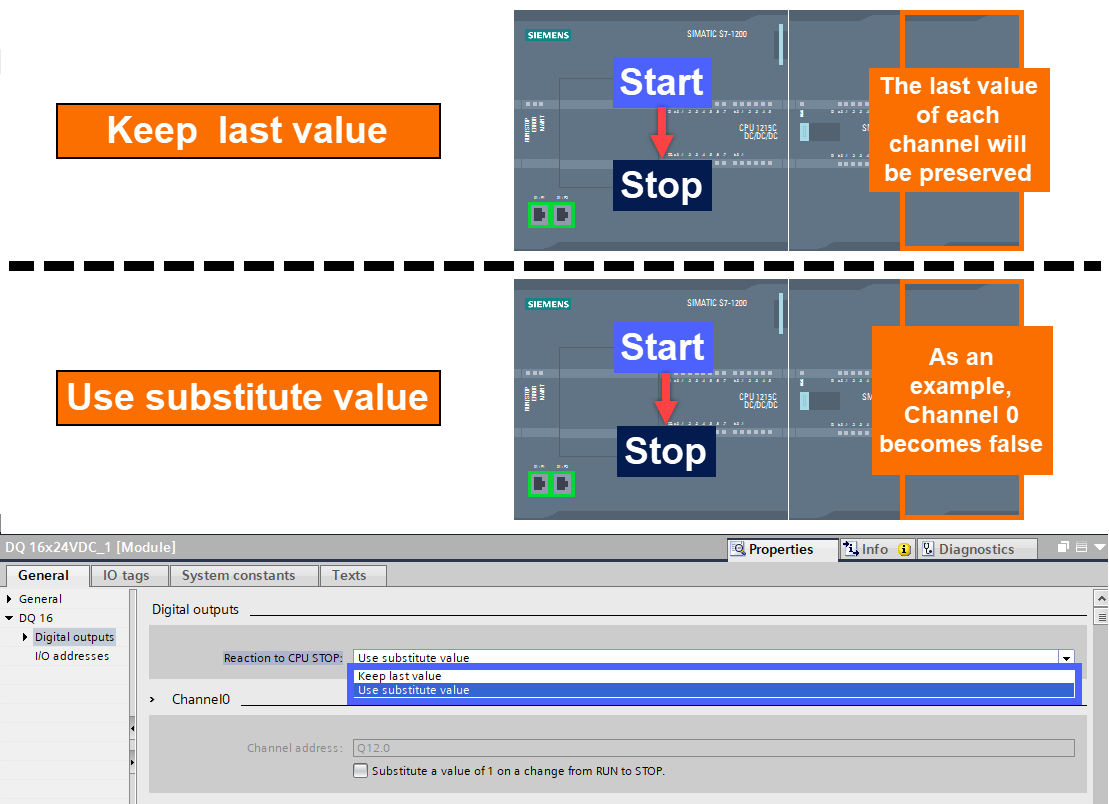
Step 1: Digital outputs section. In this section, it is possible to determine how the digital output module reacts to the stop of the CPU. The settings in this section are similar to the CPU digital output settings mentioned before.
Standard Analog Input Module Setting
To review the setting of a standard analog input module, let's use the "AI 4x16 BIT" module as a sample. When you choose this module and double-click on it, you will see the section that contains its settings.
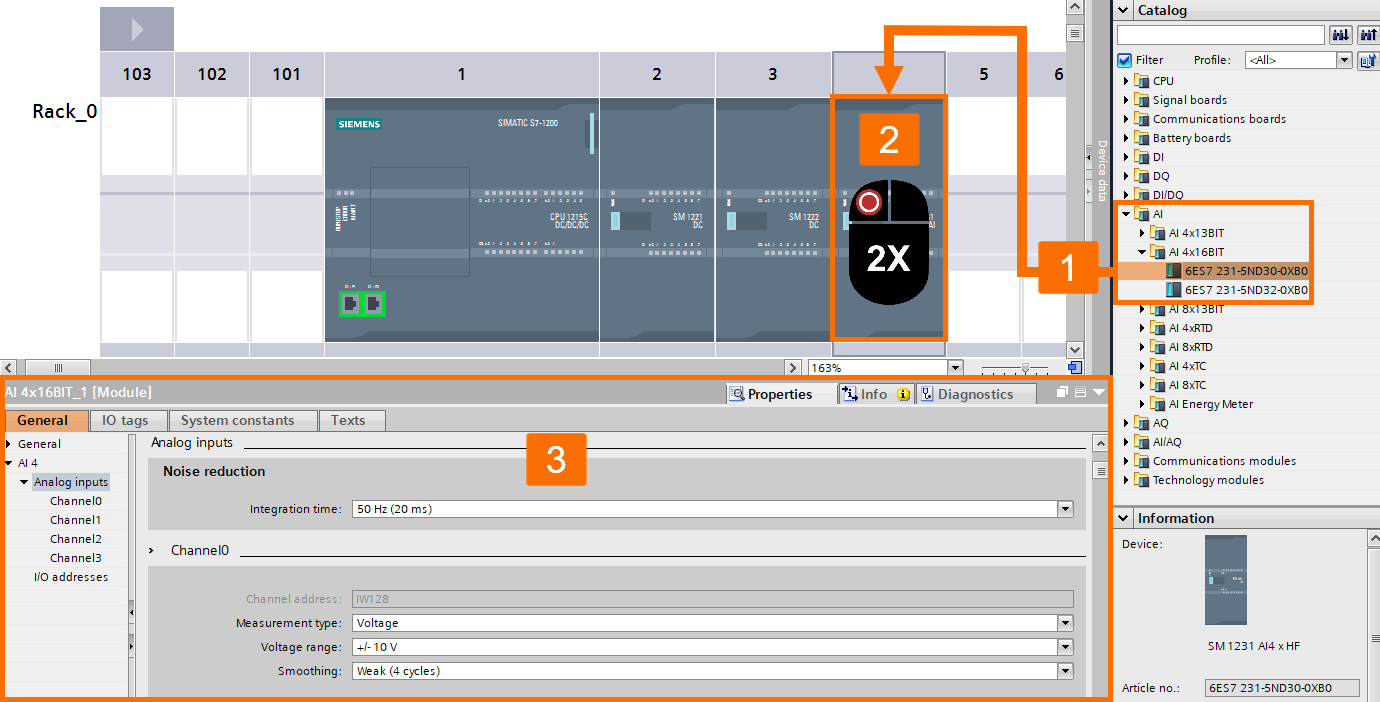
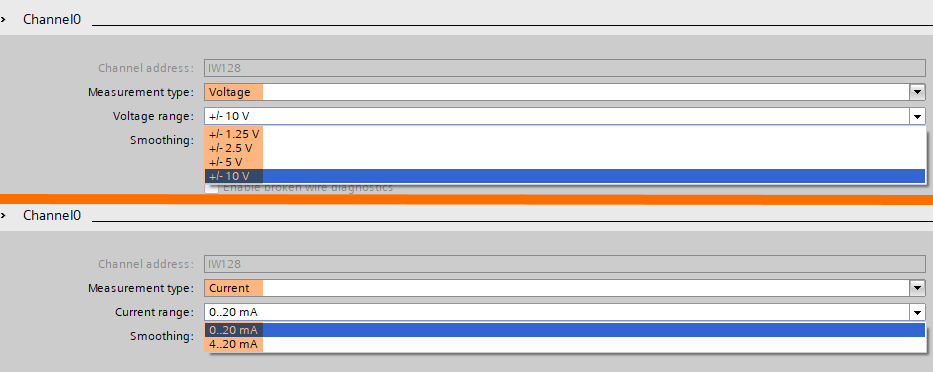
Step 1: Analog inputs section. This module can receive two types of signals: current or voltage. The difference between the settings of this module and the CPU analog input is that you can choose the type of signal and its range in this module.
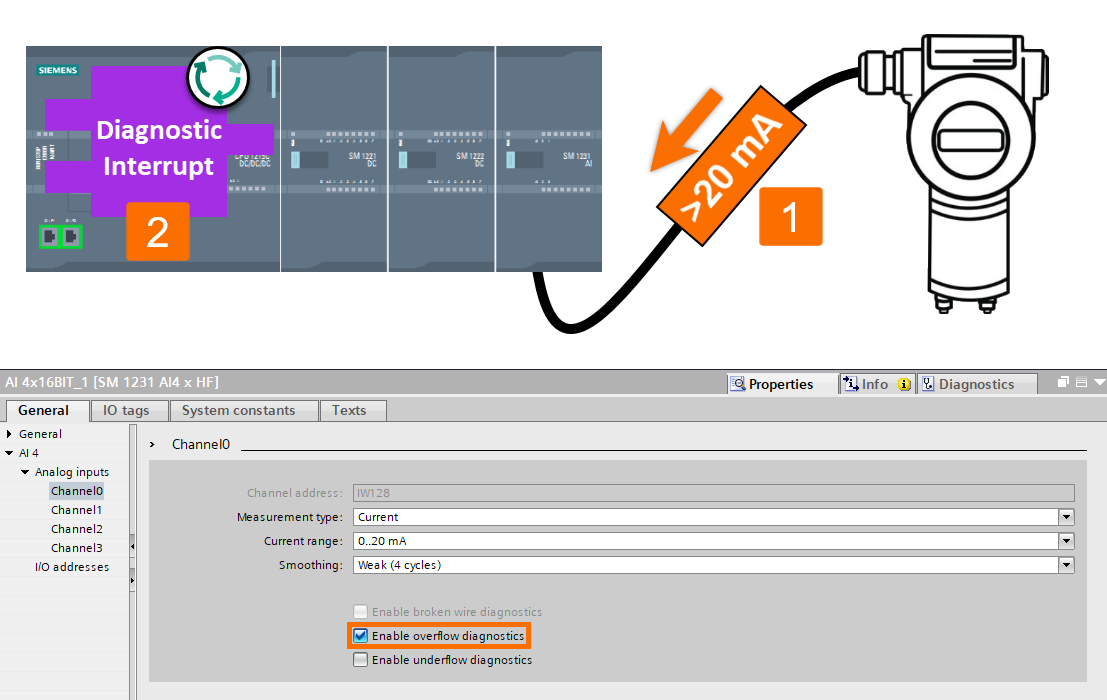
Step 2: Enable overflow diagnostics. Once this option is enabled, if the input signal to the module exceeds the limit, this error is reported to the CPU, and the corresponding OB (OB82) is called.
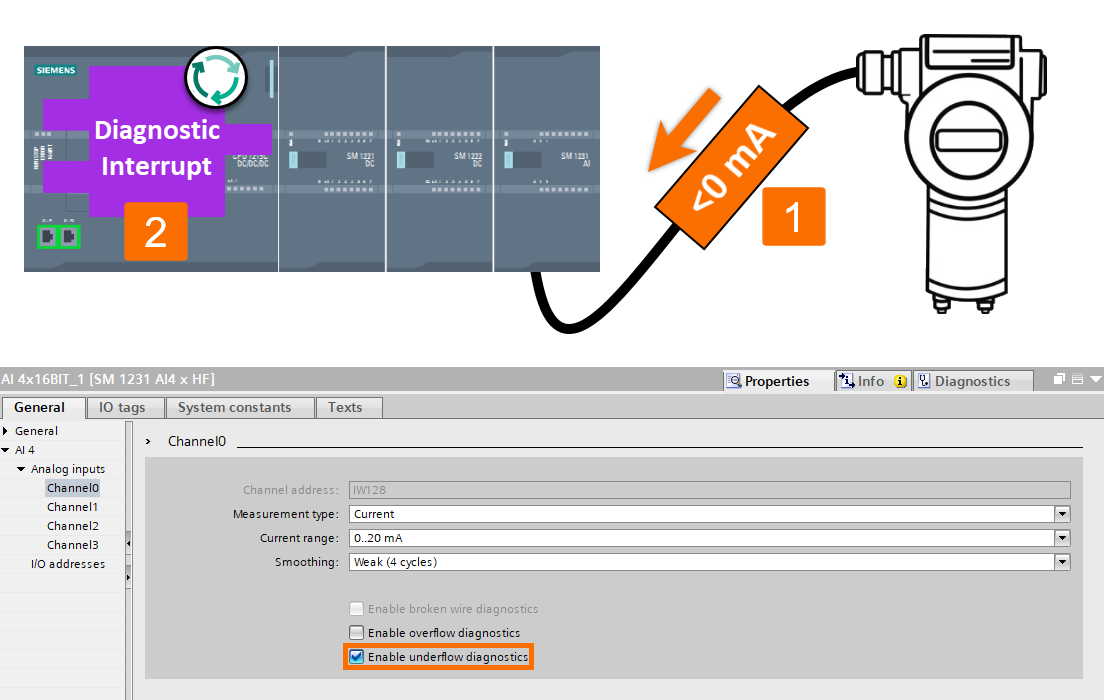
Step 3: Enable underflow diagnostics. What will happen if the input signal to the module decreases from the allowed limit while this option is enabled? This error is reported to the CPU, and the corresponding OB (OB82) is called.
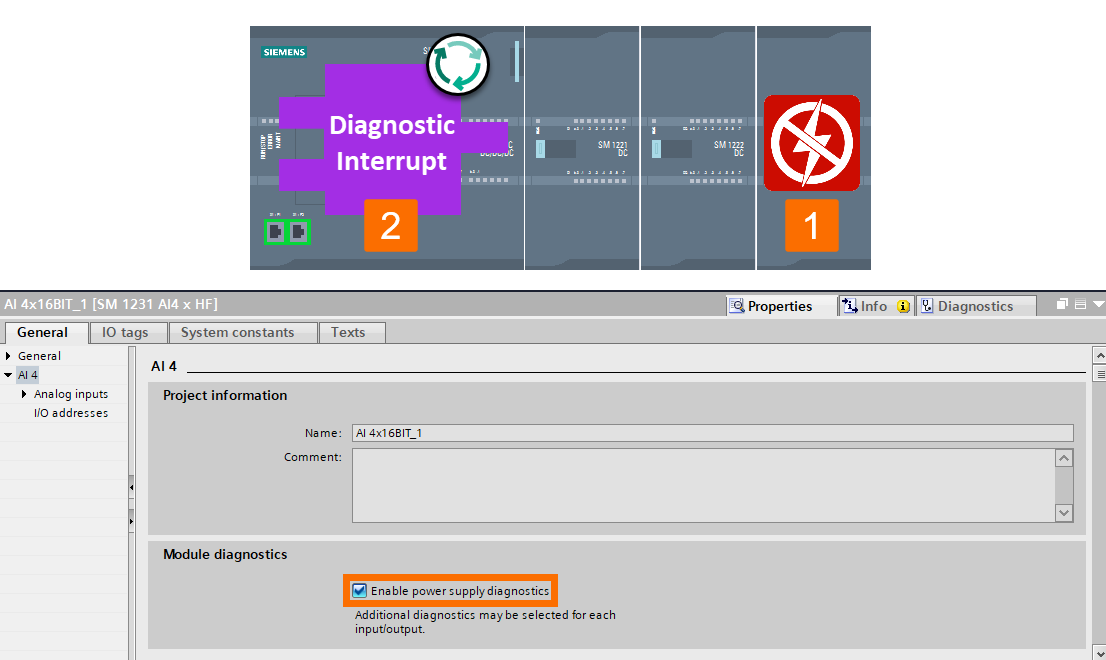
Step 4: Module diagnostics. Analog input modules can also detect power supply signal interruptions. Once this error occurs, it will be reported to the CPU, and the corresponding OB (OB82) is called.
RTD Analog Input Module Setting
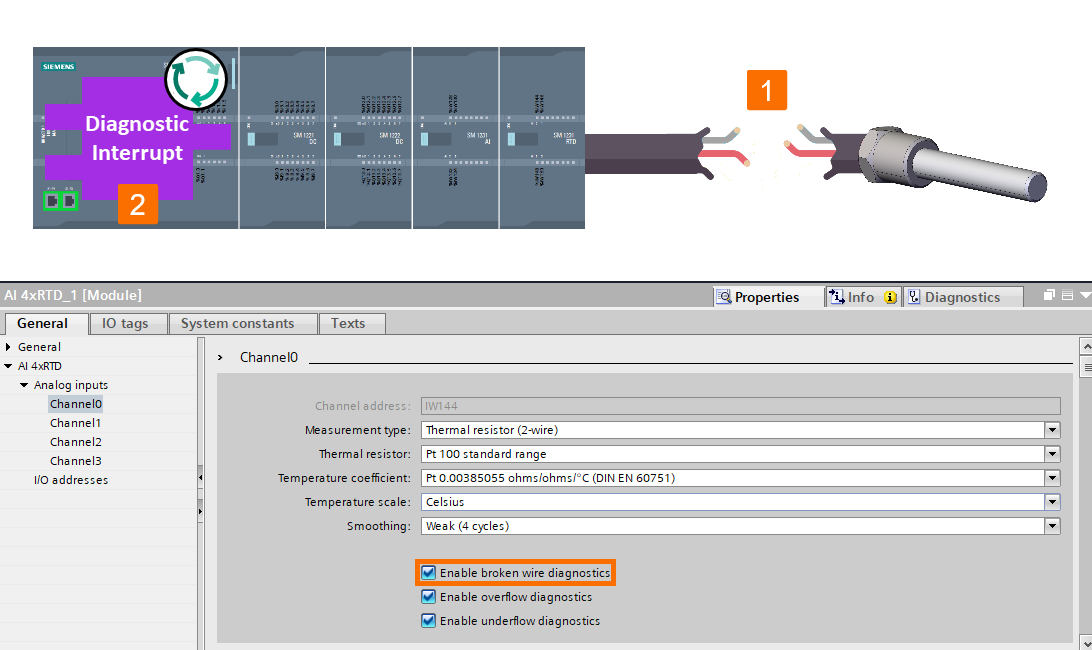
Consider the "AI 4xRTD" module as an example for checking the RTD analog input module setting. When you select this module and double-click on it, the section displaying its settings will become visible. If you use this module, the signal of RTD sensors can be received directly without a transmitter.
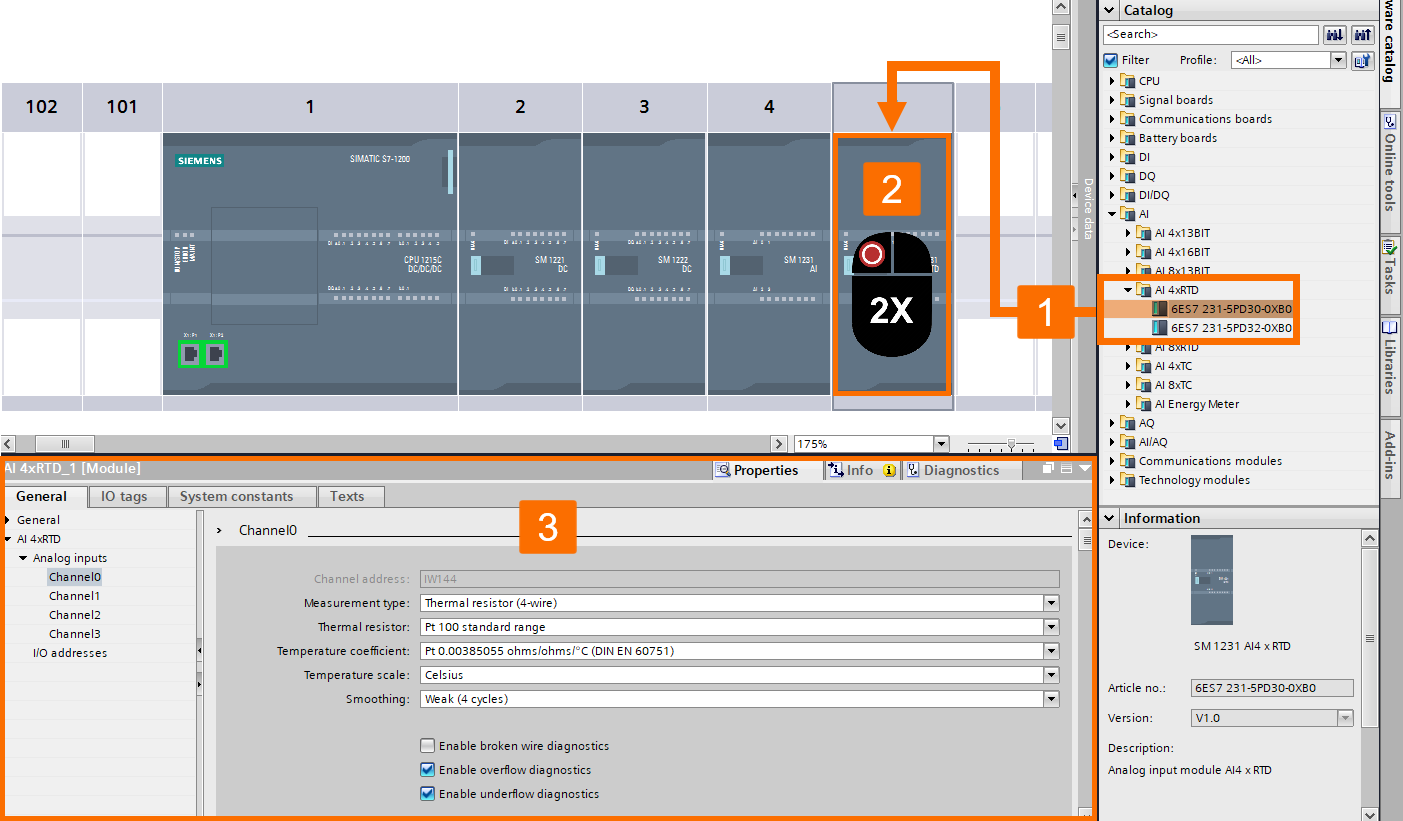
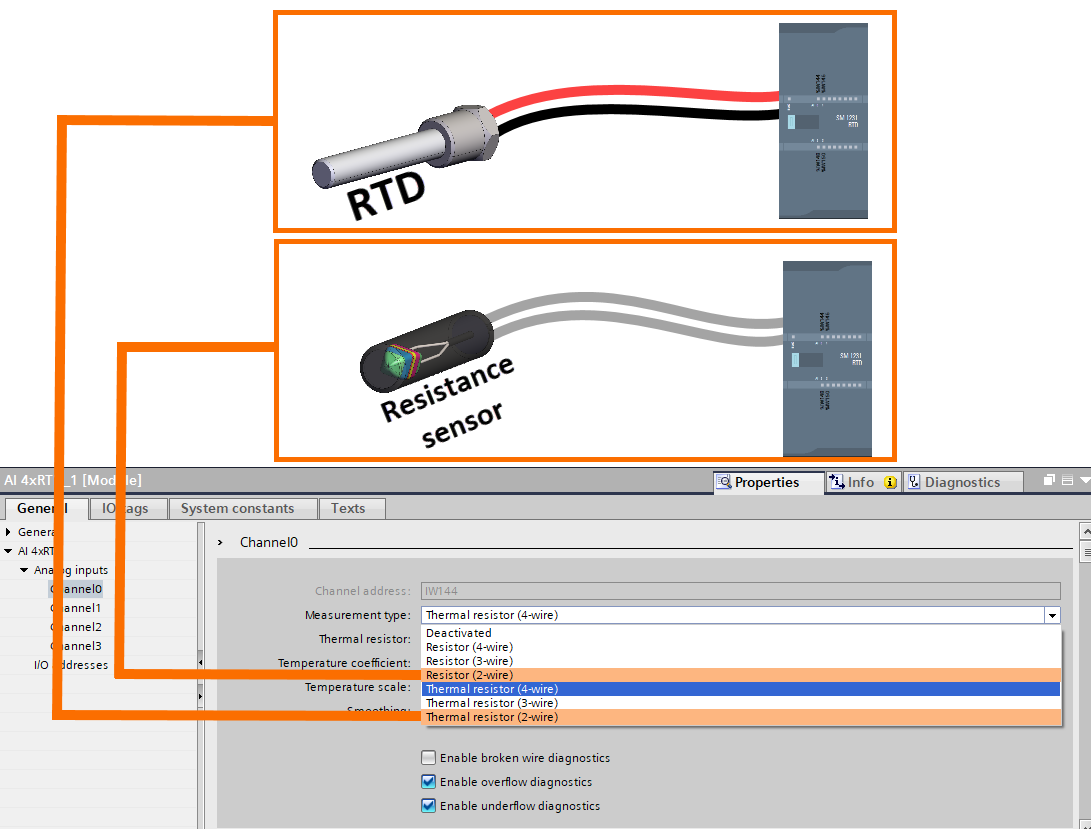
Step 1: Measurement type. The type of input signal to the card is selected in this section. Selecting the "Thermal resistor" option means choosing RTD. Selecting the "Resistor" option means choosing pure resistance. Also, selecting the "Deactivated" option means deactivating the desired channel.
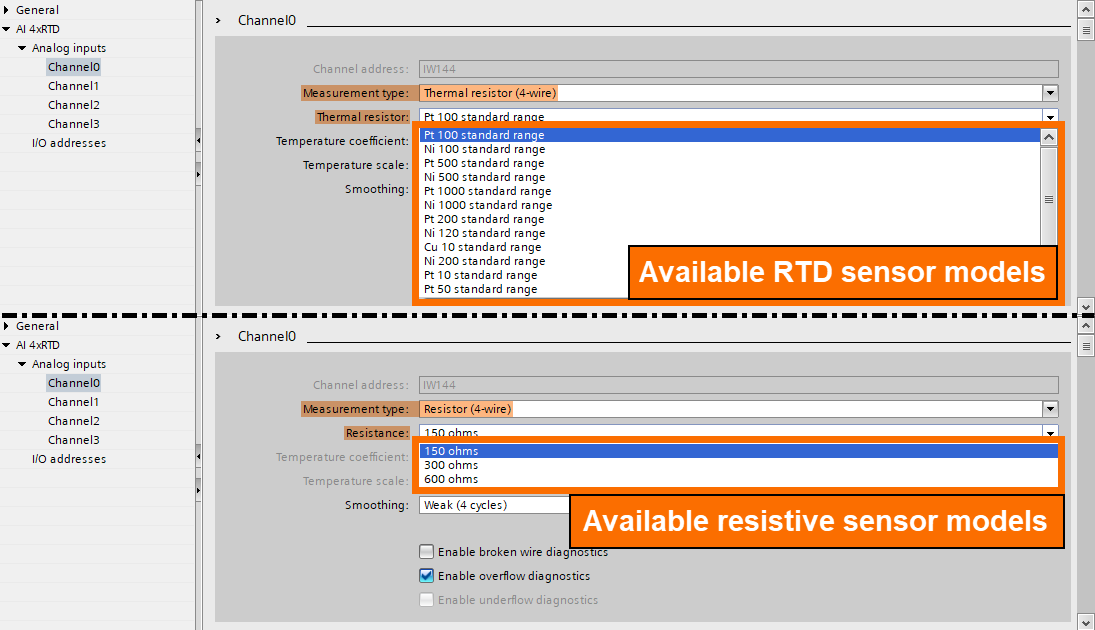
Step 2: Thermal resistor/Resistance. If the "Thermal resistor" option is selected in the "Measurement type" field, the "Thermal resistor" item will be shown in the next section. In this case, you can choose the desired RTD model. If the "Resistor" option is selected in the "Measurement type" field, the "Resistance" item will be shown in the next section. In this case, you can choose the preferred resistive sensor model.
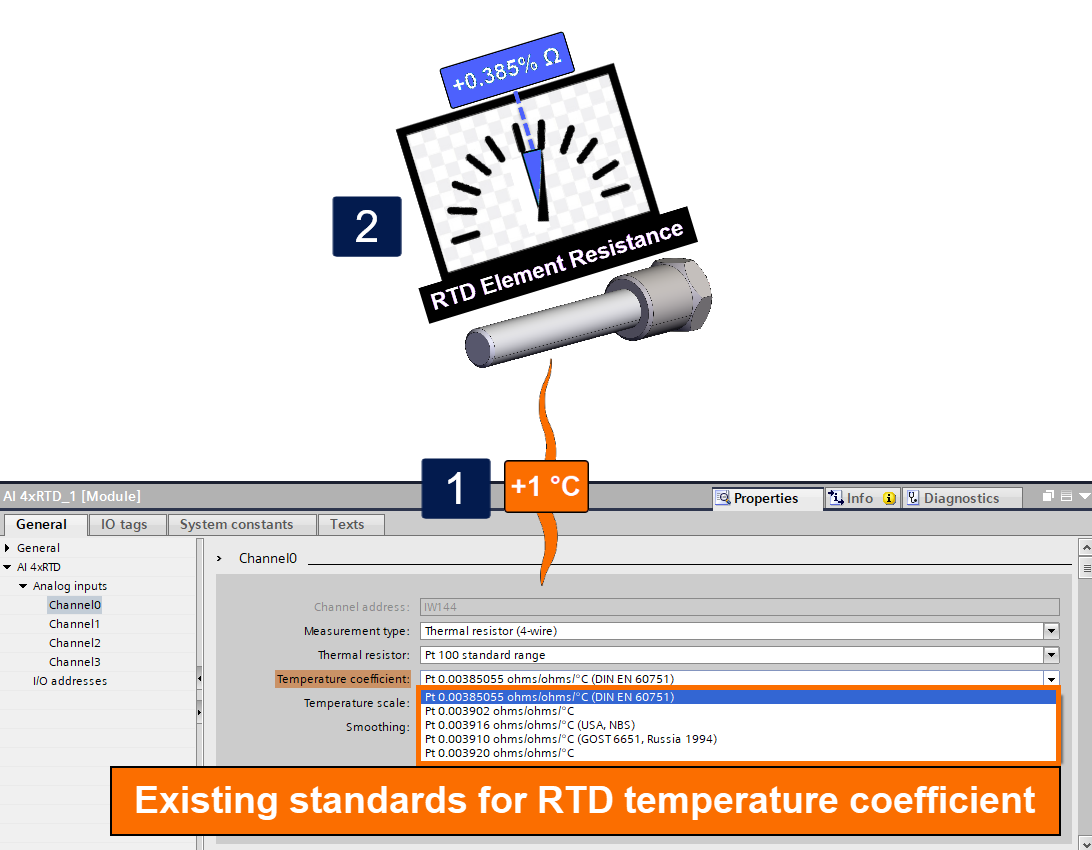
Step 3: Temperature coefficient. It is defined as the change in resistance per unit change in temperature. Typically, it is expressed in units of ohms per degree Celsius (Ω/°C). The RTD temperature coefficient can be selected according to one of the existing standards in this section.
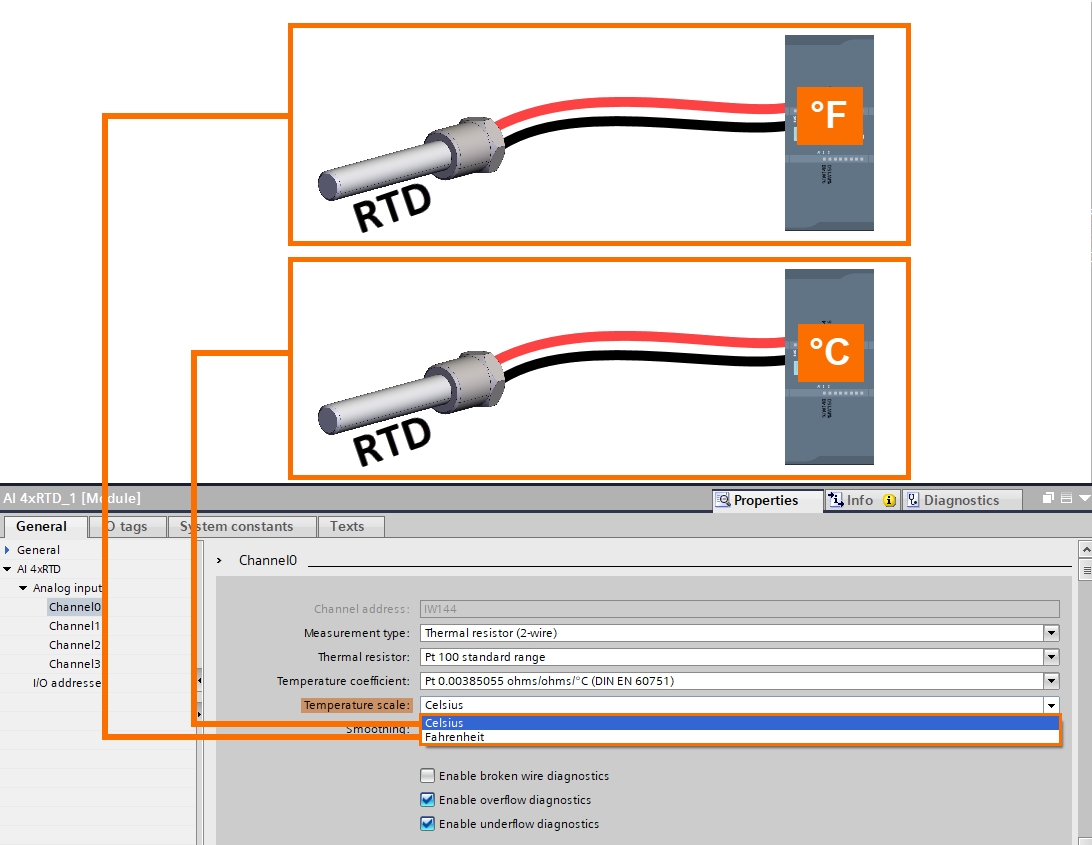
Step 4: Temperature scale. In this section, you can select the temperature measurement unit so that the analog input card can measure the temperature based on it. For example, if the Celsius option is selected, the temperature measured by the RTD is calculated in degrees Celsius. Then, after multiplying by 10, it becomes an integer.
Step 5: Enable broken wire diagnostics. Once this option is enabled, if the sensor wire becomes disconnected, this error is reported to the CPU, and the corresponding OB (OB82) is called.
Thermocouple Analog Input Module Setting
Let's take the "AI 4xTC" module as an example to review the setting of a thermocouple analog input module. If you select and double-click this module, you will be prompted with its properties window.
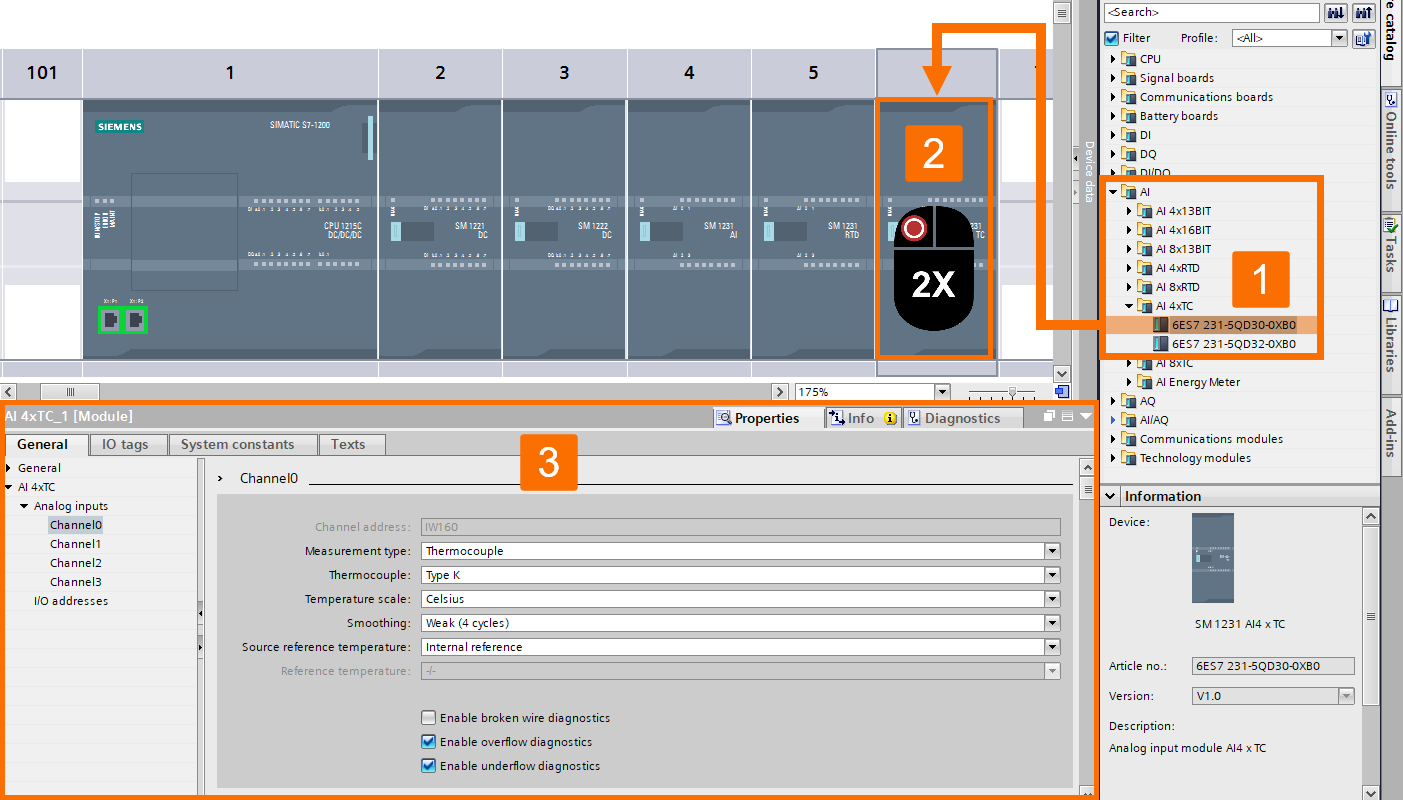
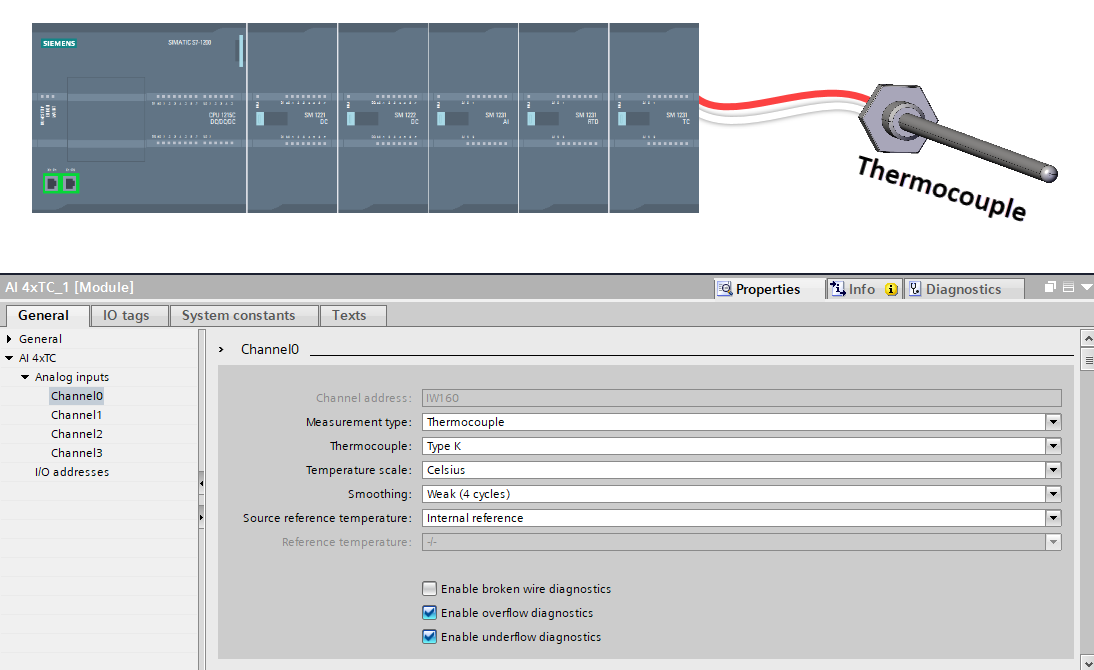
If you use this module, you can receive the signal of thermocouple sensors directly without the need for a transmitter.
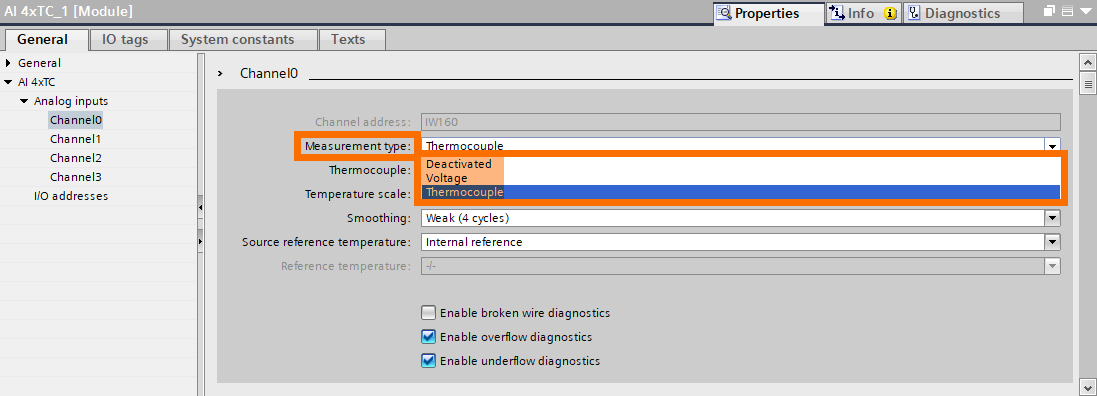
Step 1: Measurement type. The type of input signal to the module is selected in this section. Selectable options are "Thermocouple", "Voltage" and "Deactivated".
Step 2: Thermocouple. In this section, the thermocouple model is selected.
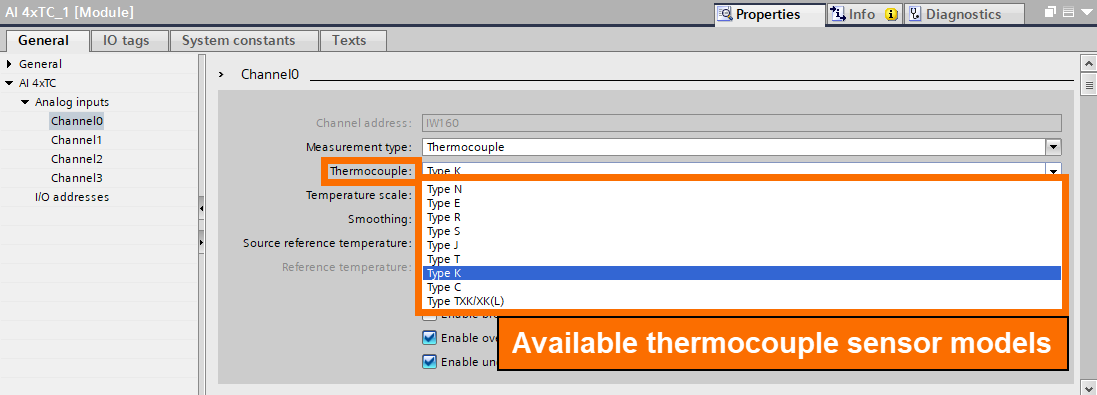
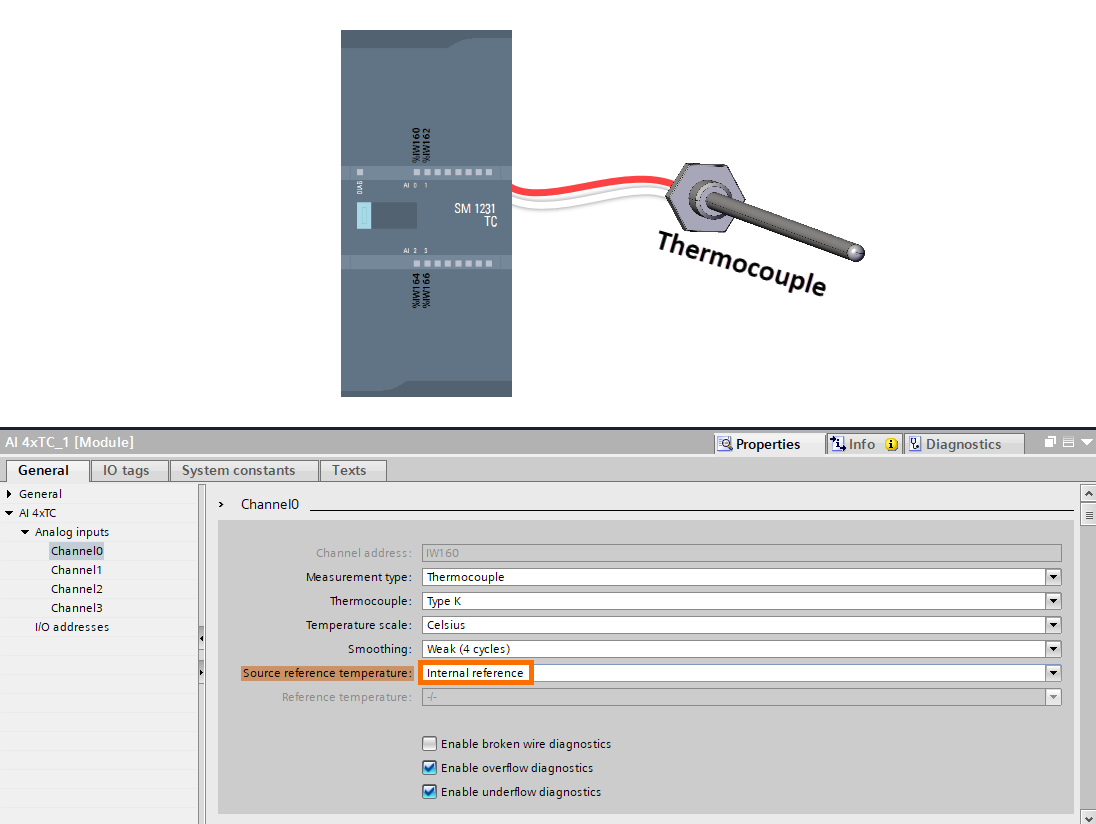
Step 3: Source reference temperature. A thermocouple is created by joining two dissimilar metals. Once the thermocouple is connected to the AI module, a new junction will be made. Thus, it can cause errors in the measured temperature of the thermocouple. The method of fixing this error is called compensation. In this module, compensation can be adjusted in the following two ways.
Step 3-1: Internal reference. The temperature of the connection point of the thermocouple cable to the AI module is calculated in this method. Then based on that, the temperature measured by the thermocouple is corrected. This operation is done automatically by the module. This method is suitable when a thermocouple cable is used to connect directly to the AI module.
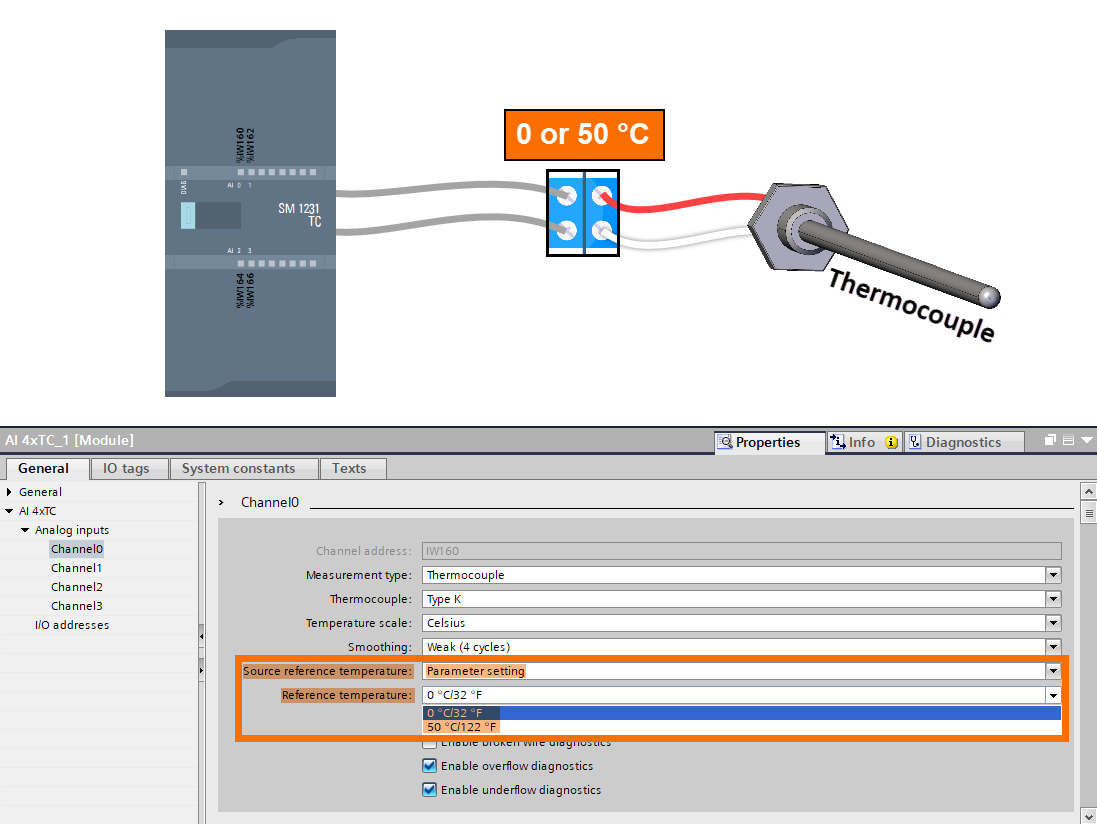
Step 3-2: Parameter setting. If you choose this option, you can set one of two temperatures of 0 or 50 degrees Celsius as the temperature of the connection point of the thermocouple cable to the AI module in the "Reference temperature" section. In this case, a non-homogeneous thermocouple cable can also be used to connect the thermocouple signal to the AI module. Here, you need to place the connection point of the thermocouple cable to the transmission cable in a box under the reference temperature (0 or 50 ° C).
Analog Output Module Setting
To review the setting of an analog output module, let's use the "AQ 2x14 BIT" module as an example. Once you choose and double-click on this module, you will see its properties window.
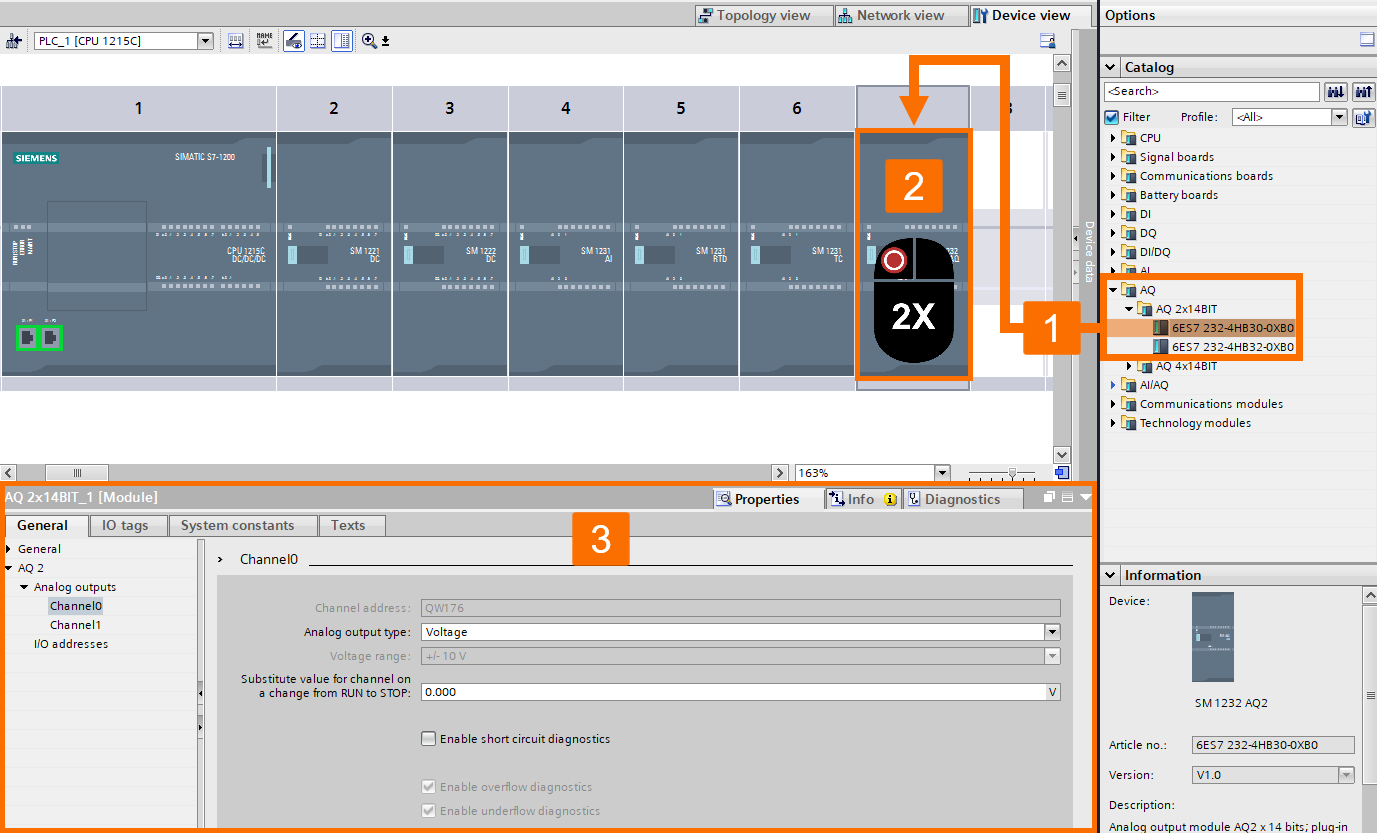
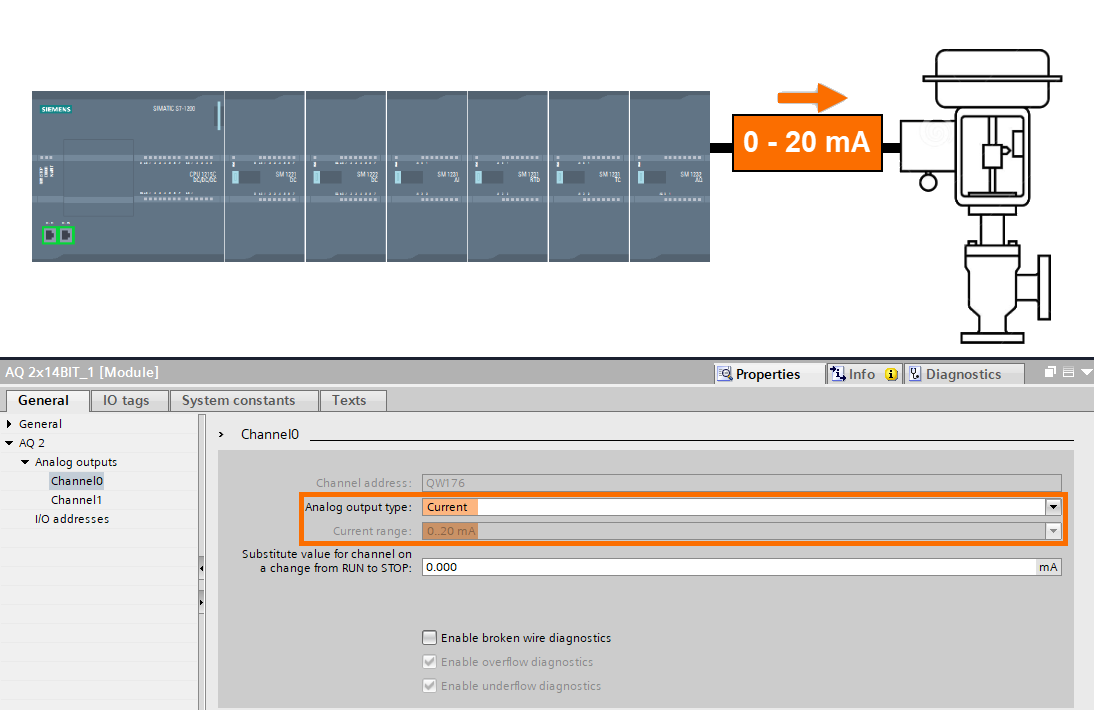
Step 1: Analog output type. In this section, the type of output signal can be determined as one of the voltage or current signals.
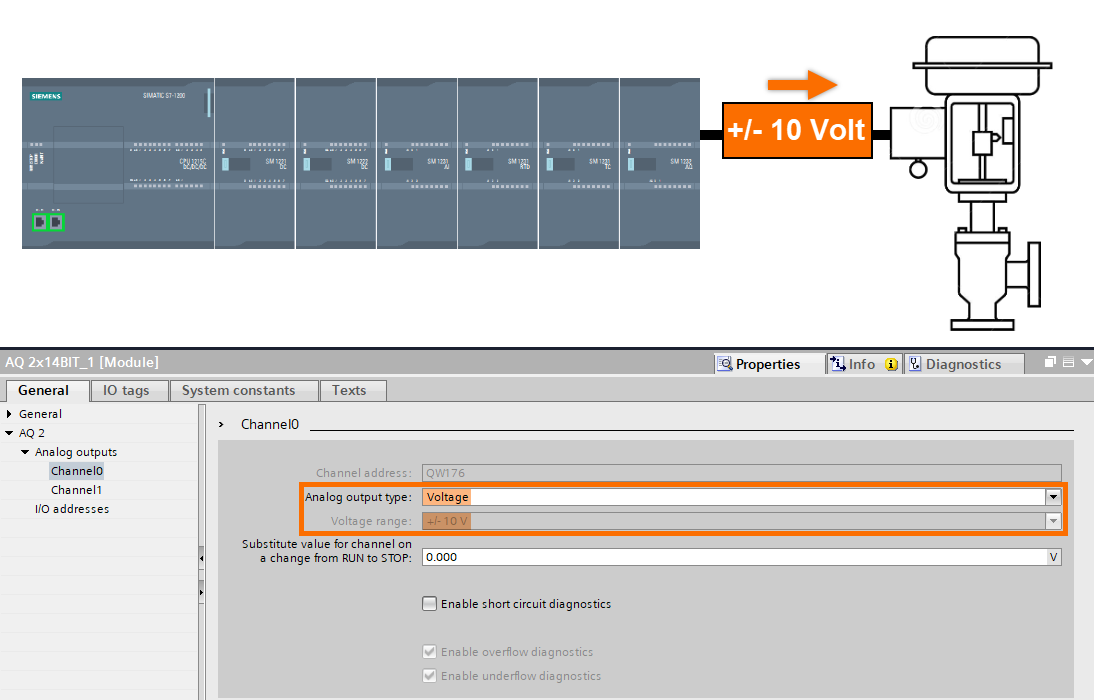
Step 2: Voltage/Current range. According to setting the type of signal as current or voltage, one of the options of Voltage range or Current range is displayed in this section. Here, you can select the desired signal range.
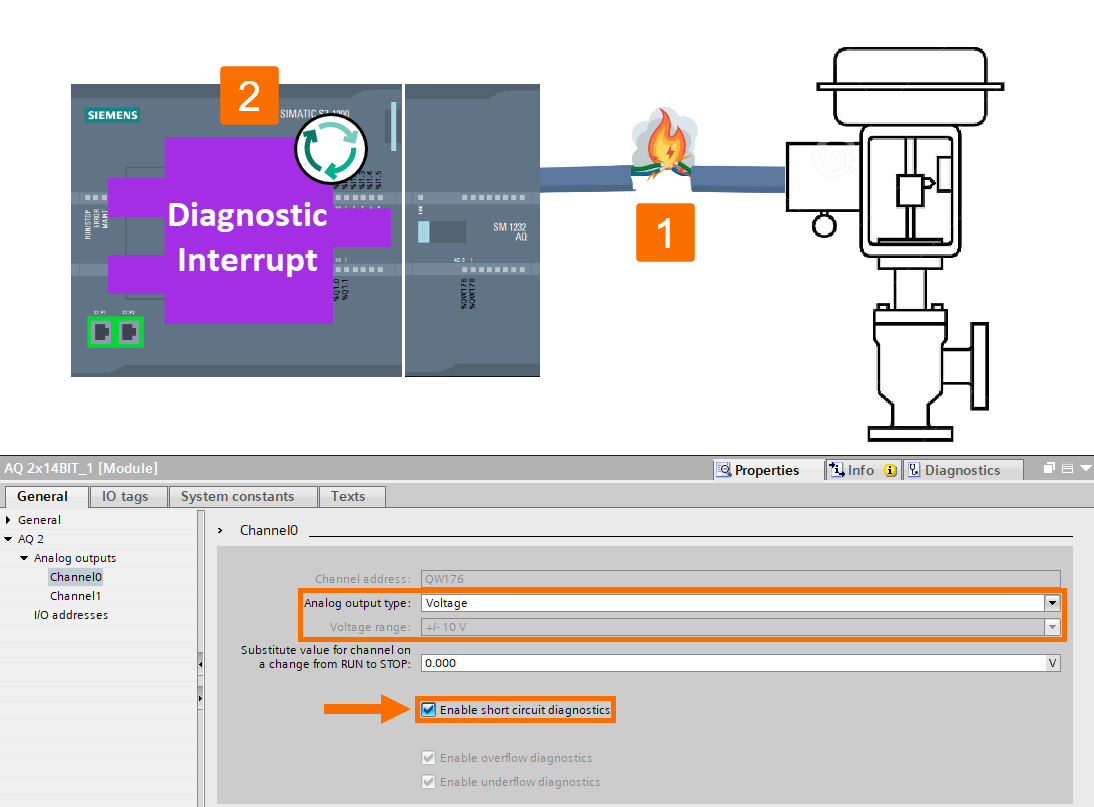
Step 3: Enable short circuit diagnostics. Once the output signal is selected as the voltage, this option is displayed. By activating it, the short circuit error is recognized by the module. In this case, this error is reported to the CPU, and the corresponding OB (OB82) is called.
Conclusion
In conclusion, configuring the digital and analog inputs and outputs of a PLC is crucial to ensure the efficient operation of the system. Once you configure the IO modules properly, the system can receive and process the desired signals accurately. Thus, it enables the PLC to control the devices and machinery per the requirements. The TIA Portal software simplifies the process of selecting and configuring IO modules. Understanding the settings of each module can optimize the system's performance significantly.


