RSLogix 5000 Analog Input Programming | Wiring Scaling Tutorial for PLC Analog Input Signal Example
Introduction
Analog PLC Inputs are crucial for modern control systems. They are utilized for pressure sensors, temperature sensors, weight-scales, flow meters, level transmitters & other devices which report a range rather than a simple ON/OFF signal. These devices typically send a 4-20mA or a 0-10VDC signal back to the main panel. At this point, the control system needs to provide an input capable of capturing this specific signal.
In the CompactLogix family of Programmable Logic Controllers, the most utilized analog input card is the 1769-IF8. It provides 8 channels which may be configured for voltage or current signals. It’s an easy to program module in RSLogix & Studio 5000 & it provides an excellent means of receiving analog sensor data.
In this article, we will be exploring & going over the steps required in order to configure and receive inputs on this module. We will be utilizing an external signal from an Automation Direct CLICK PLC in order to simulate a specific signal. Additionally, we will be programming a simple routine which is used as a way to scale the input; just as it would be in a real control system.
RSLogix Studio 5000 Adding an Analog Input card 1769-IF8 into the Project
Before we can configure the input card, we need to add it into our project. The CompactLogix PLC used in this tutorial is equipped with a backplane which allows it to communicate to the cards attached to the right of the processor. These modules may be added into the RSLogix or Studio 5000 Environment under the Expansion I/O menu. Note that the procedure is similar for other models of PLC, but the cards will be slightly different. Example: The ControlLogix family has an analog input card 1756-IF8 which provides exactly the same capabilities as the one we’re using here.
Start by creating a project in RSLogix or Studio 5000. Scroll to the Expansion I/O node & right click on it. Select “Add New Device…” & browse through the cards in the menu until you find 1769-IF8. Alternatively, you may use the search bar on top of this screen in order to narrow down the results. Note that you may add all the cards which will be added to the system through this same procedure.
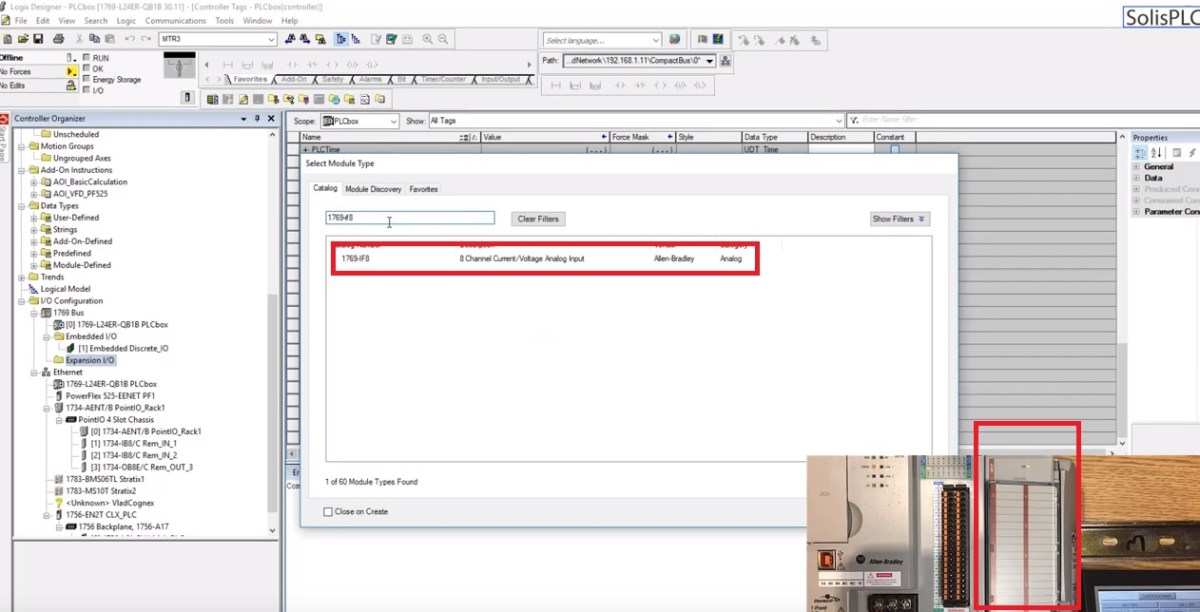
Once the card has been added to the I/O tree, the software will automatically create all the required tags which we will be using to read the inputs. They will be controller scoped tags and can be navigated to by clicking the PLC name icon at the very top of the left navigation panel.
Configuring Analog Input Channels on the 1769-IF8 Input Card
As mentioned above, the 1769-IF8 card can be used for an array of applications & is able to accept different types of signals, is equipped with multiple filters & may automatically scale the signals to a pre-defined value. To use any of these features & configure our channels, we may double-click the card within the tree & navigate to the “Configuration” panel. This screen is used for configuring the settings for each one of the channels.
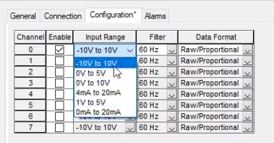
- Enable – Starts the reading [Analog to Digital] from the specified channel.
- Input Range – Specifies the range of the signal to be utilized in the control system. Options include voltage & current ranges.
- Filter – Specifies the filter to use on the signal. This setting is important as the signal can be sourced through a PWM signal instead of a pure analog one.
- Data Format – Specifies the conversion of the analog signal. Refer to the datasheet for more details: 1769-IF8 DataSheet
Wiring & Going Online with the PLC
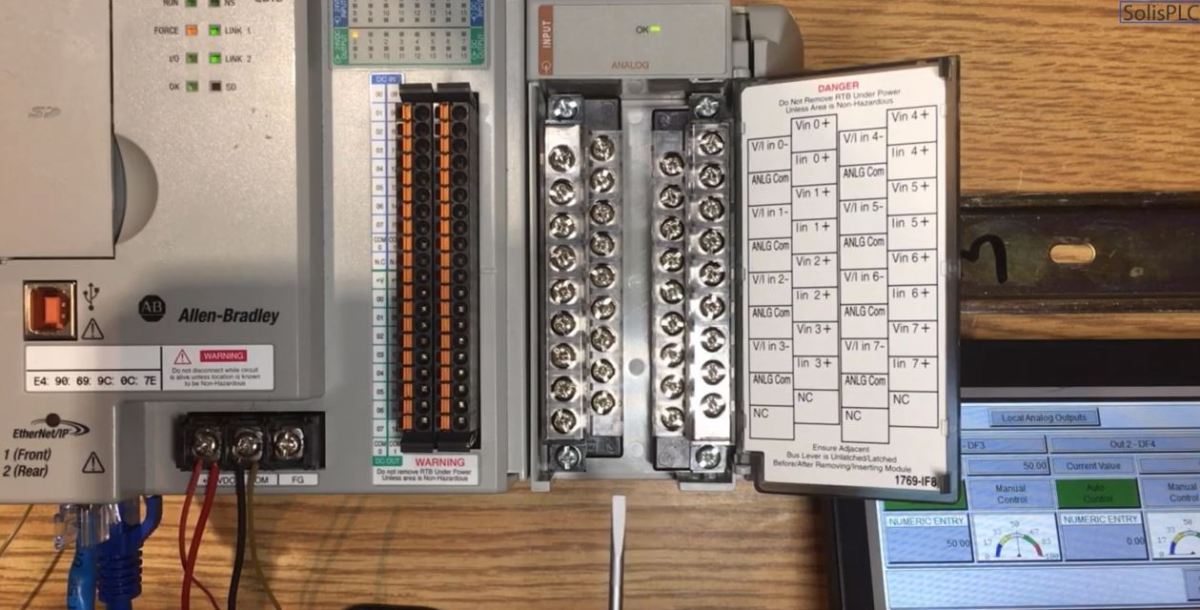
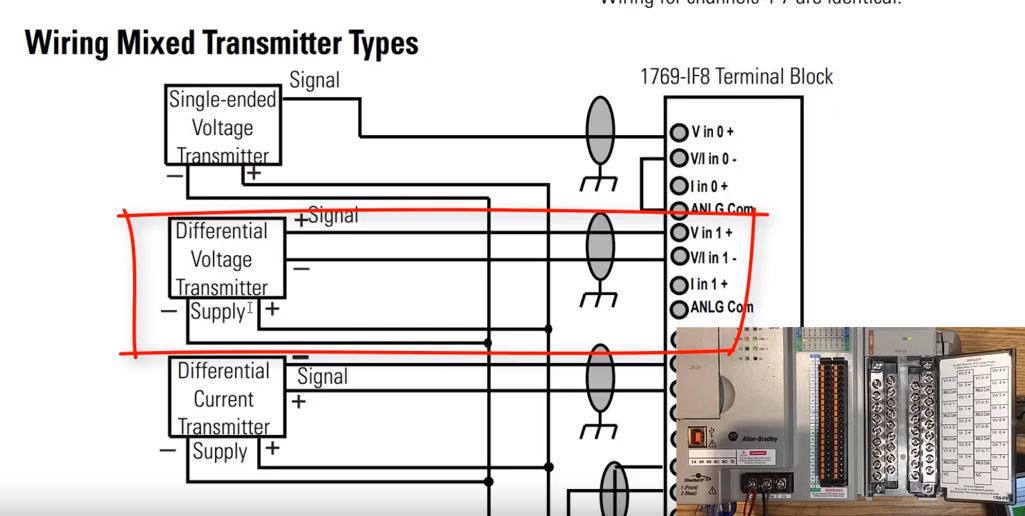
Analog signal wiring isn’t as straightforward as it is for digital signals. You need to make sure that the input is wired per the scheme proper to the signal type. In the case of a voltage signal, you will need two leads: positive & negative. These leads will be landed on the terminals specified below for Input 0 of the 1769-IF8 Input card. Note that in most cases, there will be no harm done in miss-wiring the signal wires, but in certain cases, it may cause damage to the input card or the device on the other end. Make sure to understand the proper wiring scheme prior to powering on the devices.
Scaling an Analog Signal in RSLogix 5000 Through CPT
We’ve written an extensive tutorial on how to work with a Scaling Instruction in RSLogix 500 in the past. This instruction is not available in a ladder logic format in RSLogix or Studio 5000; only in a Function Block. However, you may still apply the same mathematical principles as we explained in that tutorial to the input in a CPT instruction. In practice, the SCP instruction is just a CPT which is easier to visualize. You’ll need to solve a basic system of equations in order to find the parameters of the computation.
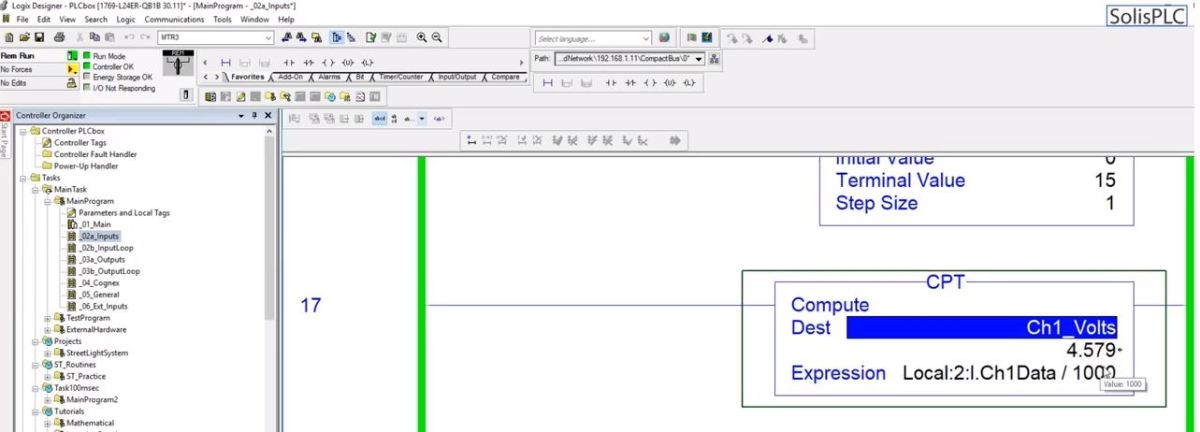
In either case, you may choose to use the CPT in ladder logic or create a subroutine which will use the SCP instruction in a Function Block format in RSLogix 5000. The scaling principles are the same and require you to reference the documentation for your specific input signal. In the tutorial, we’re sending a 0 to 5VDC signal from a secondary processor. Therefore, it makes sense to scale down to the same value. Since we’re reading a 0 to 5000 signal, we can safely perform a simple division by a constant in order to extract the voltage. In other words, the final voltage = input signal / 1000.
Conclusion
Analog signals aren’t complicated but do require more thought than digital counterparts. Most control systems offer a way to receive such inputs into the Programmable Logic Controller & manipulate the values in order to extract meaningful data which can then be used by the programmers. For the CompactLogix platform, the most used card is the 1769-IF8 module. It’s a highly flexible card which may be configured to receive voltage or current based inputs. It’s easy to integrate & deploy through RSLogix or Studio 5000 software.


