PLC Forces Tutorial - Working with Forced Inputs, Outputs, Troubleshooting & Disabling Online Forces RSLogix
Introduction
PLC Forces is an important tool which can be easily misused. It’s something with which you need to deal on a regular basis and something you should have in your toolkit as a competent PLC Programmer. The primary purpose of PLC Forces is to either enable or disable an input or output residing within the PLC Program. By doing so, the programmer can be certain that a certain input or output is energized or de-energized.
Although it may seem simple, forces do require some thought and more often than not are heavily utilized for the wrong reasons. The main reason being as temporary patches. In fact, a lot of incompetent individuals will use a force temporarily in order to resolve a problem. They may have the right intention and come back to fix the core issue, but based on personal experience, this rarely happens and the force remains in place.
PLC Forces & Troubleshooting
The primary reason why you’d want to use forces within your PLC is to troubleshoot certain problems. When enabled, a force will undeniably make sure that the tag is either ON or OFF (depending on the force). This becomes extremely useful as you get into complex code which continuously enables or disables certain outputs. Instead of trying to find where it’s being turn ON or OFF, you can force it to be whatever you need.
A simple example could be a light which is controlled by multiple sources. As it is blinking, you’re not exactly sure why that is so and how to turn it off for replacement. By forcing the light OFF, you save yourself the time of figuring out what’s causing the blinking & eliminating the need to do so temporarily.
During a process start-up, forces are often used instead of creating fully functional tags. It’s very convenient to be able to toggle the output in order to make sure that it’s the correct one, but you may already have logic in place which prevents you from doing so. By leveraging a force, you can disregard all the underlying logic and easily check your IO points. I do this all the time.
Lastly, you can use the force for troubleshooting as a temporary bandaid. As mentioned above, you may find yourself in a situation where production takes priority over you being able to figure out what’s wrong. In this case, you need to simply force the tag ON and move on with your other tasks. A good example of this would be a pump which is no longer turning on because of a level sensor. You may have determined that the sensor is the problem, but this pump needs to run all night until the morning shift comes in. As you place an order for a new sensor, it’s possible for you to “patch” the problem by leaving a force which keeps the pump running for the time being.
Working with Force in RSLogix / Studio 5000
Now that we’re aware of their applications, it’s time to look at forces from a much more practical approach.
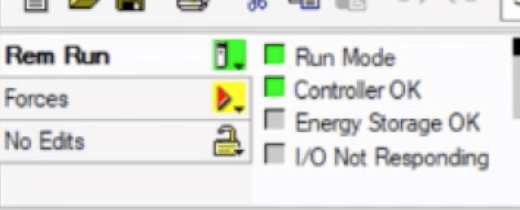
On an Allen Bradley based PLC, you will find forces within the controller through the RSLogix or Studio 5000 software. It’s also used in RSLogix 500, but works slightly differently. The top left corner toolbar, allows the user to access the settings for the forces on the controller. From here, you can enable, disable or remove forces. The toolbar also provides a visual way to tell the status of the forces on the controller.

By clicking on the “Forces” button, you will find all the features outlined above. Furthermore, the small triangle in the center of the screen indicates that there are forces on this controller and they are currently enabled.
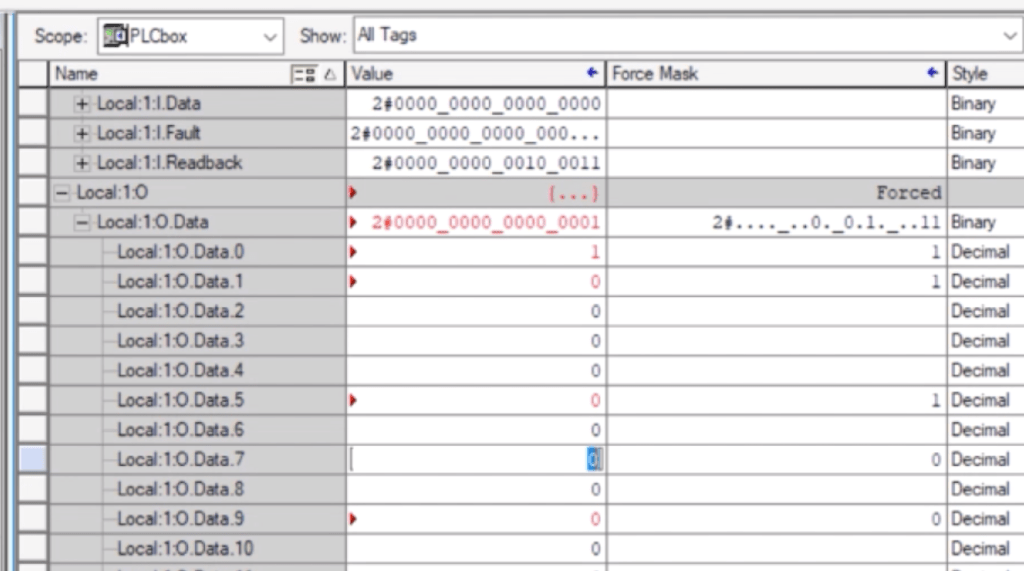
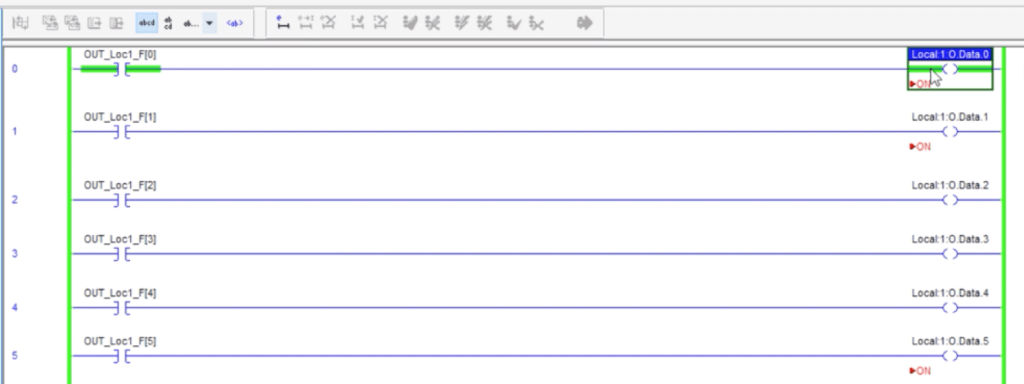
Forces can be set from the tag editor or from within the logic editor (in ladder logic, function blocks or structured text). By right-clicking the tag you wish to force, you may select the “Force ON” or “Force OFF” feature. Do keep in mind that forces must be enabled globally in order to take effect. In other words, there’s an enable tag for all forces which can be accessed through the menu covered above.
Here are examples of forces within the PLC tag structure as well as the ladder logic diagram.


Conclusion
Forces are a powerful tool which can be primarily leveraged during start-ups and/or for troubleshooting. It allows one to set input or output to an energized or de-energized state bypassing whatever logic is tied to it.
Within the industry, forces are being heavily utilized as patches for solving problems. The key to properly utilizing forces is to make sure that none of them are left within the program as you walk away. In case you need to temporarily force an Input or Output, you must remember to rectify the problem and remove said force.


